MMDetection 3.x 自定义数据集
最近在调研目标检测方面的技术实现,发现关于 MMDetection 自定义数据集的文章,多是就 2.x 版本进行描述的,而关于 3.x 版本的则比较少。有些文章在制作COCO数据集的时候,需要修改多处源代码,而这是没有必要的。本文主要参考了[MMDetection 使用示例:从入门到出门](https://ifantasy.net/2022/05/20/mmdetection_setup_and_
最近在调研目标检测方面的技术实现,发现关于 MMDetection 自定义数据集的文章,多是就 2.x 版本进行描述的,而关于 3.x 版本的则比较少。有些文章在制作COCO数据集的时候,需要修改多处源代码,而这是没有必要的。本文主要参考了MMDetection 使用示例:从入门到出门,并根据官方文档,对3.x自定义数据集进行了描述。
一、CelebA 数据集下载
CelebA 是 CelebFaces Attribute 的缩写,意即名人人脸属性数据集,其包含 10177 个名人身份的 202599 张人脸图片,每张图片都做好了特征标记,包含人脸 bbox 标注框、 5 个人脸特征点坐标以及 40 个属性标记, CelebA 由香港中文大学开放提供,广泛用于人脸相关的计算机视觉训练任务,可用于人脸属性标识训练、人脸检测训练以及 landmark 标记等。
1.1 下载
在Large-scale CelebFaces Attributes (CelebA) Dataset找到百度云盘下载链接(密码: rp0s),进行下载。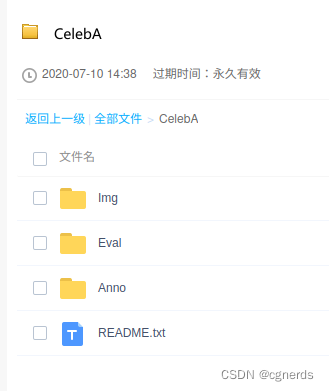
- Img 中的 img_align_celeba.zip :经过人脸对齐和裁剪了的图像
- Img 中的 img_celeba.7z :原始人脸图像,从网络爬取未有做任何裁剪缩放操作的人脸图像
- Anno: 标签文件
– identity_CelebA.txt :每张图片对应的身份编号信息
– list_attr_celeba.txt :40 个属性标签文件,第一行为图像张数,第二行为属性名,有该属性则标记为1,否则标记为-1
– list_bbox_celeba.txt :人脸标注框坐标注释文件,包含每一张图片对应的 bbox 起点坐标及其宽高
– list_eval_partition.txt :用于划分为 training , validation 及 testing 等数据集的标签文件,标签0对应 training ,标签1对应 validation ,标签2对应 testing
– list_landmarks_align_celeba.txt :人脸对齐后的5个特征点landmark坐标注释文件
1.2 解压缩
sudo apt install p7zip-full
cd CelebA/Img
7za x img_celeba.7z
1.3 提取前100张图片
CelebA 包含大量数据,这里只想测试 MMDetection 自定义数据集的训练方法而非真的要训练出一个效果极好的图像分类识别模型,因此需要对数据集进行简化,大致流程如下:
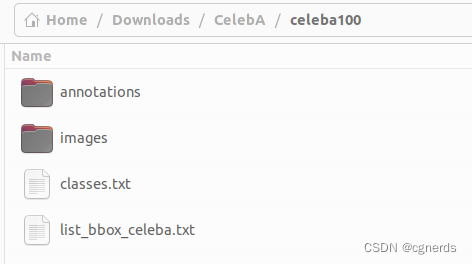
- 创建训练数据文件夹 celeba100
- 将 CelebA/img_celeba 中前100张图片复制到 celeba100/images 目录下
- 将 CelebA/Anno/list_bbox_celeba.txt 复制到 celeba100/list_bbox_celeba.txt
- 创建 celeba100/classes.txt 文件并写入一行数据 face
此时训练集目录如下:
1.4 转换
用 txt2json.py 代码将 celeba100/list_bbox_celeba.txt 中前100行标签格式转为 COCO 格式,并存放于 celeba100/annotations/label.json。
txt2json.py 代码如下:
import os
from PIL import Image
import json
basepath = "/home/xy/Downloads/CelebA/celeba100"
imagepath = os.path.join(basepath, "images")
annpath = os.path.join(basepath, "annotations")
annfile = os.path.join(annpath, "label.json")
labeltxt = os.path.join(basepath, "list_bbox_celeba.txt")
calssestxt = os.path.join(basepath, "classes.txt")
def get_image_size(infile):
    im = Image.open(infile)
    return im.size

label = {}
with open(calssestxt, 'r+') as f:
    classes = []
    lines = f.readlines()
    for i, line in enumerate(lines):
        c = {}
        c['id'] = i
        c['name'] = line.strip() # 去掉换行符
        c['supercategory'] = "mark"
        classes.append(c)
label['categories'] = classes

images = []
annotations = []
with open(labeltxt, 'r+') as f:
    # 去除前两行
    lines = f.readlines()[2:102]
    for i, line in enumerate(lines):
        d = line.split()
        imgpath = os.path.join(imagepath, d[0])
        img = {}
        img_size = get_image_size(imgpath)
        img['id'] = i
        img['file_name'] = d[0]
        img['width'] = img_size[0]
        img['height'] = img_size[1]
        images.append(img)
        ann = {}
        ann['id'] = i
        ann['image_id'] = i
        ann['category_id'] = 0
        ann['iscrowd'] = 0
        ann['bbox'] = [int(t) for t in d[1:]]
        ann['area'] = (ann['bbox'][2] - ann['bbox'][0]) * (ann['bbox'][3] - ann['bbox'][1])
        annotations.append(ann)

label['images'] = images
label['annotations'] = annotations

with open(annfile, "w+") as f:
    json.dump(label, f)
二、MMDetection 安装
2.1 安装
安装PyTorch
conda create -n label python=3.10 pip numpy
conda activate label
conda install pytorch torchvision torchaudio pytorch-cuda=11.8 -c pytorch -c nvidia
安装MMCV
pip install -U openmim
mim install mmengine
mim install "mmcv>=2.0.0"
安装 MMDetection
git clone https://github.com/open-mmlab/mmdetection
cd mmdetection
# v 表示输出详细信息,e 表示可编辑
pip install -v -e .
2.2 测试
创建目录
mkdir checkpoints && cd checkpoints
rtmdet 模型下载
https://download.openmmlab.com/mmdetection/v3.0/rtmdet/rtmdet_m_8xb32-300e_coco/rtmdet_m_8xb32-300e_coco_20220719_112220-229f527c.pth
rtmdet 测试
python demo/image_demo.py demo/demo.jpg configs/rtmdet/rtmdet_m_8xb32-300e_coco.py --weights checkpoints/rtmdet_m_8xb32-300e_coco_20220719_112220-229f527c.pth
faster_rcnn 模型下载
https://download.openmmlab.com/mmdetection/v2.0/faster_rcnn/faster_rcnn_r50_fpn_1x_coco/faster_rcnn_r50_fpn_1x_coco_20200130-047c8118.pth
faster_rcnn 模型测试
python demo/image_demo.py demo/demo.jpg configs/faster_rcnn/faster-rcnn_r50_fpn_1x_coco.py --weights checkpoints/faster_rcnn_r50_fpn_1x_coco_20200130-047c8118.pth
2.3 相关问题解决
Could not load library libcudnn_con_infer.so.8. Error: libnvrtc.so: cannot open shared object file: No such file or directory
找到~/miniconda3/envs/label/libnvrtc.so.11.8.89,复制一份,将其重命名为libnvrtc.so即可。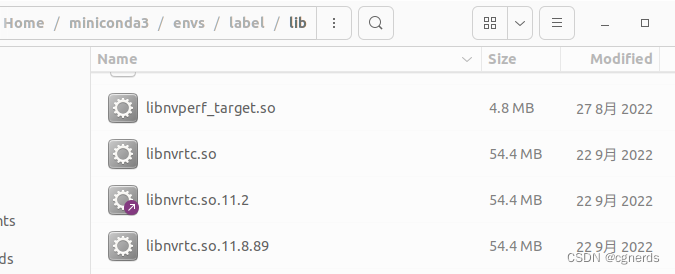
三、自定义配置文件
上面已整理出 MMDetection 能直接使用的小数据集,现在需要编写我们训练所使用的模型配置文件。在 mmdetection 根目录下创建一个 celeba 文件夹,并在其下创建模型配置文件 celeba.py ,写入内容如下
_base_ = '../configs/fcos/fcos_r101-caffe_fpn_gn-head_ms-640-800-2x_coco.py'

import os

dataset_type = 'CocoDataset'
classes = ('face')
# 注意后面需要带 /
data_root = "/home/xy/Downloads/CelebA/celeba100/"

train_dataloader = dict(
    batch_size=2,
    num_workers=2,
    dataset=dict(
        type=dataset_type,
        # explicitly add your class names to the field `metainfo`
        metainfo=dict(classes=classes),
        data_root=data_root,
        ann_file='annotations/label.json',
        data_prefix=dict(img='images/')
        )
    )

val_dataloader = dict(
    batch_size=1,
    num_workers=2,
    dataset=dict(
        type=dataset_type,
        test_mode=True,
        # explicitly add your class names to the field `metainfo`
        metainfo=dict(classes=classes),
        data_root=data_root,
        ann_file='annotations/label.json',
        data_prefix=dict(img='images/')
        )
    )

test_dataloader = dict(
    batch_size=1,
    num_workers=2,
    dataset=dict(
        type=dataset_type,
        test_mode=True,
        # explicitly add your class names to the field `metainfo`
        metainfo=dict(classes=classes),
        data_root=data_root,
        ann_file='annotations/label.json',
        data_prefix=dict(img='images/')
        )
    )

val_evaluator = dict(
    ann_file=data_root + 'annotations/label.json')
model = dict(bbox_head=dict(num_classes=1))

work_dir = os.path.join(data_root, 'work_dir')
runner = dict(type='EpochBasedRunner', max_epochs=100)
checkpoint_config = dict(interval=5)
load_from = './checkpoints/fcos_r101_caffe_fpn_gn-head_mstrain_640-800_2x_coco-511424d6.pth'
四、训练
4.1 训练
python tools/train.py celeba/celeba.py
训练完成后,如下所示: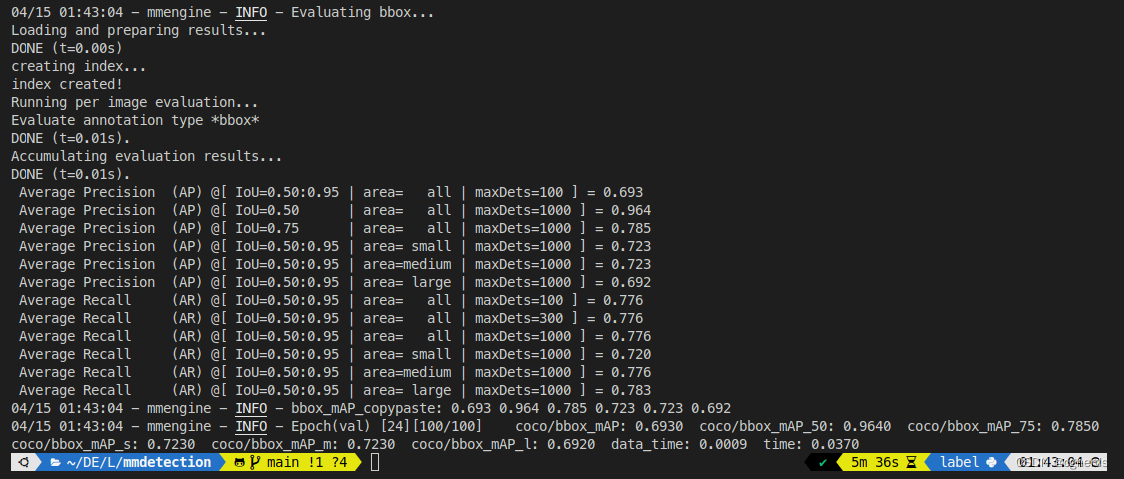
4.2 相关问题解决
class RandomChoiceResize in mmcv/transforms/processing.py: init() missing 1 required positional argument: ‘scales’
文件 configs/fcos/fcos_r101-caffe_fpn_gn-head_ms-640-800-2x_coco.py 中将 scale 修改为 scales。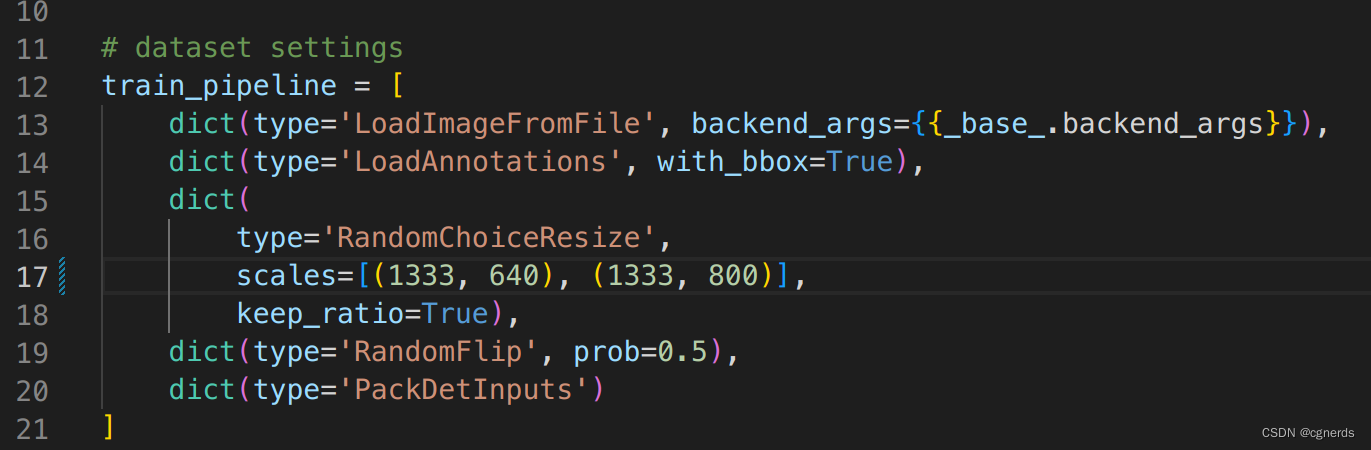
参考链接

魔乐社区(Modelers.cn) 是一个中立、公益的人工智能社区,提供人工智能工具、模型、数据的托管、展示与应用协同服务,为人工智能开发及爱好者搭建开放的学习交流平台。社区通过理事会方式运作,由全产业链共同建设、共同运营、共同享有,推动国产AI生态繁荣发展。
更多推荐


 0
0 0
0- 0


 已为社区贡献1条内容

所有评论(0)