基于深度学习的石油泄漏检测系统(YOLOv8+YOLO数据集+UI界面+Python项目+模型)
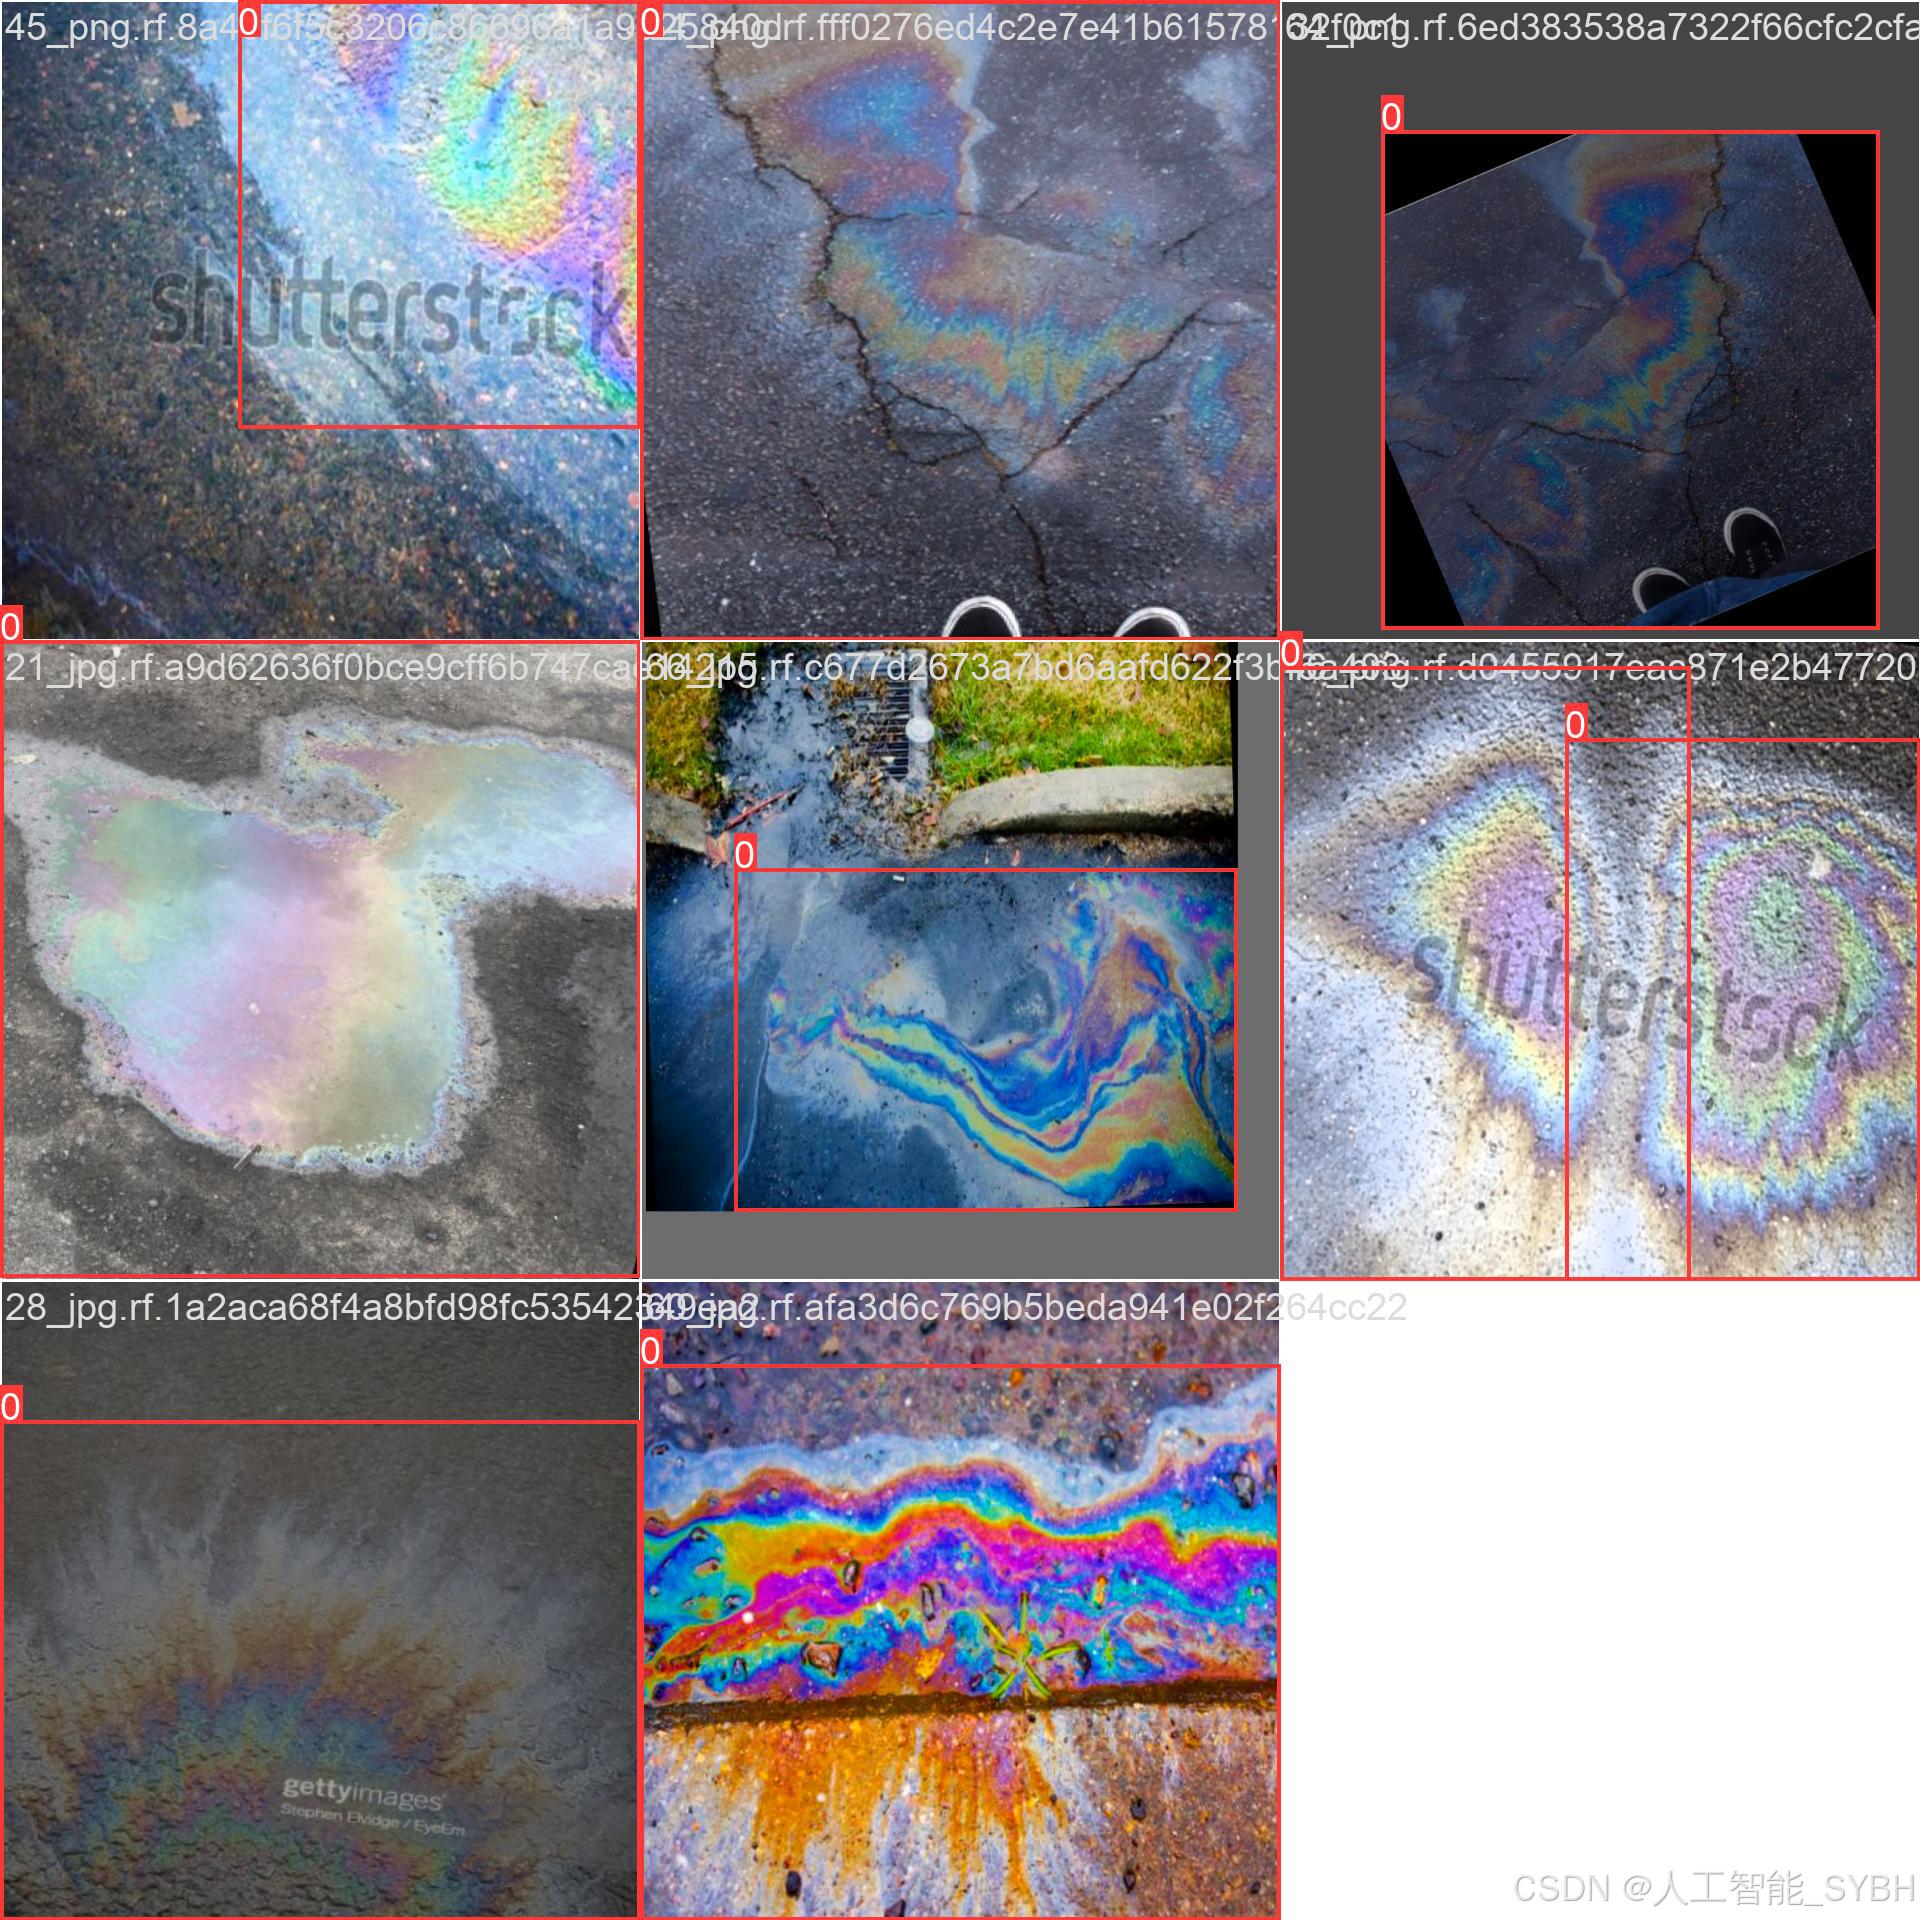
本项目基于YOLOv8深度学习算法,开发了一套高效、精准的石油泄漏检测系统,专门用于识别和定位图像或视频中的石油泄漏区域(类别:petrol)。系统在130张训练图像和24张验证图像的数据集上进行训练,通过数据增强、迁移学习等技术优化模型性能,使其能够在复杂环境(如海洋、陆地工业区)中准确检测石油污染。YOLOv8的实时检测能力使其适用于无人机巡检、卫星遥感监测、工业安防监控等多种场景,为环境监测
一、项目介绍
摘要
本项目基于YOLOv8深度学习算法,开发了一套高效、精准的石油泄漏检测系统,专门用于识别和定位图像或视频中的石油泄漏区域(类别:petrol)。系统在130张训练图像和24张验证图像的数据集上进行训练,通过数据增强、迁移学习等技术优化模型性能,使其能够在复杂环境(如海洋、陆地工业区)中准确检测石油污染。YOLOv8的实时检测能力使其适用于无人机巡检、卫星遥感监测、工业安防监控等多种场景,为环境监测和灾害预警提供智能化解决方案。
本系统支持多平台部署,包括边缘计算设备(如Jetson系列)、无人机机载AI模块、云端服务器等,可广泛应用于环保监管、石油化工安全、海洋生态保护等领域。项目采用PyTorch框架,并针对小样本数据进行了优化,确保模型在有限数据下仍具备较高的泛化能力。
项目意义
1. 技术创新价值
-
小样本目标检测优化:在训练数据较少(仅130张)的情况下,通过迁移学习(预训练权重)、数据增强(模拟油膜反光、多角度光照)等技术提升模型鲁棒性,解决石油泄漏检测中数据稀缺的难题。
-
复杂环境适应性:石油泄漏通常在水面(海洋、河流)或地面(工业区)呈现不规则形状,且易受光照、波浪干扰。YOLOv8通过多尺度特征融合,增强了模型对低对比度、动态背景的检测能力。
-
实时监测能力:相比传统遥感或人工巡检,YOLOv8的高帧率检测(30+ FPS)使其适用于无人机实时巡检测漏,大幅提升应急响应速度。
2. 实际应用场景
-
海洋环境保护:
-
用于卫星/无人机遥感图像分析,监测海上石油平台、运输船舶的泄漏情况,助力早期预警和污染治理。
-
结合无人艇(USV),实现近海油污自动巡查,减少人工成本。
-
-
工业安全监控:
-
在石油化工厂、储油罐区部署摄像头,实时检测地面泄漏,预防火灾和环境污染事故。
-
-
管道巡检:
-
集成到管道巡检机器人中,自动识别管道破损导致的石油渗漏,提高维护效率。
-
-
灾害评估与应急响应:
-
在石油泄漏事故发生后,快速分析污染范围,辅助制定清理方案。
-
3. 社会效益
-
生态环境保护:
-
石油泄漏对海洋生态破坏极大(如影响鱼类、鸟类生存)。本系统可缩短检测时间,帮助相关部门快速介入,减少生态损失。
-
-
安全生产保障:
-
在石油工业中,泄漏可能引发爆炸或长期污染。自动检测系统可7×24小时监控,降低事故风险。
-
-
降低监管成本:
-
传统人工巡检或实验室分析成本高、效率低。AI自动化检测能大幅减少人力投入,提升监测覆盖率。
-
4. 学术研究价值
-
小样本学习在环境监测中的应用:
-
石油泄漏数据集通常较少(因事故频率低且标注困难),本项目为小样本环境目标检测提供了可行方案。
-
-
多模态数据融合探索:
-
未来可结合红外热成像(油污与水温差异)或雷达数据(SAR图像),提升不同天气条件下的检测精度。
-
-
轻量化模型部署:
-
研究YOLOv8在边缘设备(如无人机机载计算机)上的量化与剪枝技术,实现低功耗实时检测。
-
5. 商业潜力
-
环保科技公司合作:
-
为环保部门或石油企业提供SaaS监测平台,按需提供泄漏检测服务。
-
-
硬件集成方案:
-
开发专用AI摄像头+无人机套件,面向石油平台、港口码头等场景销售。
-
-
数据服务扩展:
-
积累石油泄漏数据,构建行业数据库,未来提供污染扩散预测模型等增值服务。
-
总结
本YOLOv8石油泄漏检测系统通过AI技术赋能环境监测,在数据有限、场景复杂的条件下仍实现了高精度检测,为石油泄漏的早期发现、快速响应、智能监管提供了创新解决方案。项目不仅具有显著的环保和社会价值,也为工业安全、灾害防控等领域提供了可推广的技术范式。未来可结合多光谱遥感、物联网(IoT)传感器进一步优化系统,构建更全面的生态安全监测网络。
基于深度学习的石油泄漏检测系统(YOLOv8+YOLO数据集+UI界面+Python项目源码+模型)_哔哩哔哩_bilibili
基于深度学习的石油泄漏检测系统(YOLOv8+YOLO数据集+UI界面+Python项目源码+模型)
二、项目功能展示
系统功能
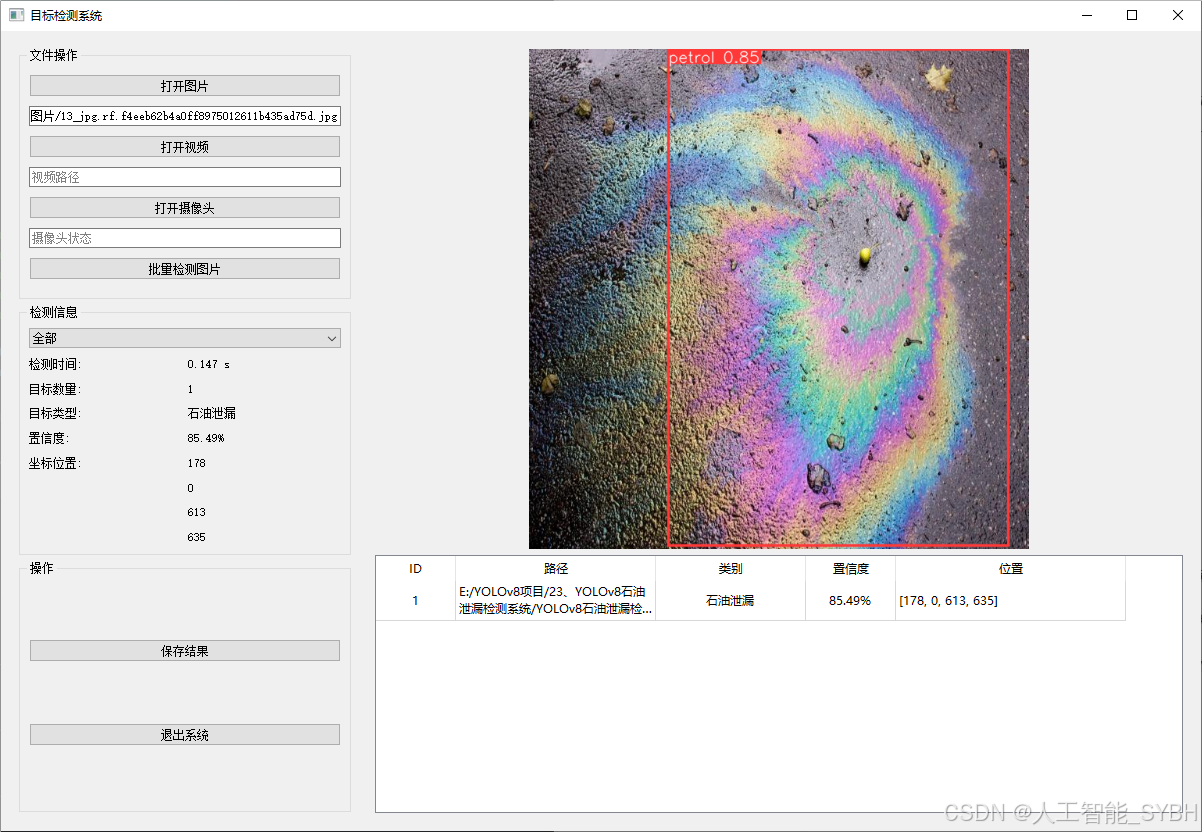
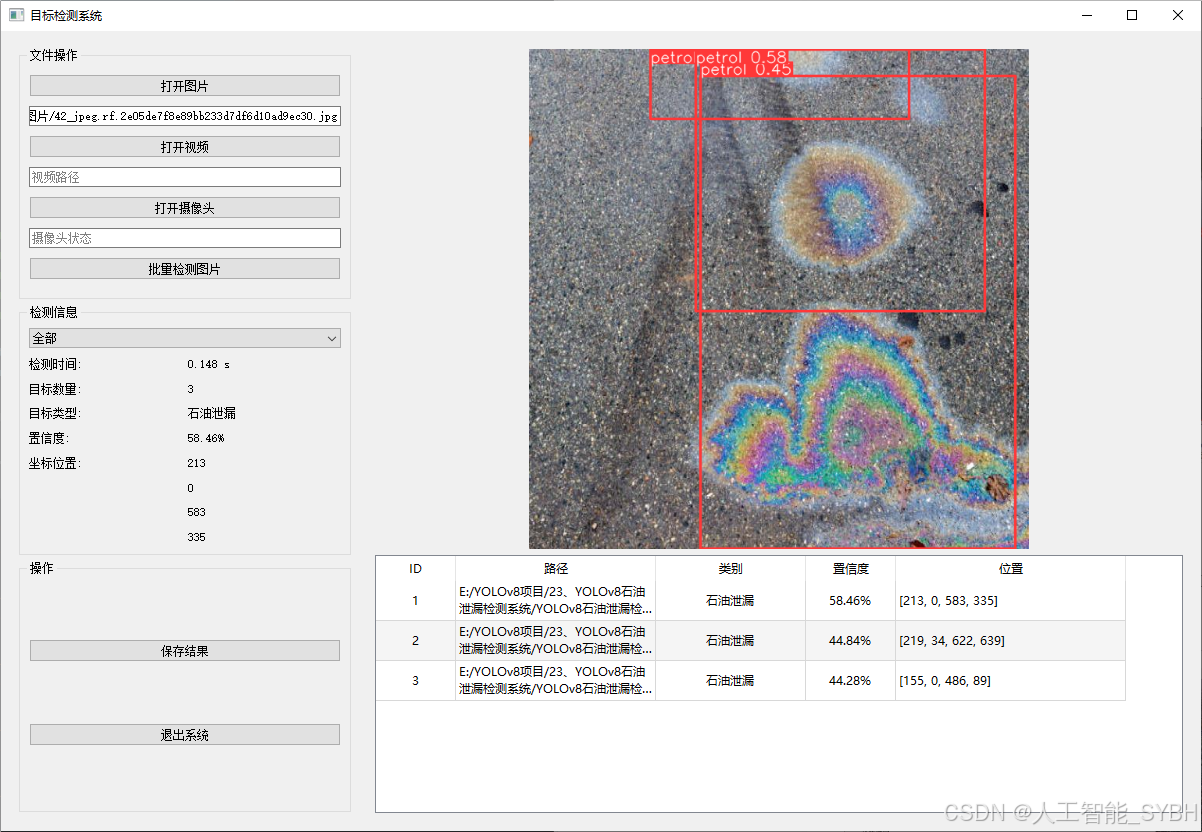
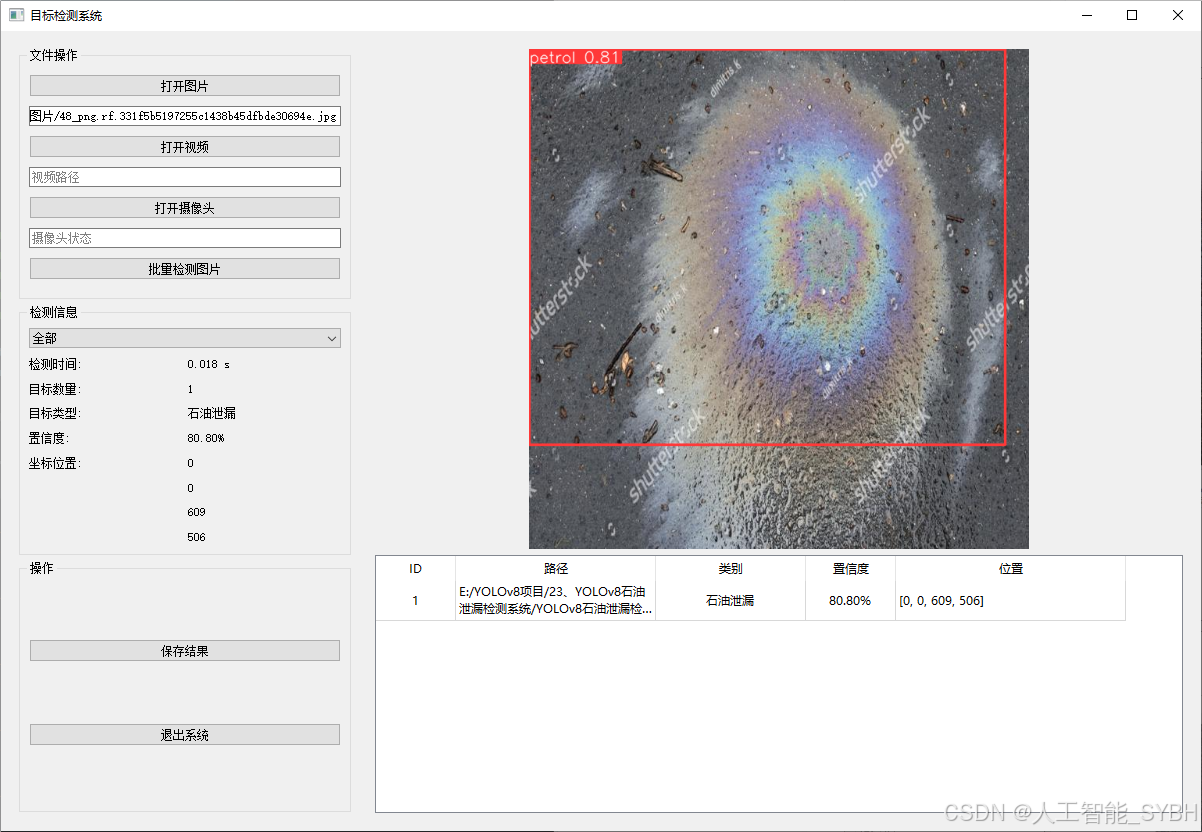
✅ 图片检测:可对单张图片进行检测,返回检测框及类别信息。
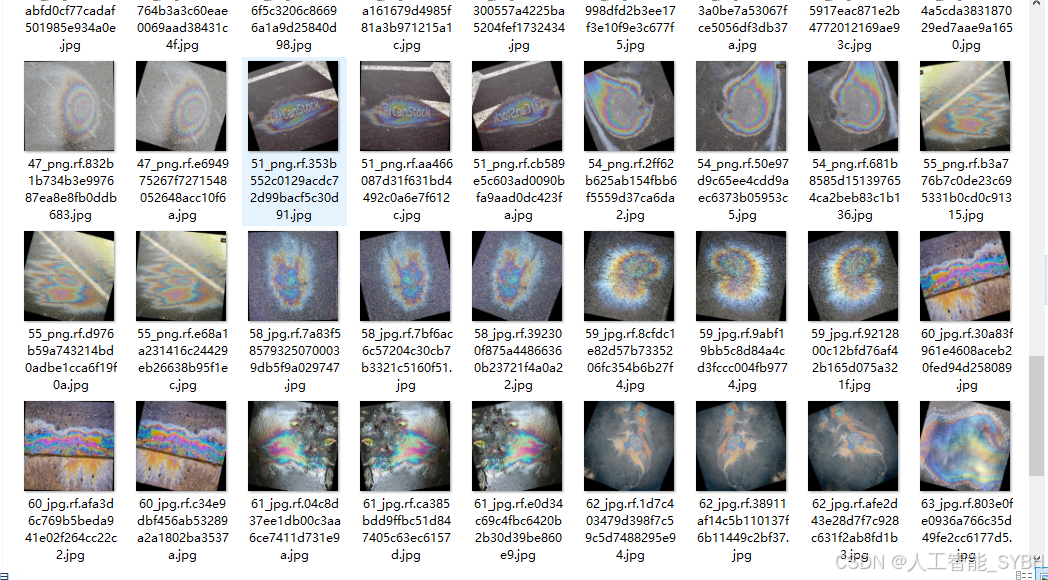
✅ 批量图片检测:支持文件夹输入,一次性检测多张图片,生成批量检测结果。
✅ 视频检测:支持视频文件输入,检测视频中每一帧的情况。
✅ 摄像头实时检测:连接USB 摄像头,实现实时监测,

-
图片检测
该功能允许用户通过单张图片进行目标检测。输入一张图片后,YOLO模型会实时分析图像,识别出其中的目标,并在图像中框出检测到的目标,输出带有目标框的图像。批量图片检测
用户可以一次性上传多个图片进行批量处理。该功能支持对多个图像文件进行并行处理,并返回每张图像的目标检测结果,适用于需要大规模处理图像数据的应用场景。
-
视频检测
视频检测功能允许用户将视频文件作为输入。YOLO模型将逐帧分析视频,并在每一帧中标记出检测到的目标。最终结果可以是带有目标框的视频文件或实时展示,适用于视频监控和分析等场景。
-
摄像头实时检测
该功能支持通过连接摄像头进行实时目标检测。YOLO模型能够在摄像头拍摄的实时视频流中进行目标检测,实时识别并显示检测结果。此功能非常适用于安防监控、无人驾驶、智能交通等应用,提供即时反馈。
核心特点:
- 高精度:基于YOLO模型,提供精确的目标检测能力,适用于不同类型的图像和视频。
- 实时性:特别优化的算法使得实时目标检测成为可能,无论是在视频还是摄像头实时检测中,响应速度都非常快。
- 批量处理:支持高效的批量图像和视频处理,适合大规模数据分析。
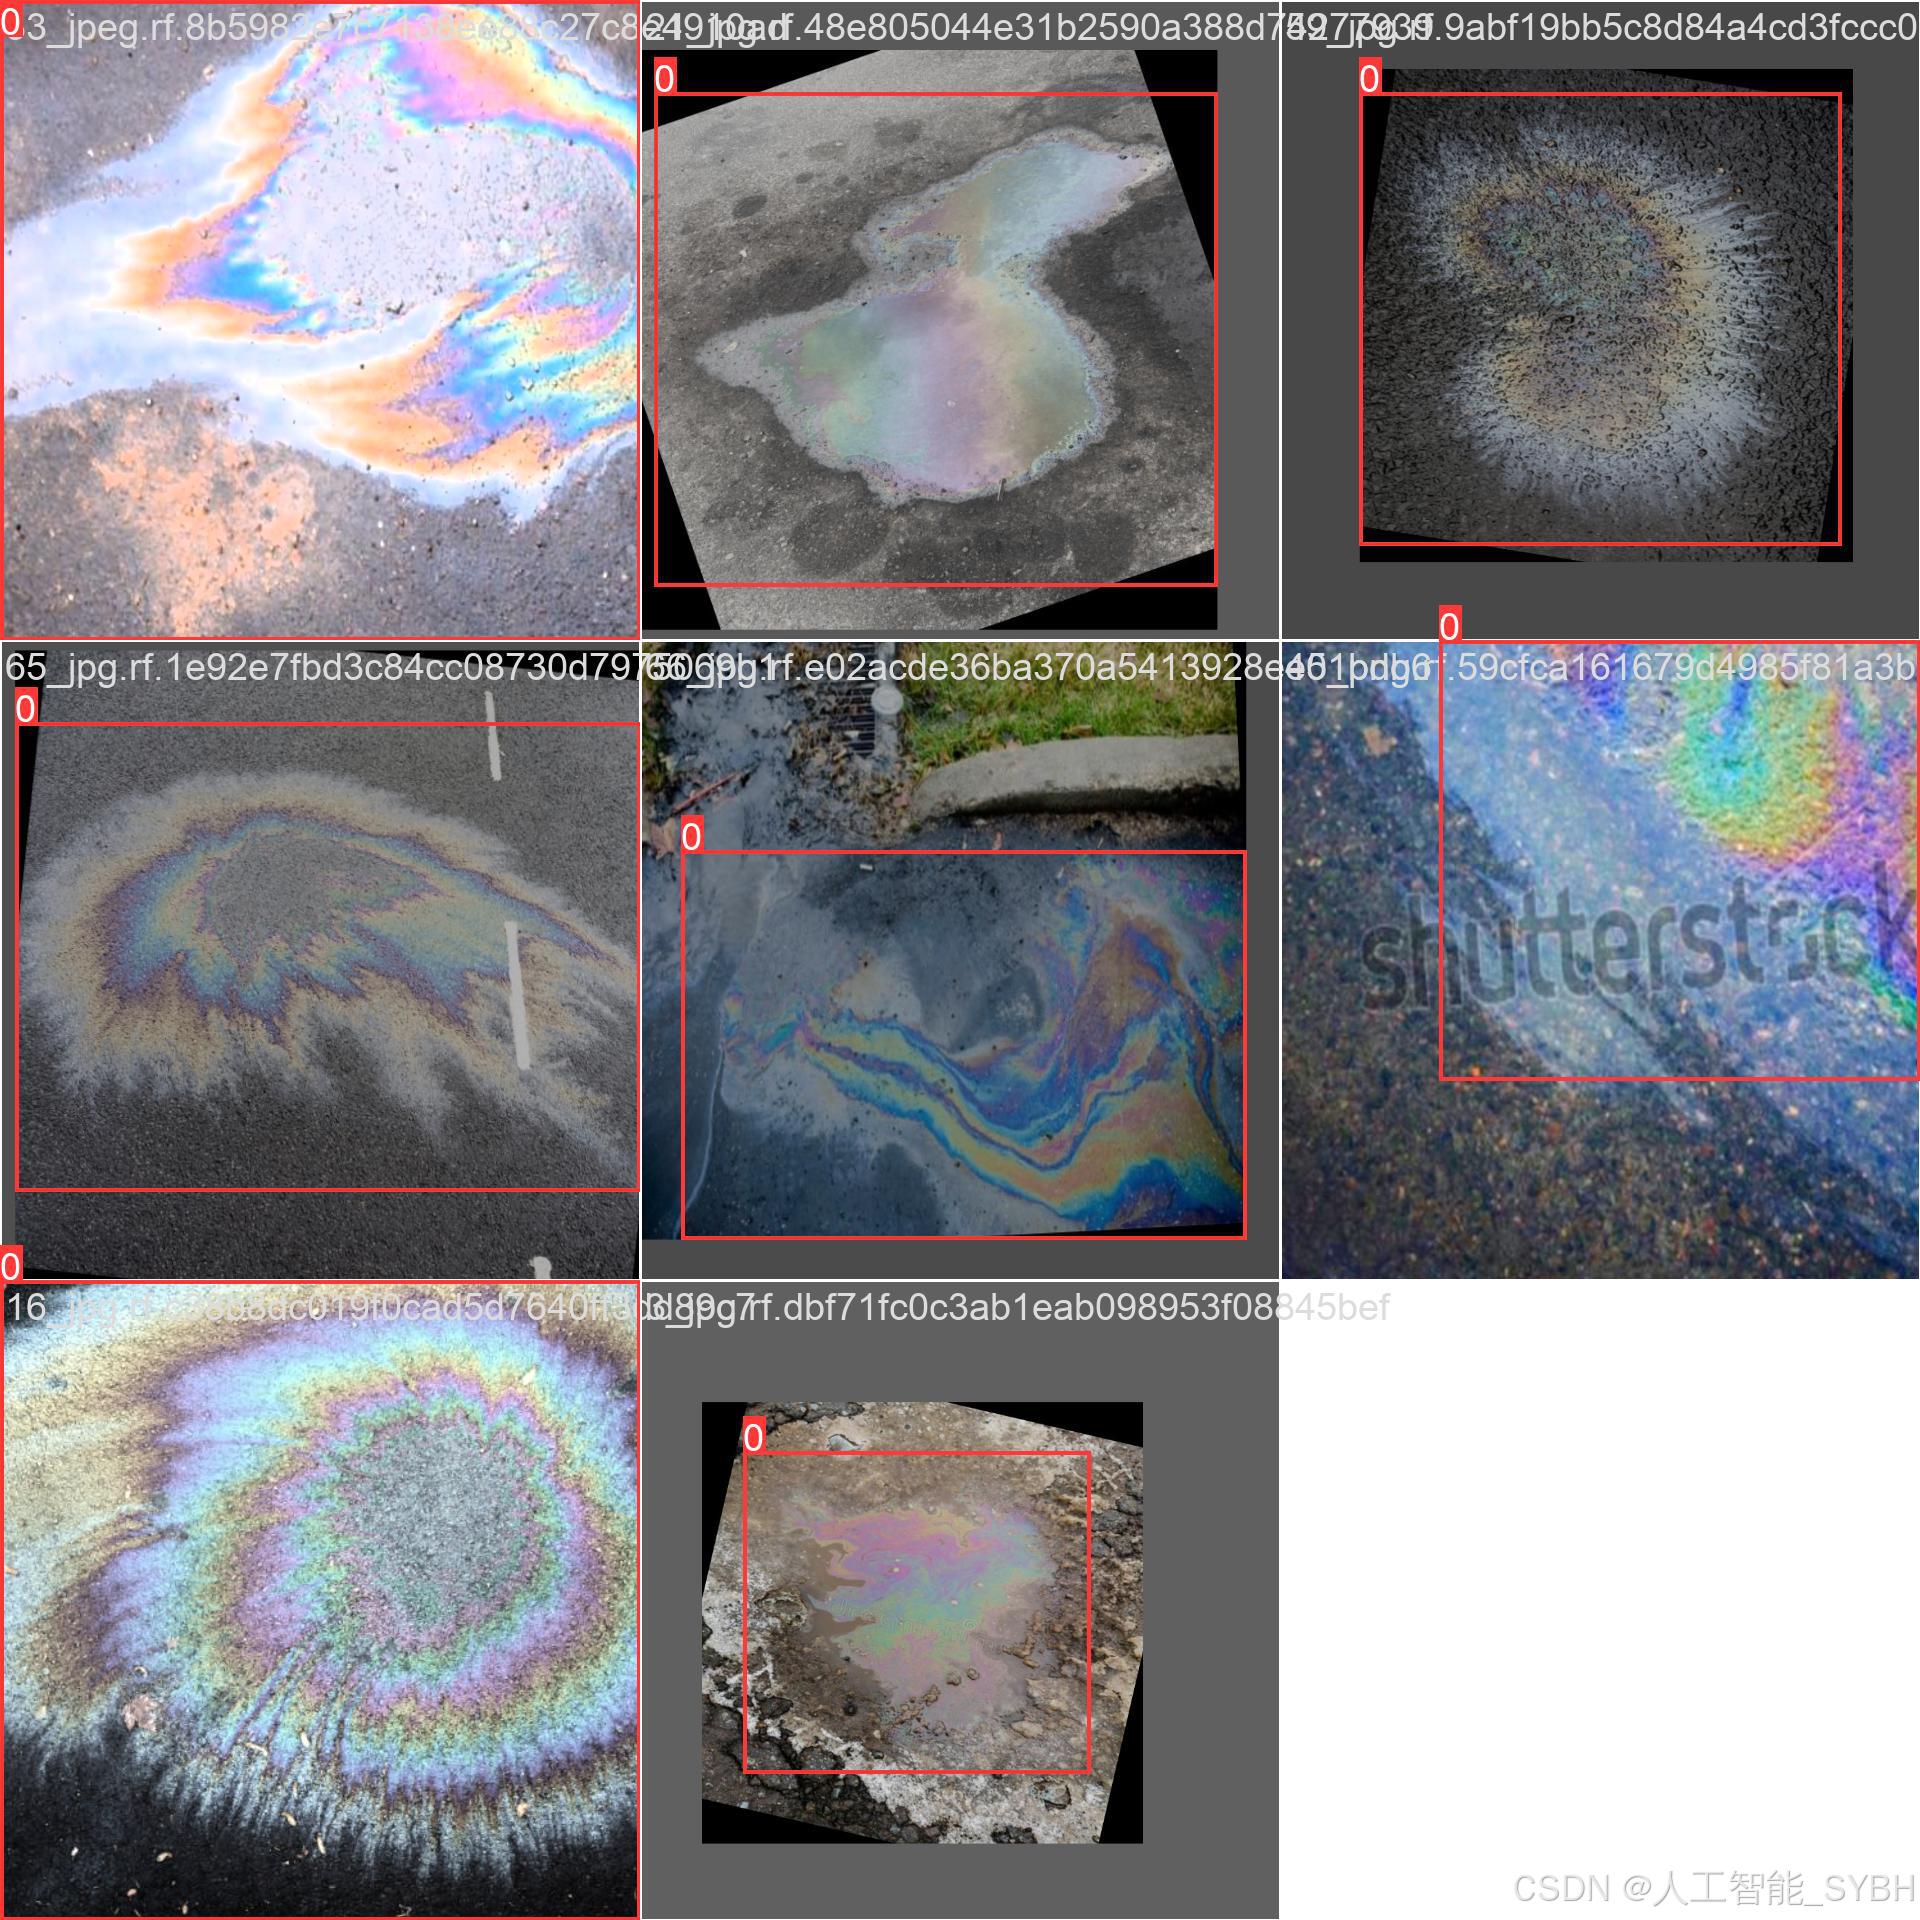
三、数据集介绍


数据集配置文件data.yaml
train: .\datasets\images\train
val: .\datasets\images\val
test: .\datasets\images\test


nc: 1
names: ['petrol']
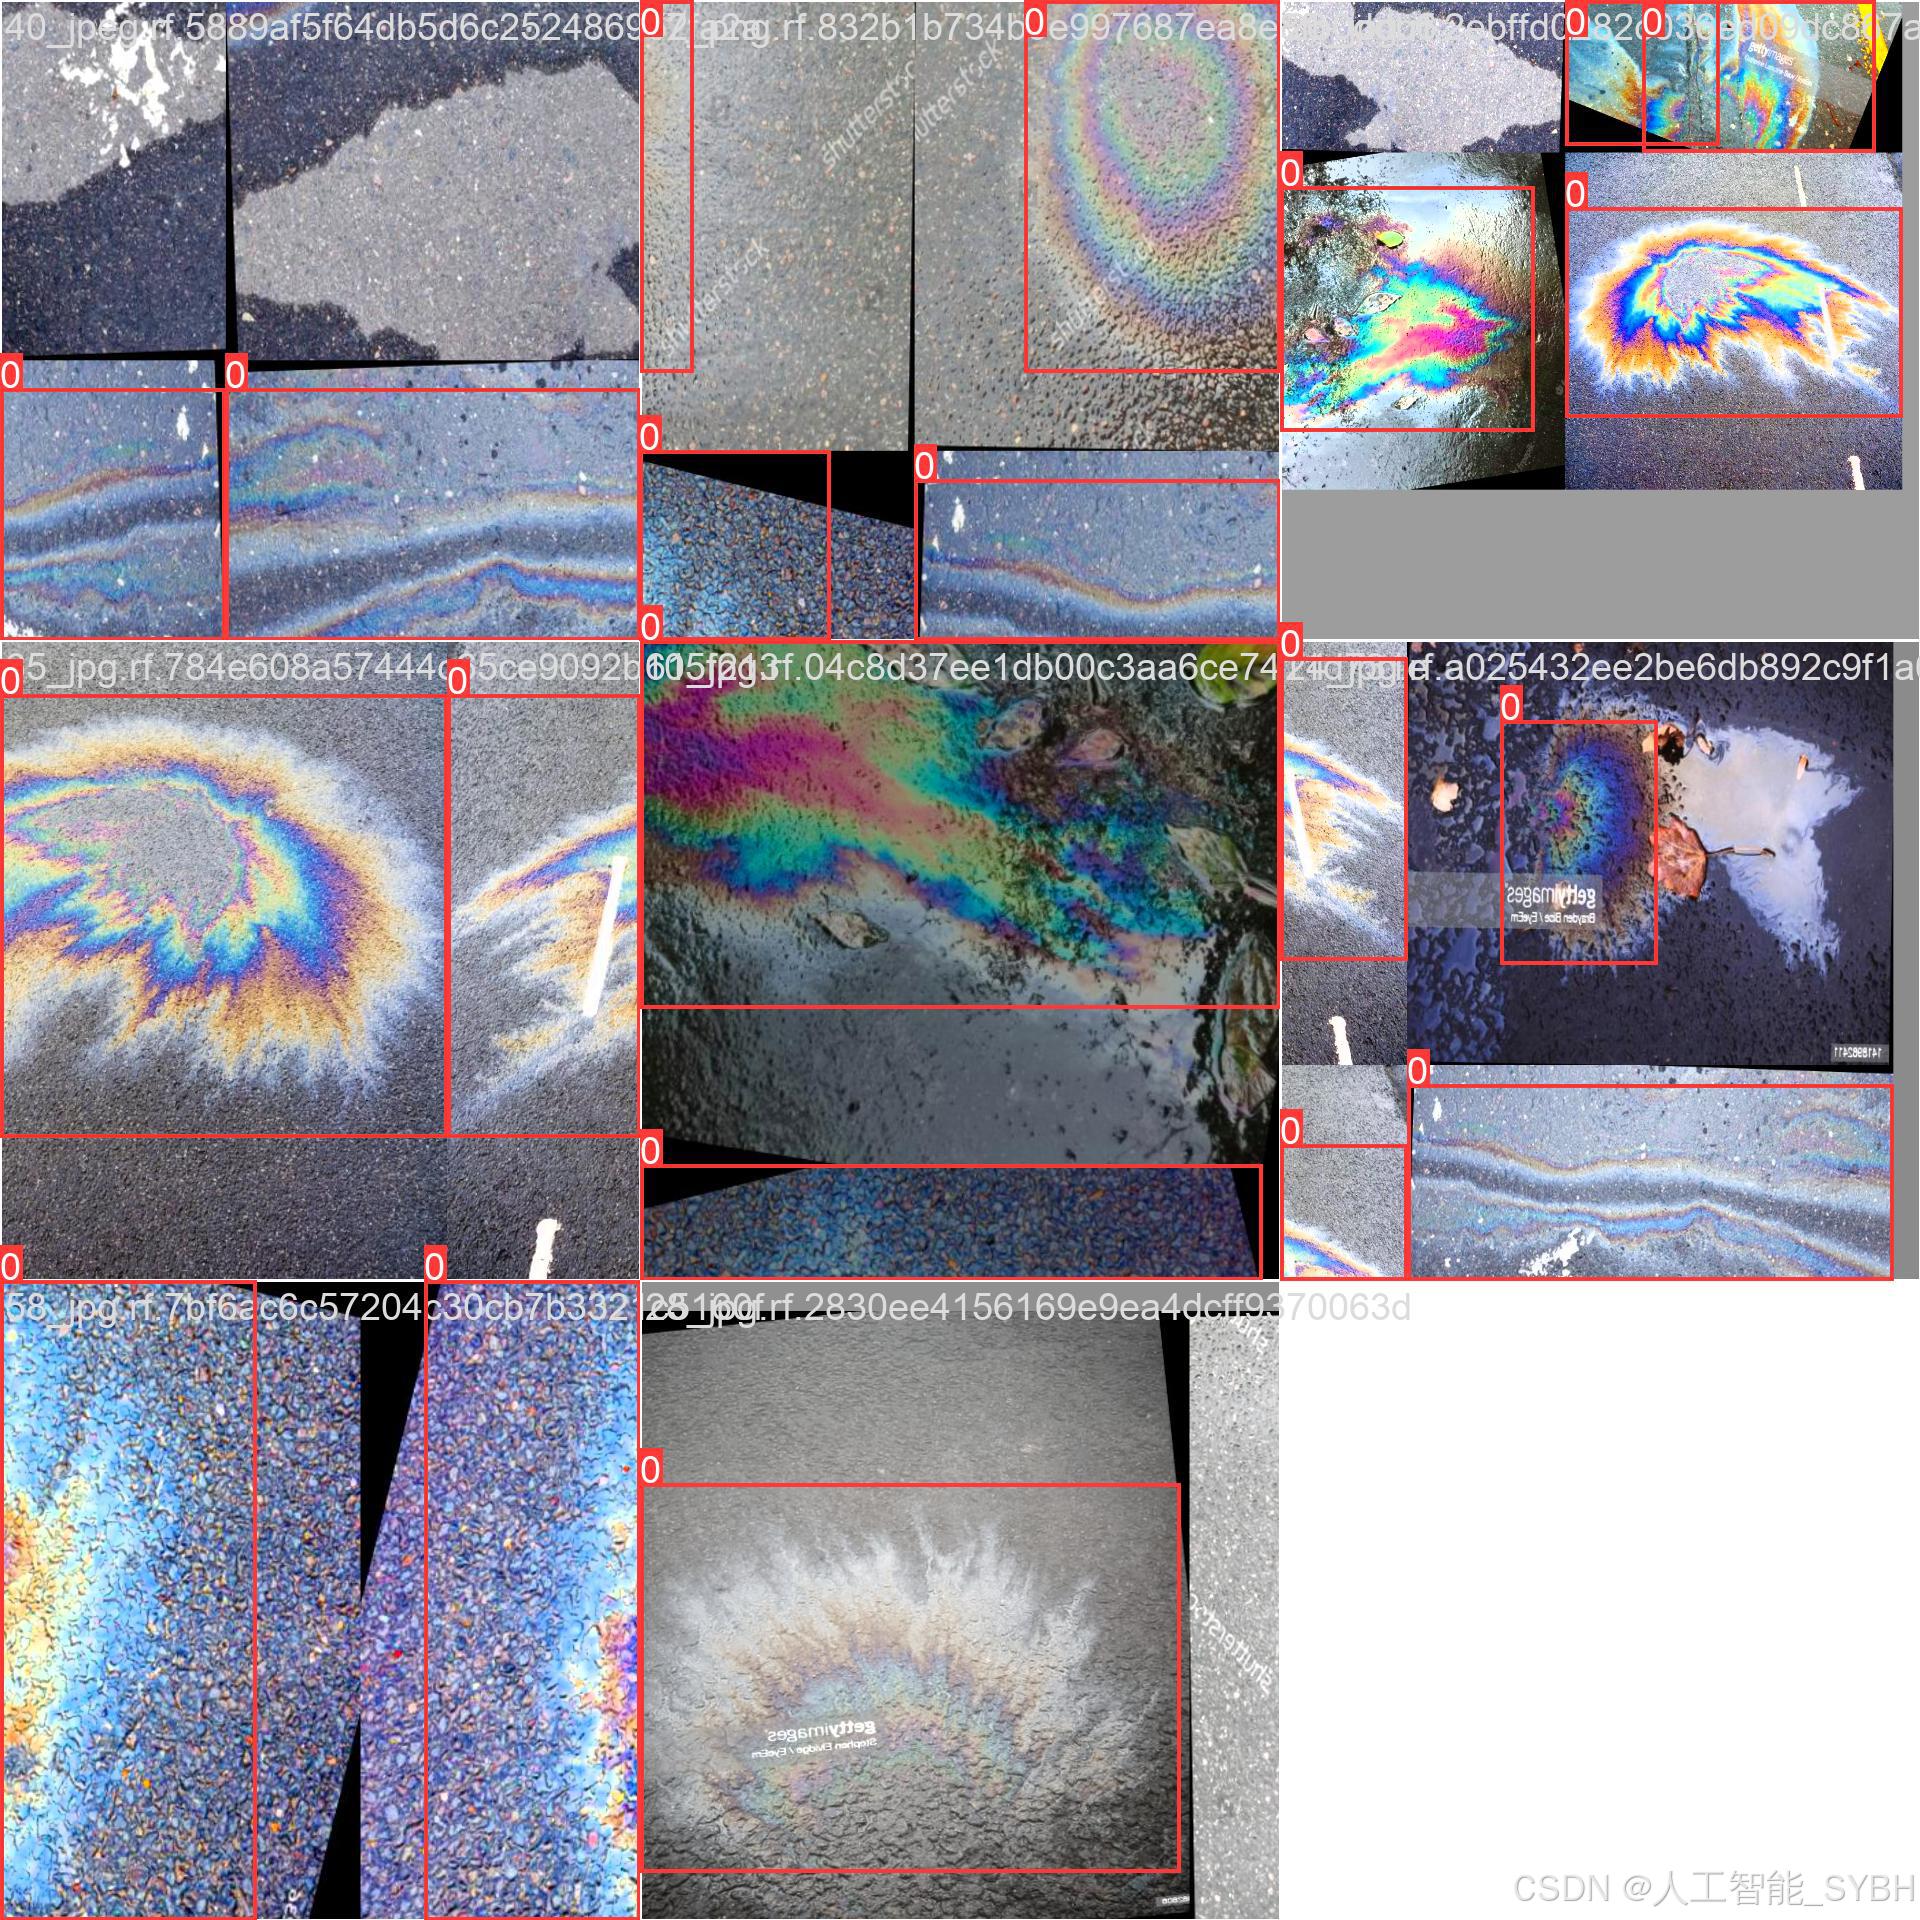
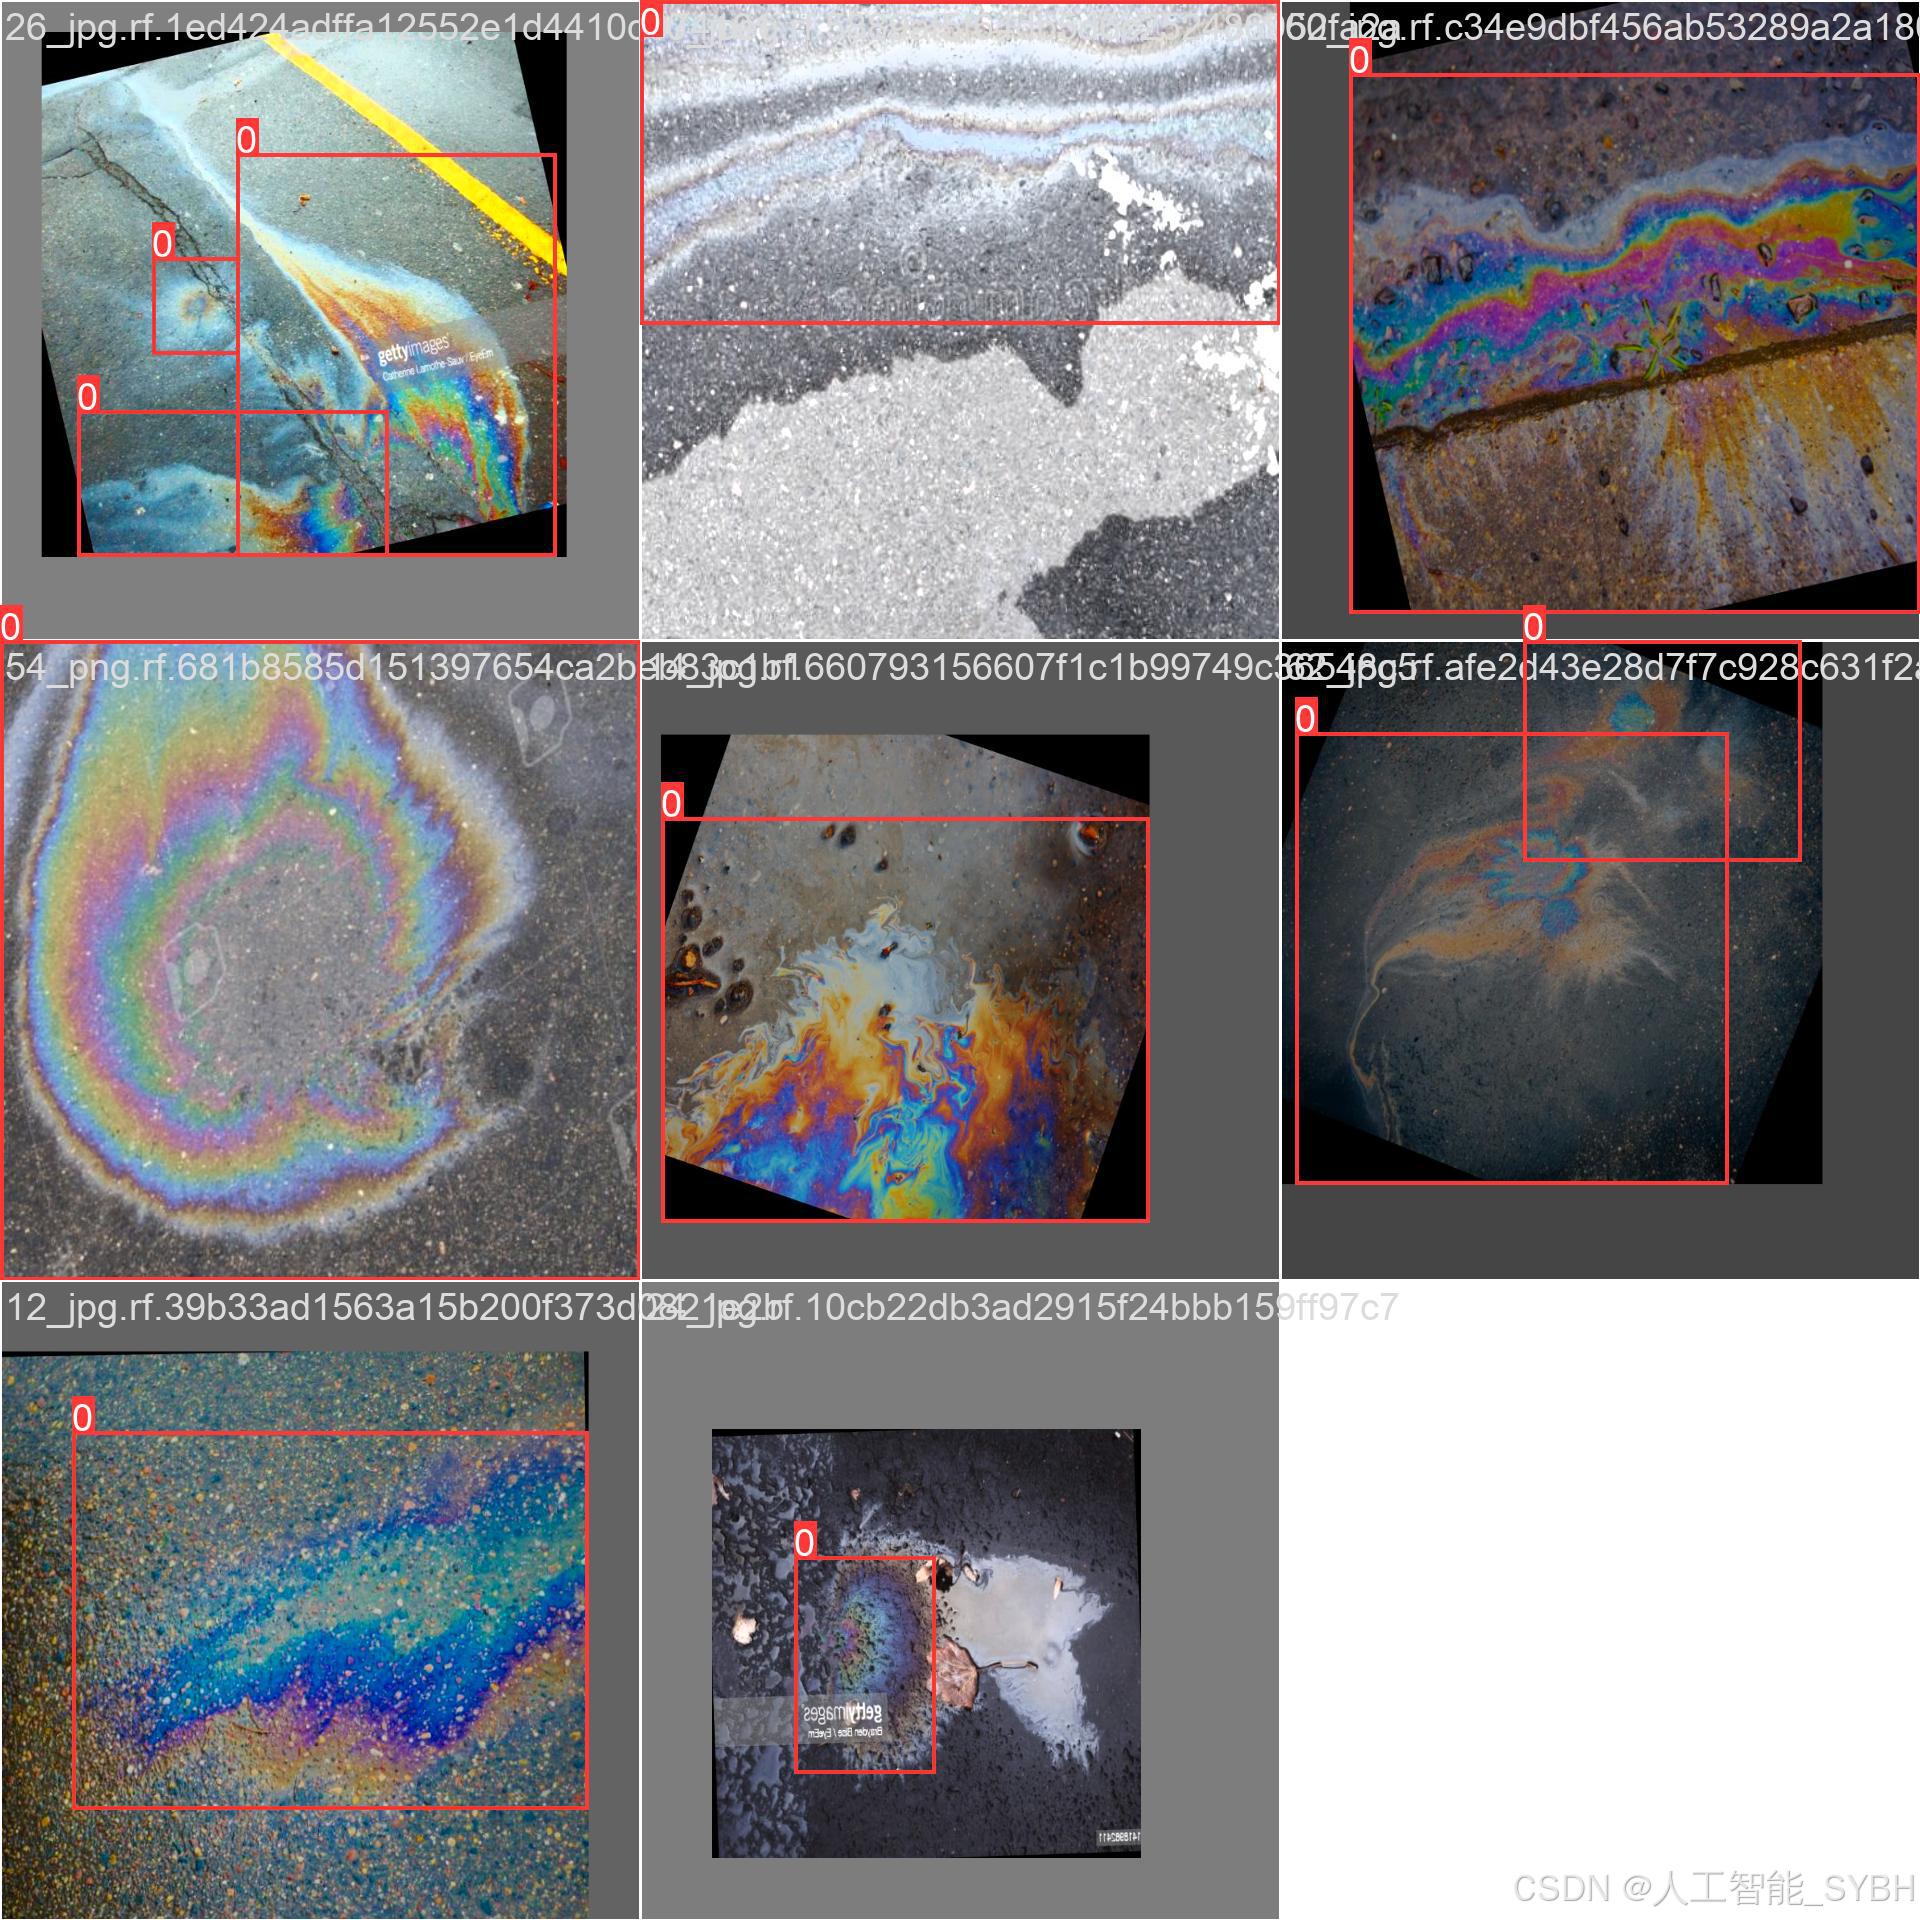
数据集制作流程
-
标注数据:使用标注工具(如LabelImg、CVAT等)对图像中的目标进行标注。每个目标需要标出边界框,并且标注类别。
-
转换格式:将标注的数据转换为YOLO格式。YOLO标注格式为每行:
<object-class> <x_center> <y_center> <width> <height>,这些坐标是相对于图像尺寸的比例。 -
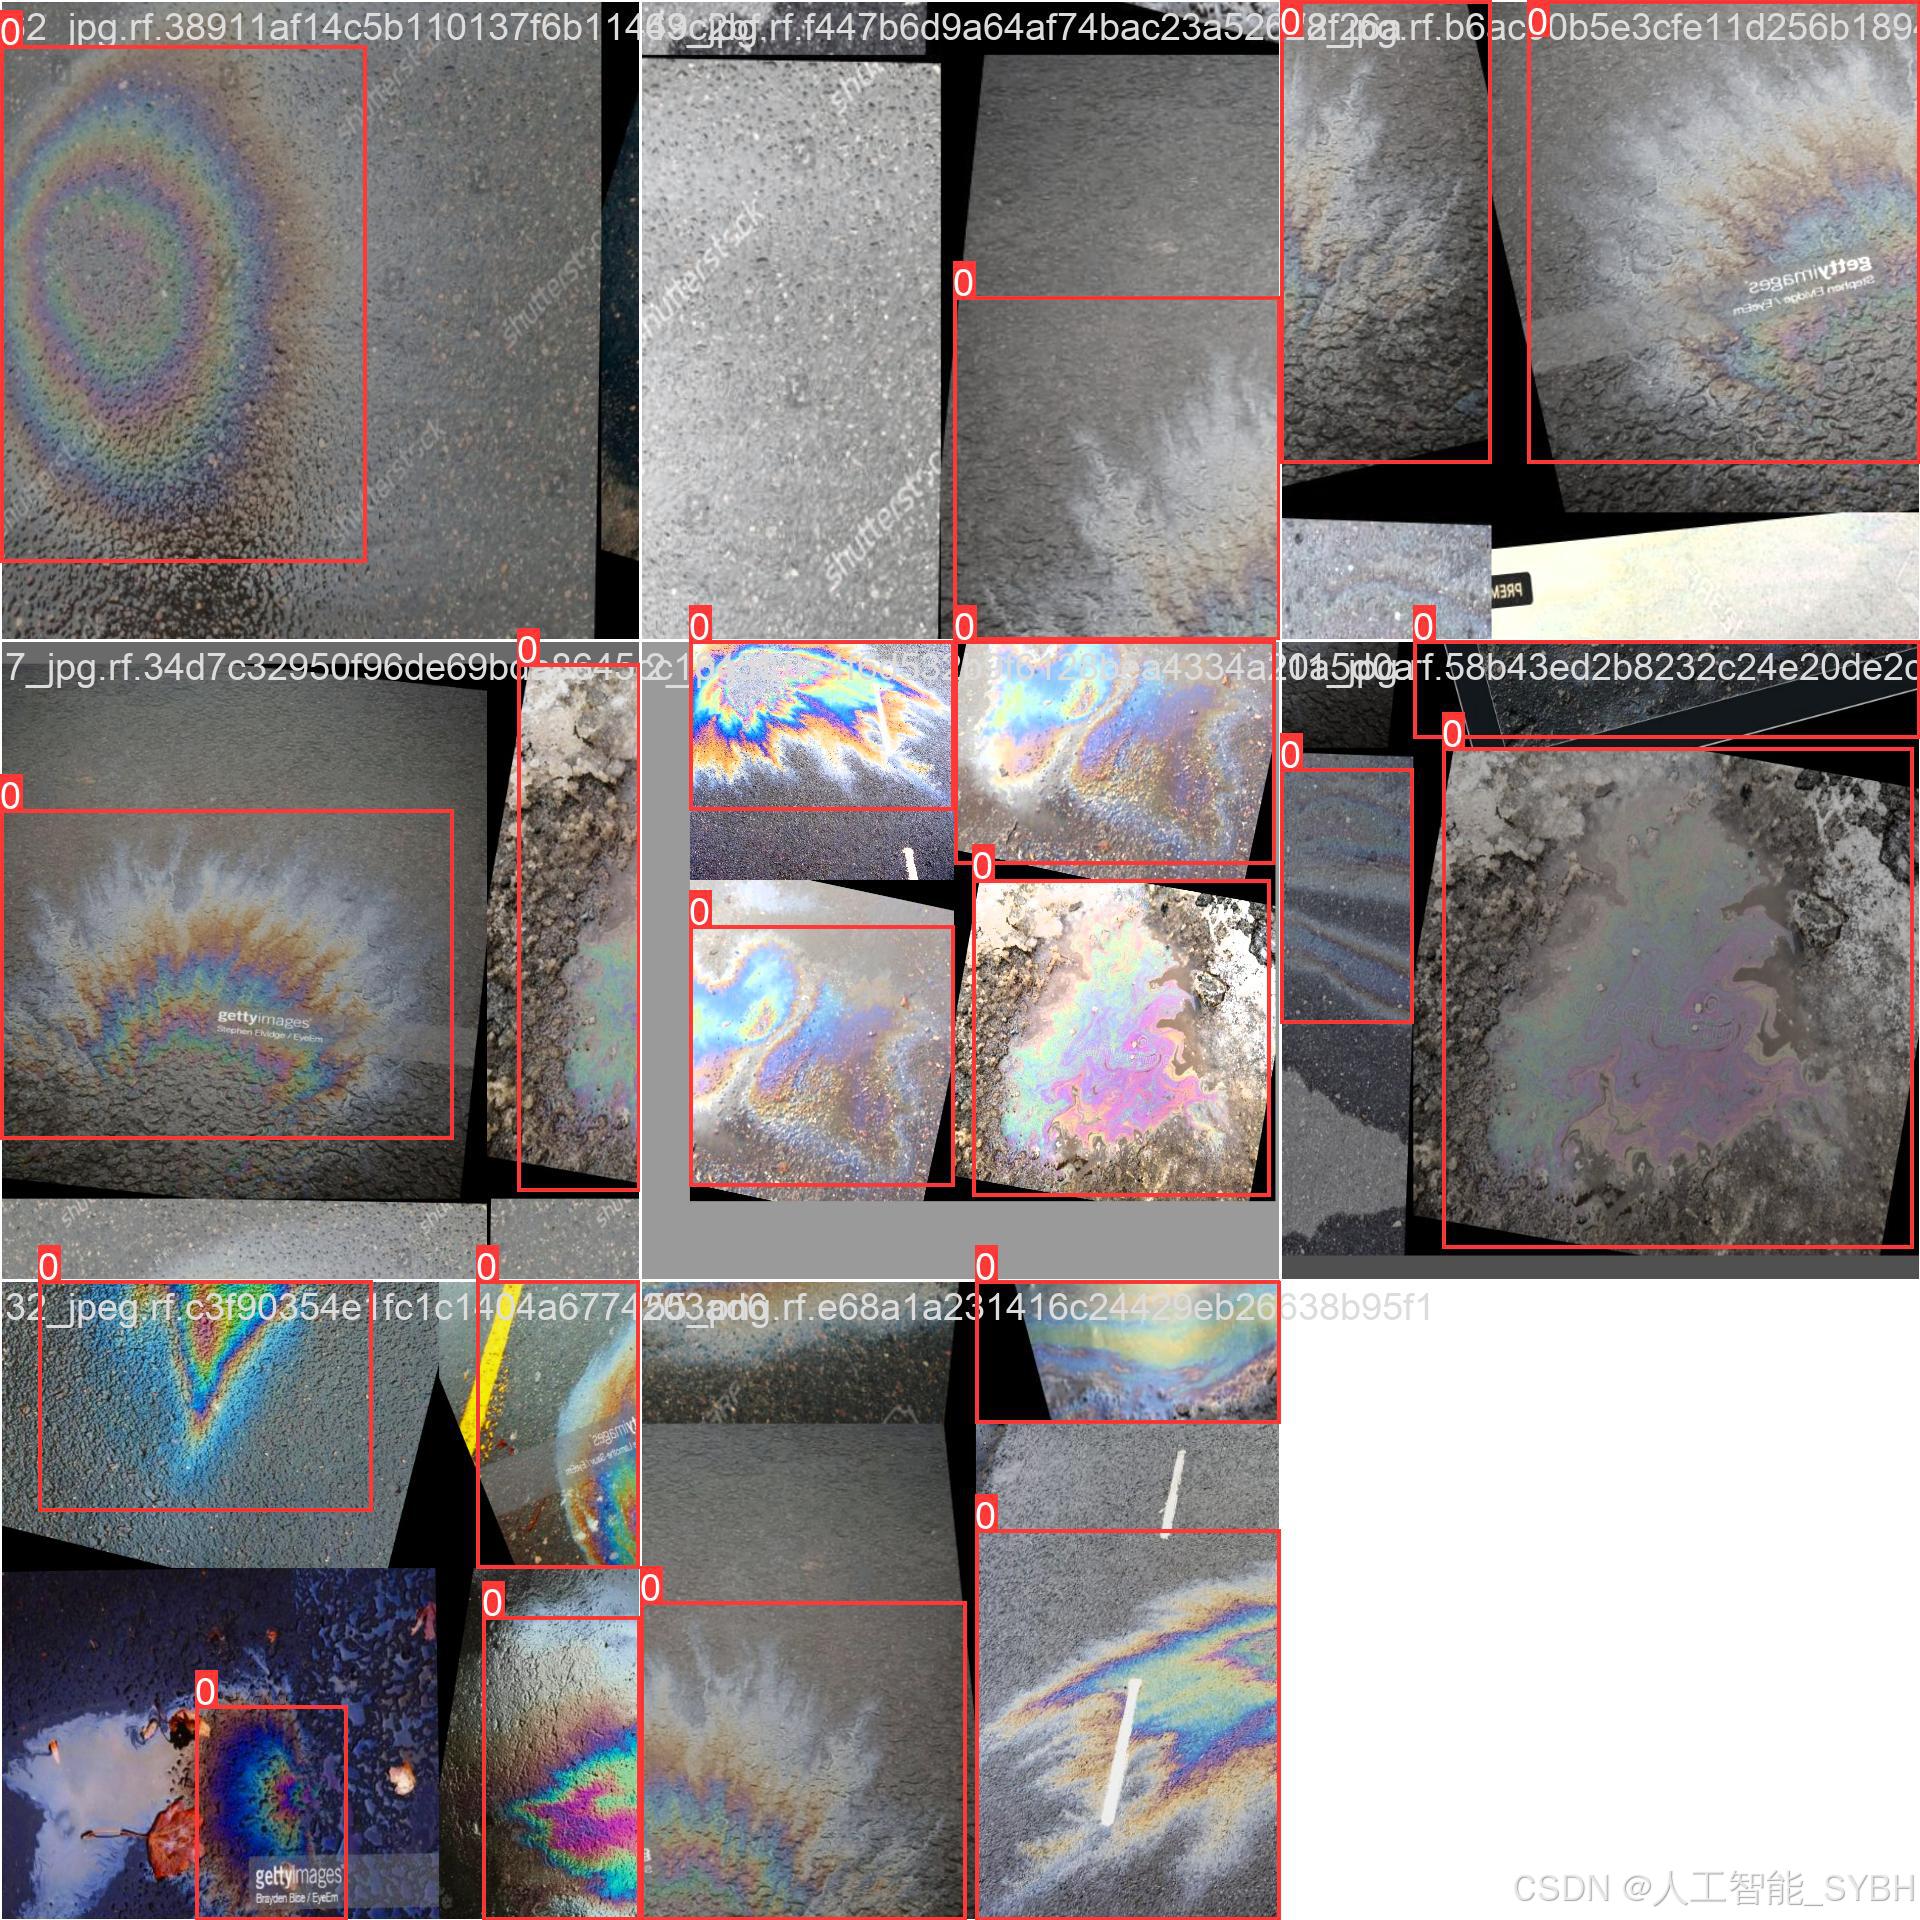
分割数据集:将数据集分为训练集、验证集和测试集,通常的比例是80%训练集、10%验证集和10%测试集。
-
准备标签文件:为每张图片生成一个对应的标签文件,确保标签文件与图片的命名一致。
-
调整图像尺寸:根据YOLO网络要求,统一调整所有图像的尺寸(如416x416或608x608)。

四、项目环境配置
创建虚拟环境
首先新建一个Anaconda环境,每个项目用不同的环境,这样项目中所用的依赖包互不干扰。
终端输入
conda create -n yolov8 python==3.9

激活虚拟环境
conda activate yolov8

安装cpu版本pytorch
pip install torch torchvision torchaudio

pycharm中配置anaconda


安装所需要库
pip install -r requirements.txt

五、模型训练
训练代码
from ultralytics import YOLO

model_path = 'yolov8s.pt'
data_path = 'datasets/data.yaml'

if __name__ == '__main__':
    model = YOLO(model_path)
    results = model.train(data=data_path,
                          epochs=500,
                          batch=64,
                          device='0',
                          workers=0,
                          project='runs/detect',
                          name='exp',
                          )
根据实际情况更换模型 yolov8n.yaml (nano):轻量化模型,适合嵌入式设备,速度快但精度略低。 yolov8s.yaml (small):小模型,适合实时任务。 yolov8m.yaml (medium):中等大小模型,兼顾速度和精度。 yolov8b.yaml (base):基本版模型,适合大部分应用场景。 yolov8l.yaml (large):大型模型,适合对精度要求高的任务。
--batch 64:每批次64张图像。--epochs 500:训练500轮。--datasets/data.yaml:数据集配置文件。--weights yolov8s.pt:初始化模型权重,yolov8s.pt是预训练的轻量级YOLO模型。
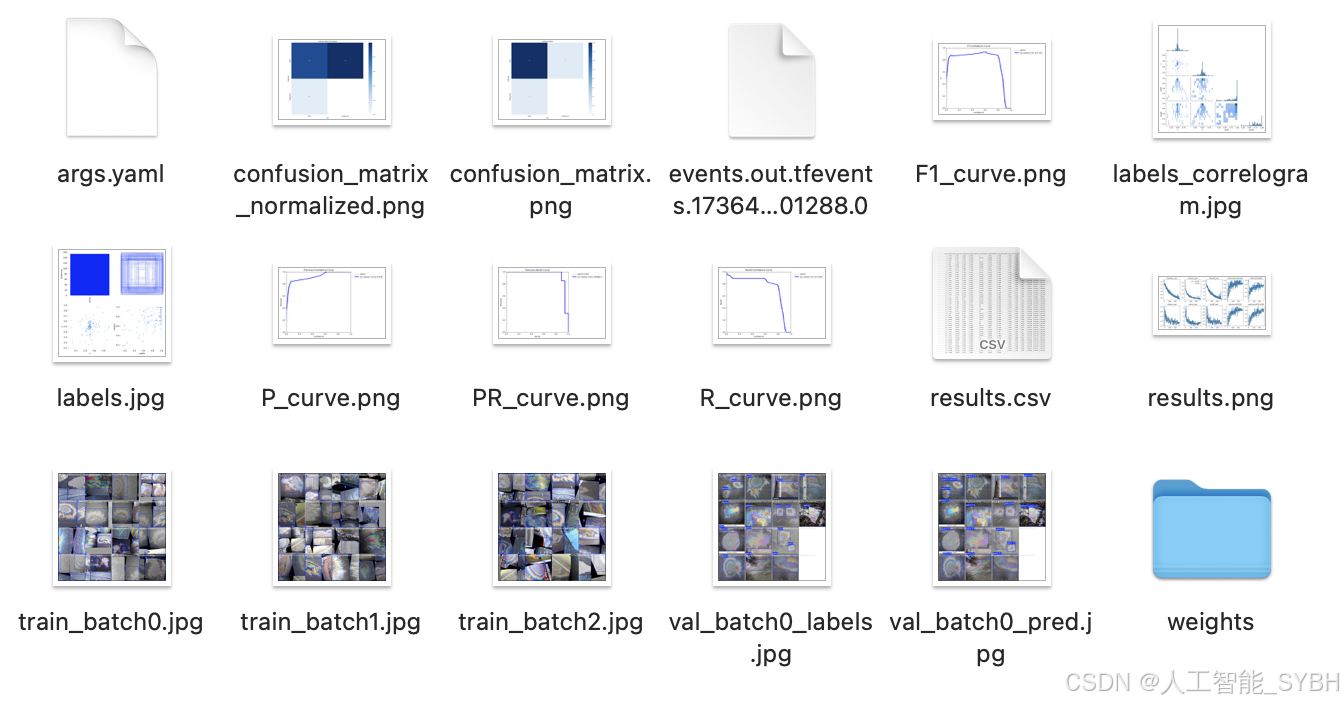
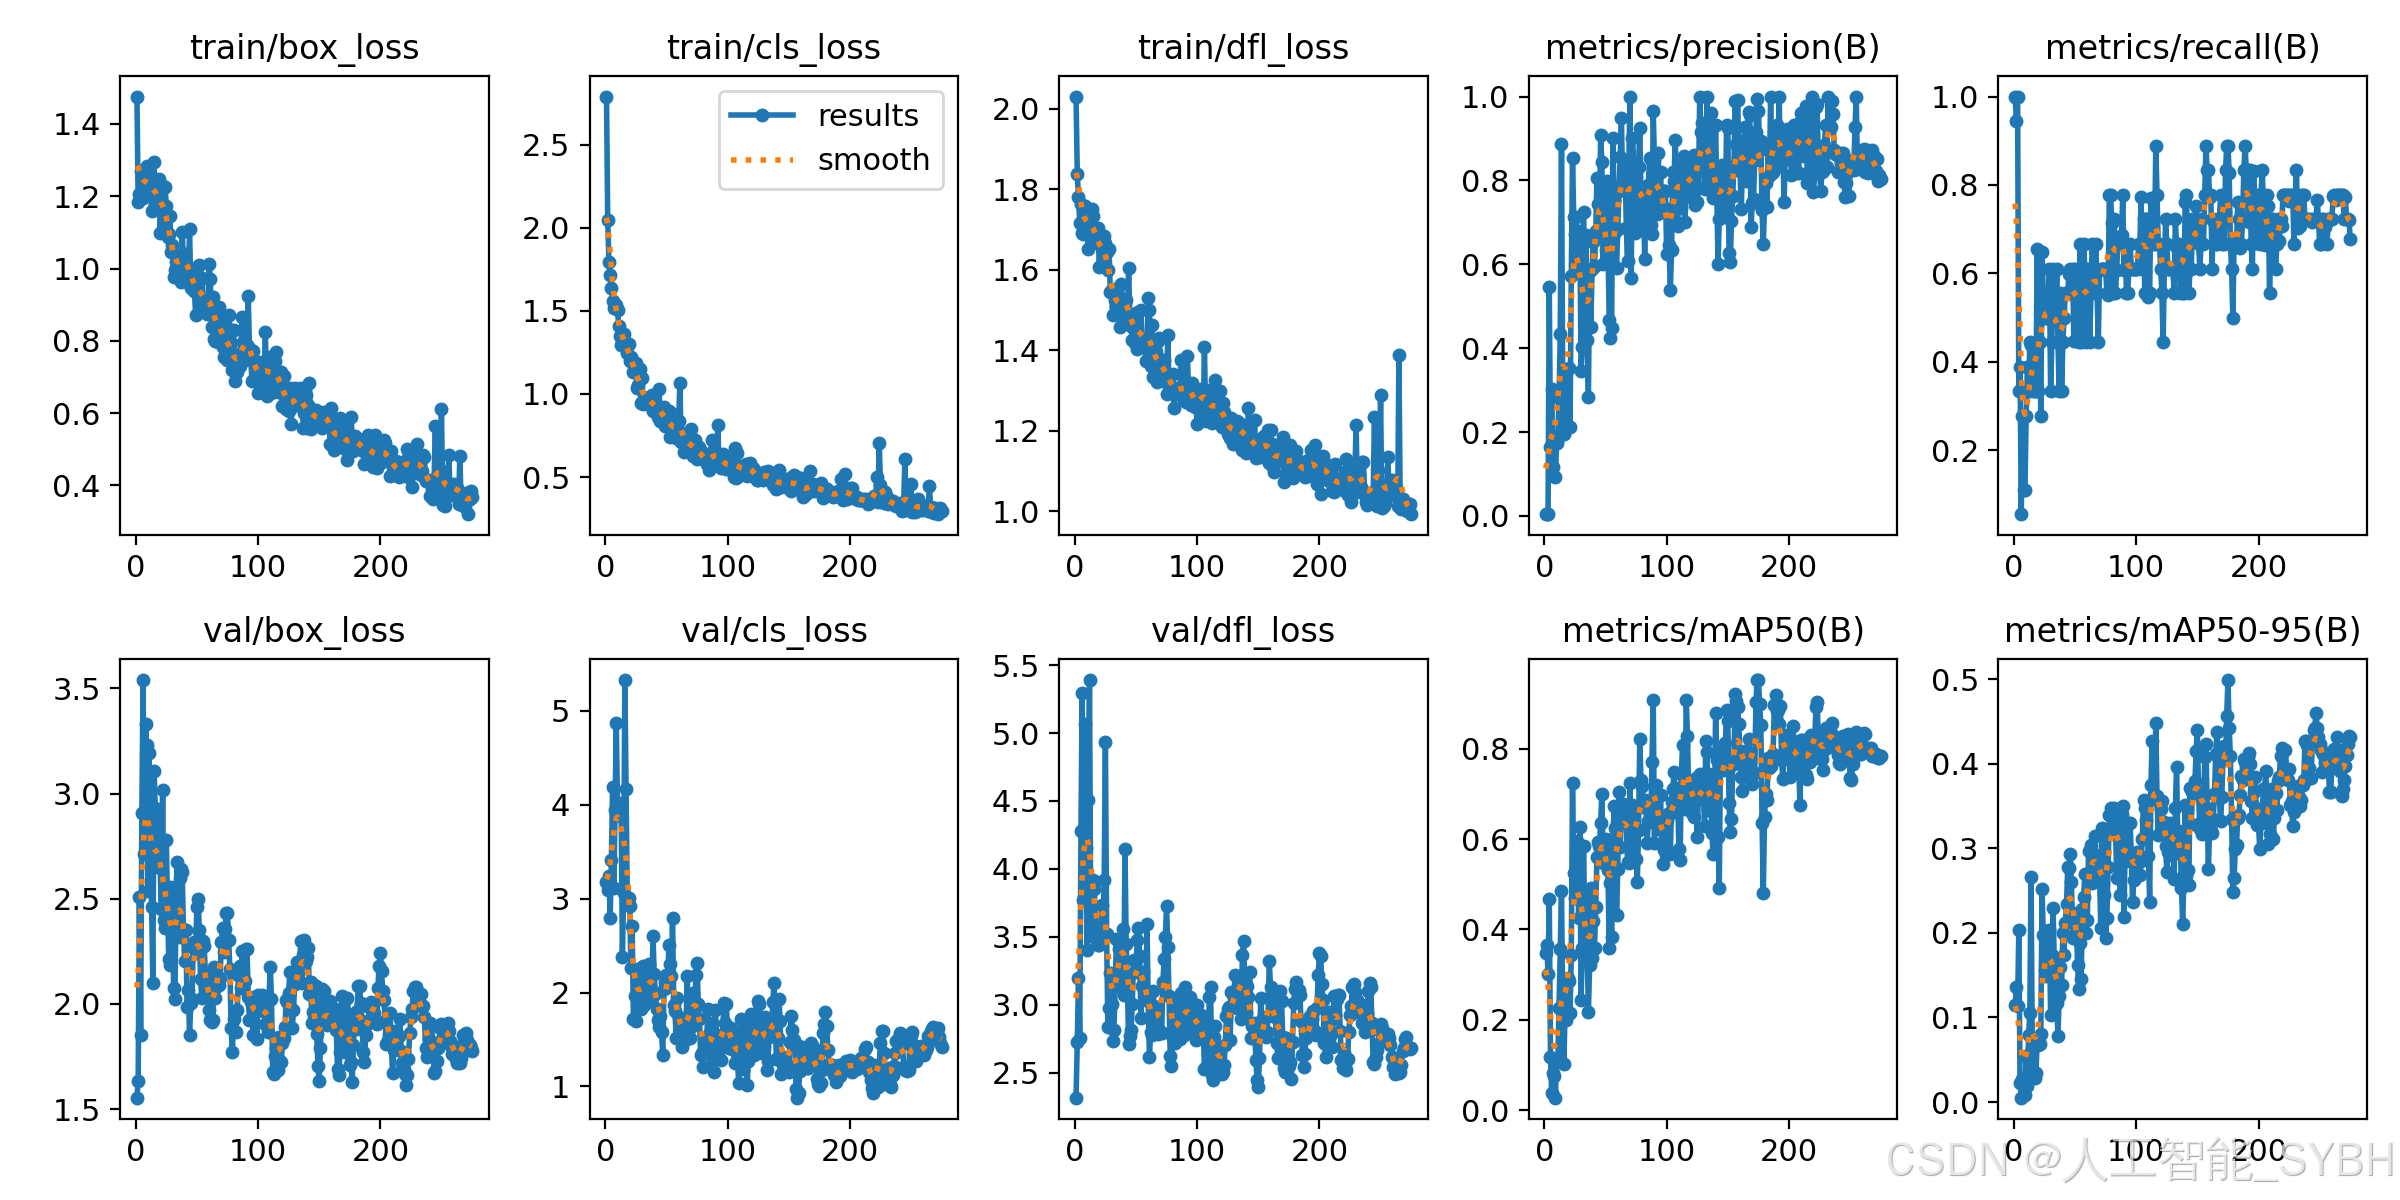
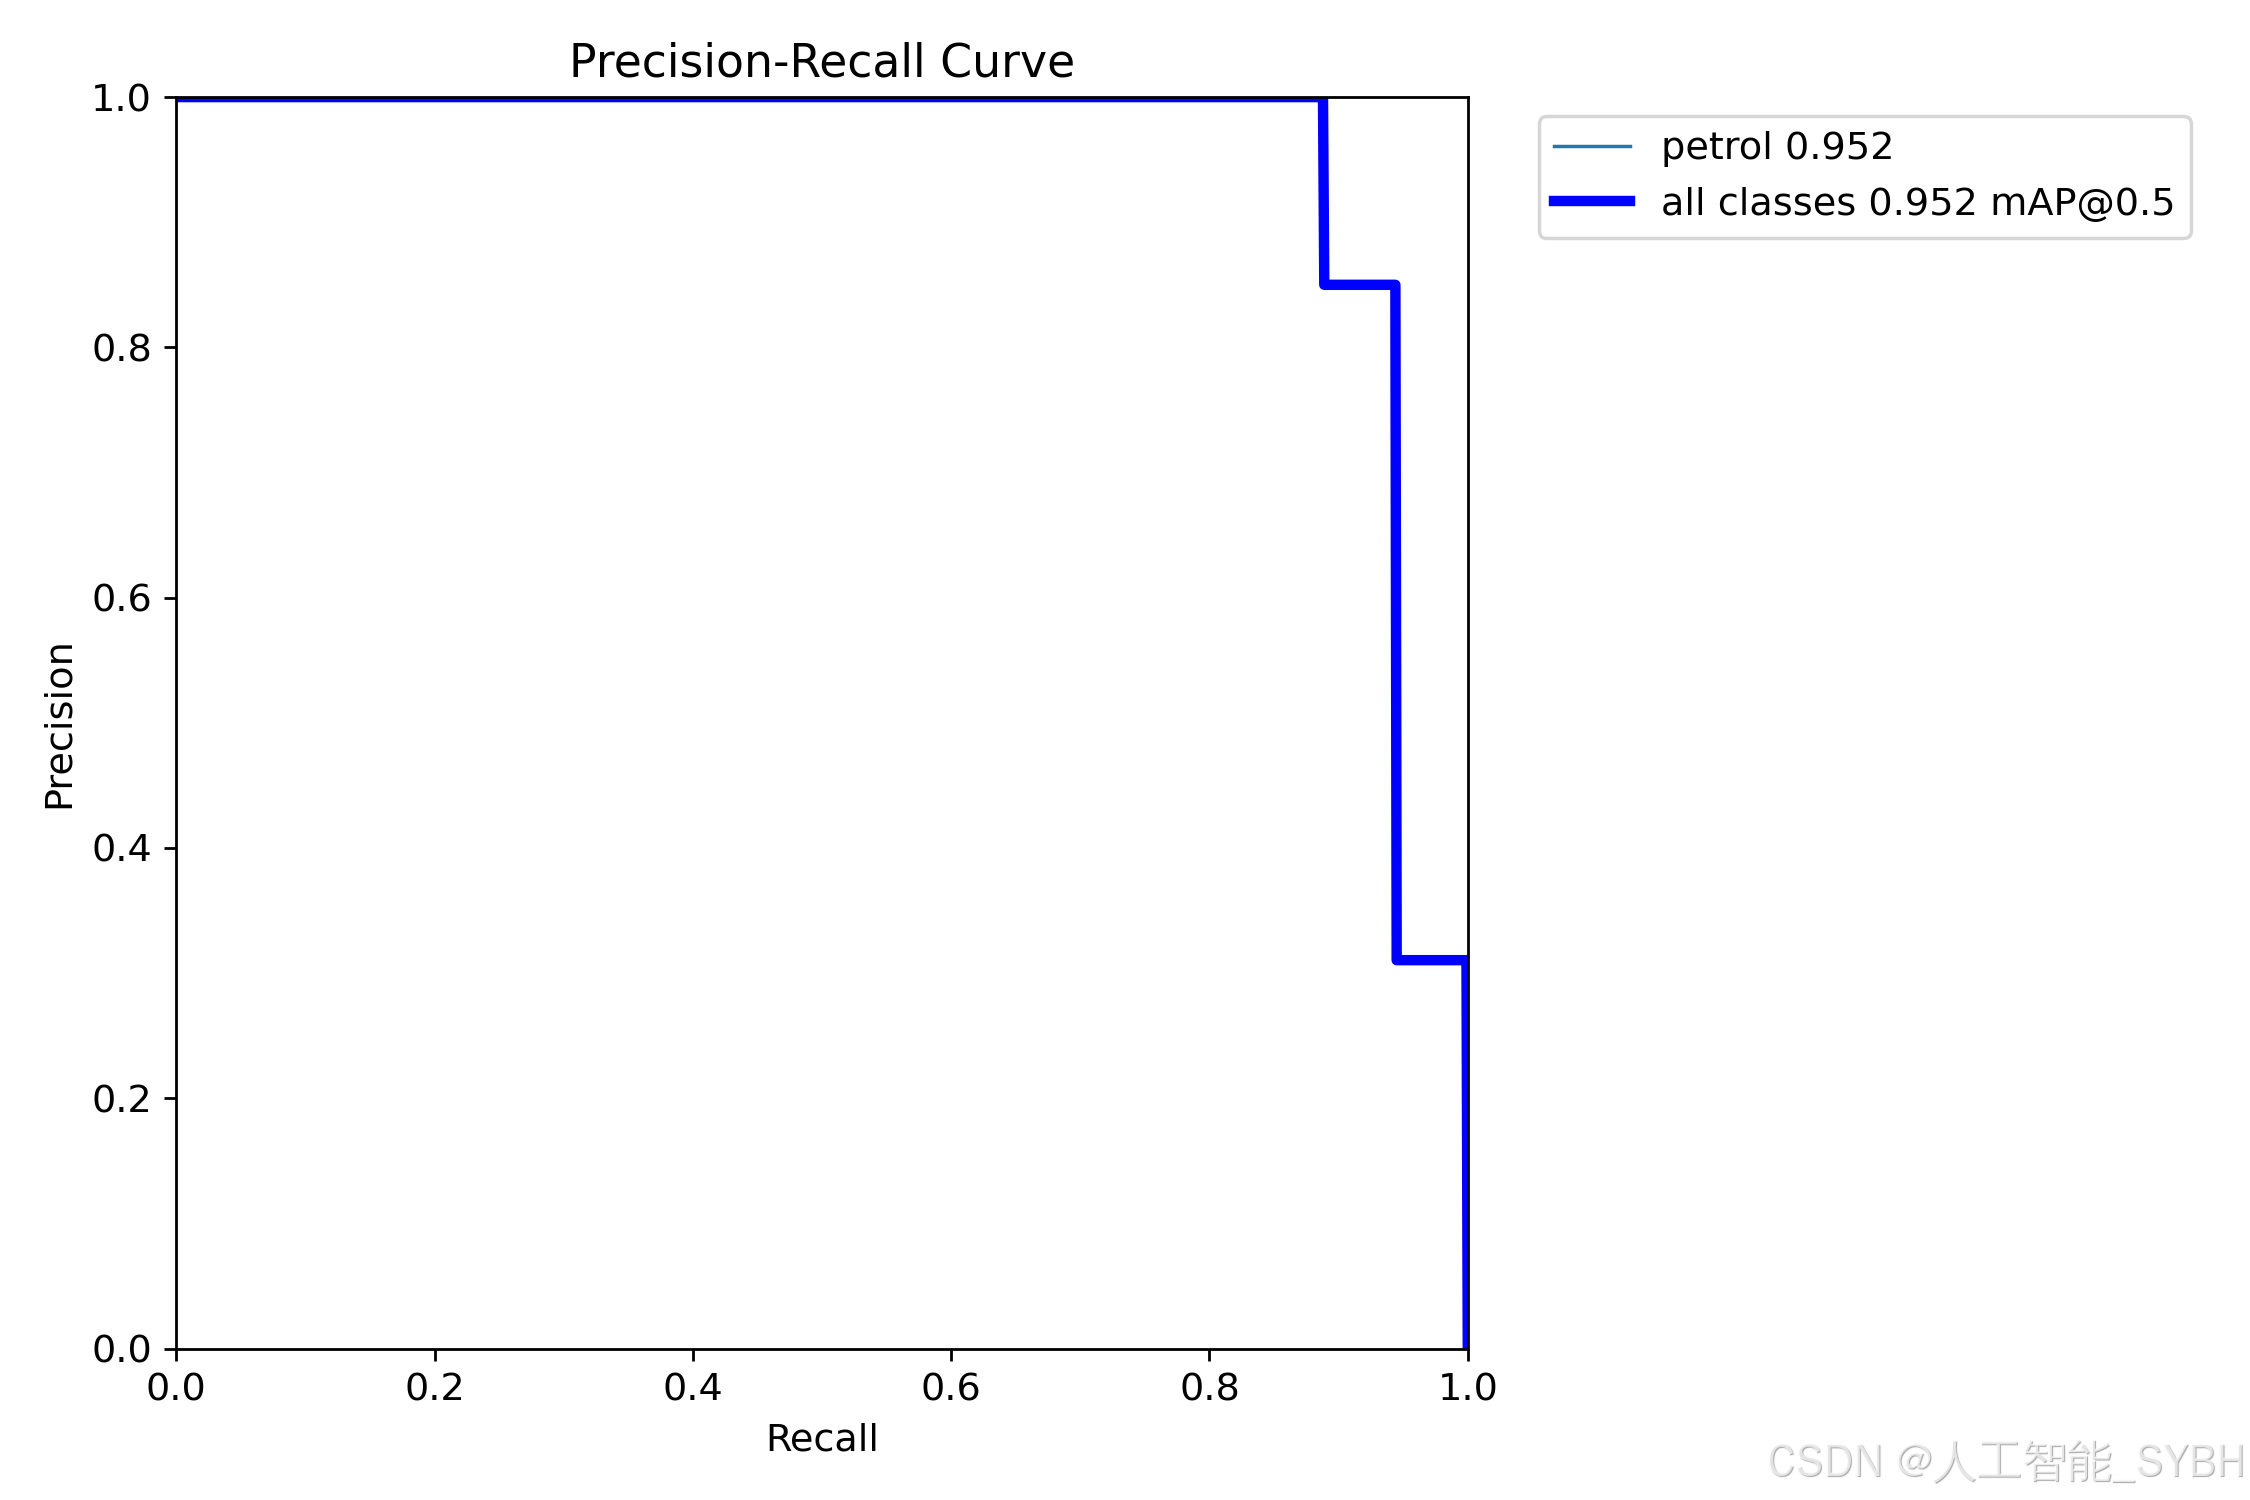
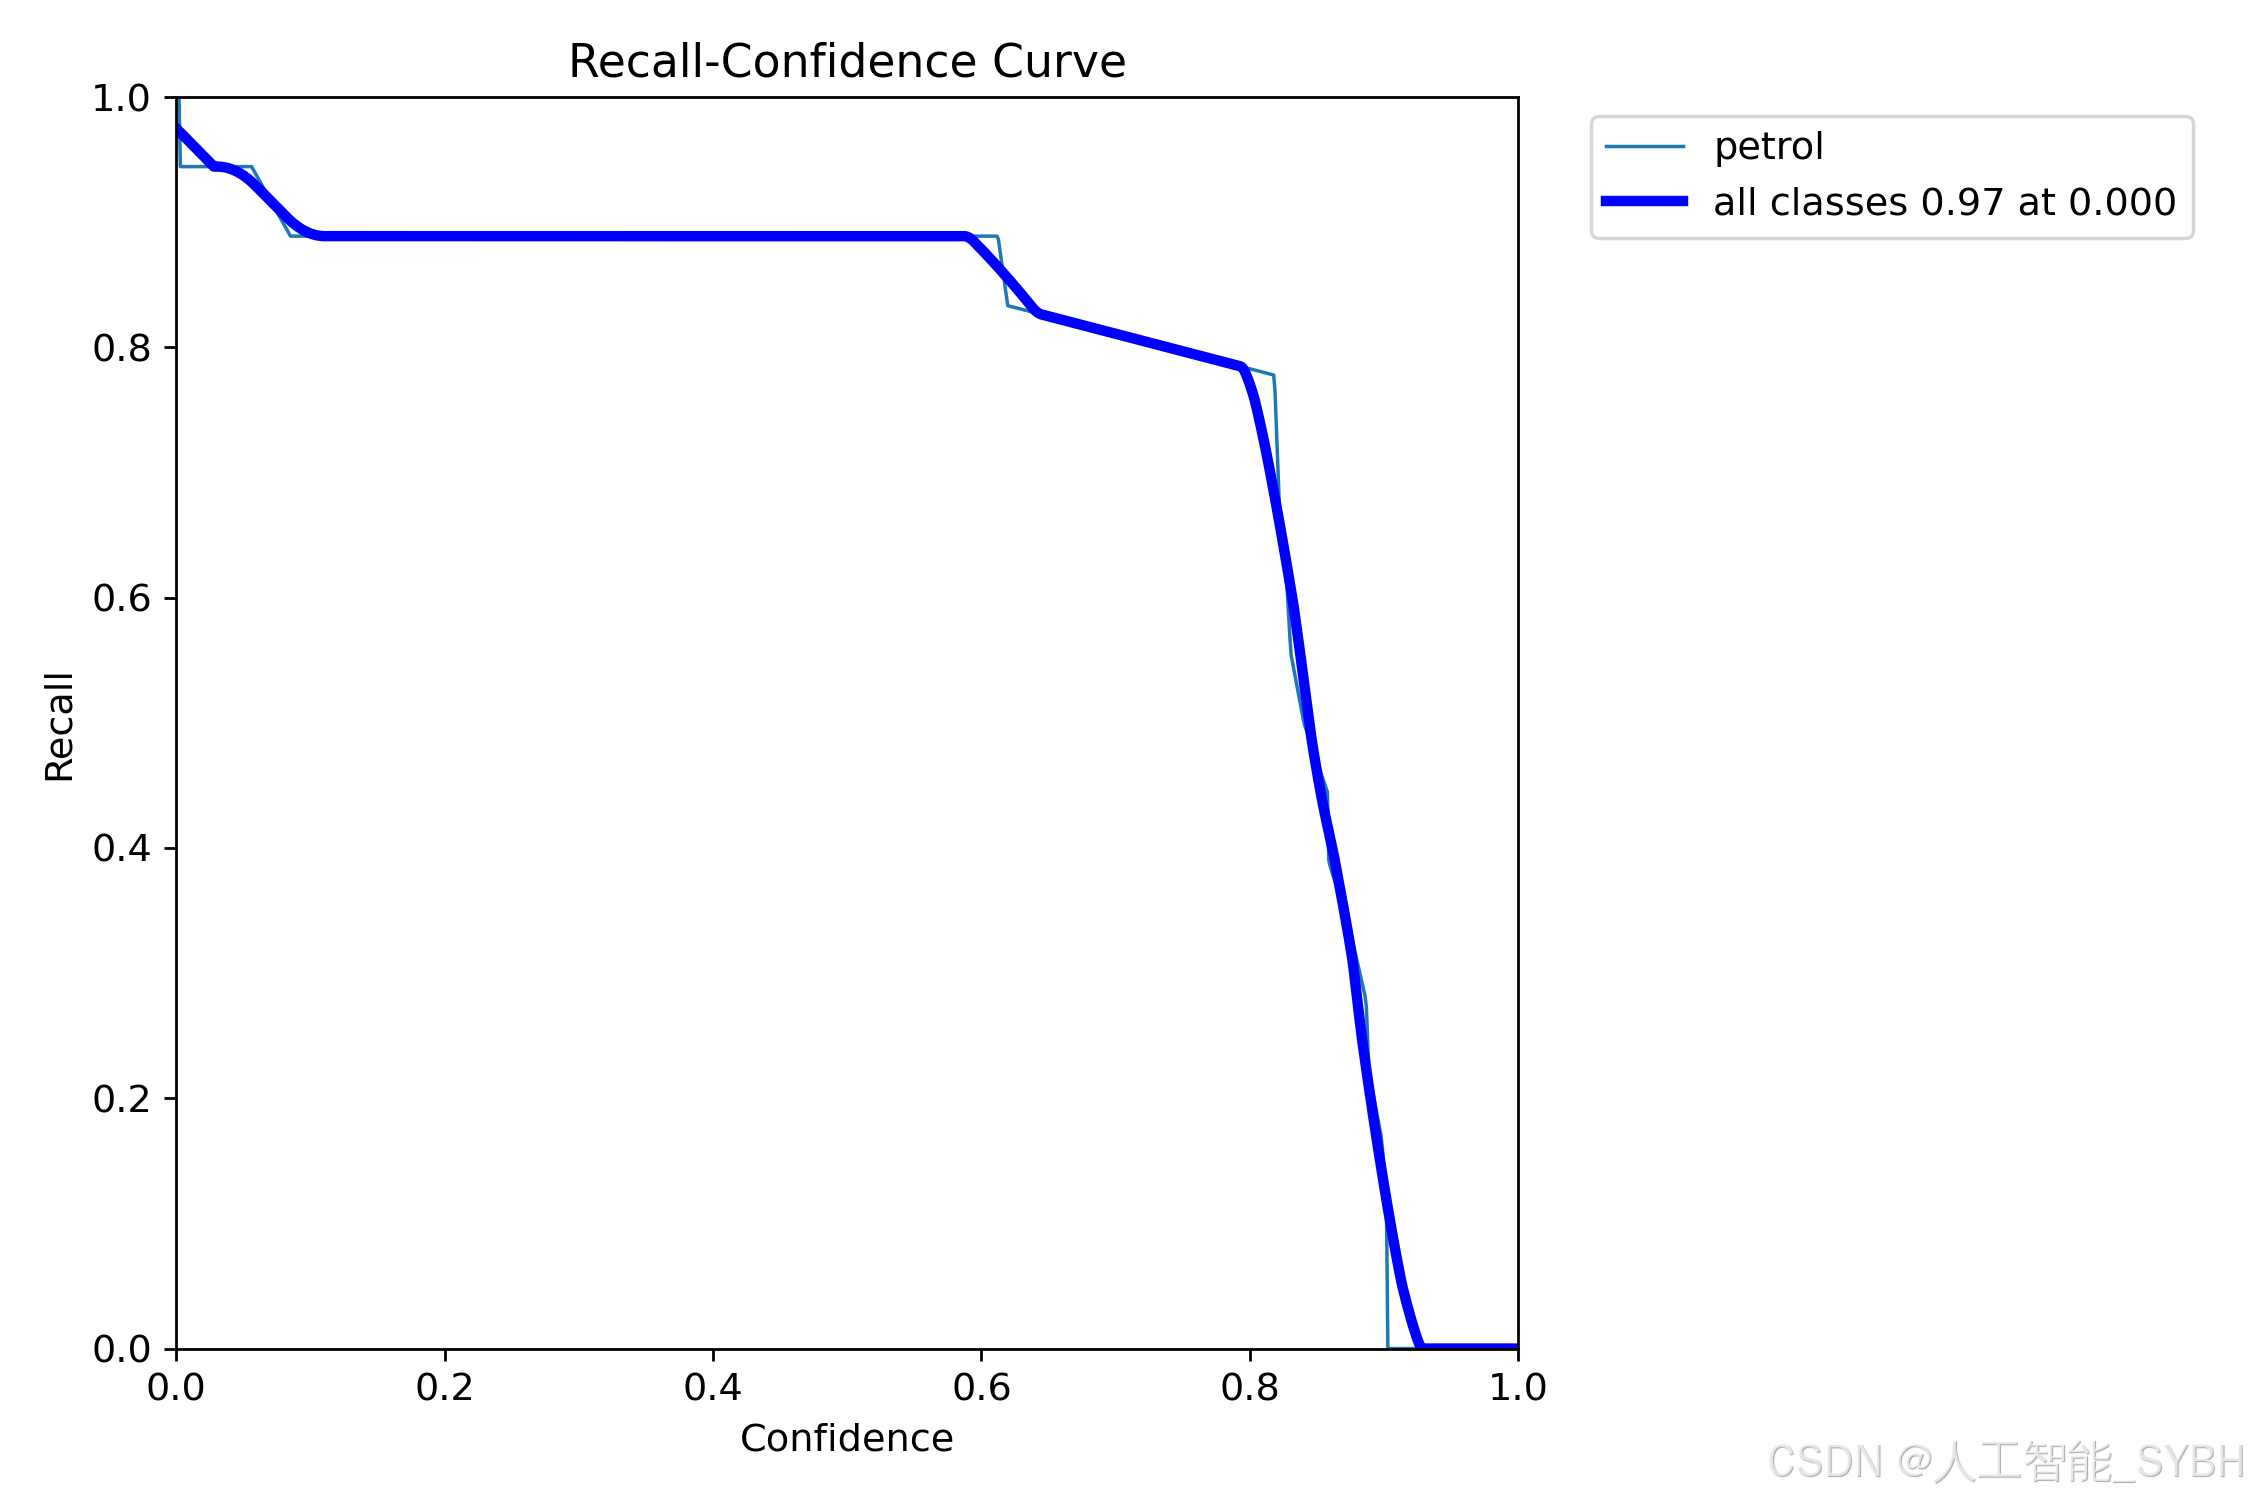
训练结果

六、核心代码
# -*- coding: utf-8 -*-
import os
import sys
import time
import cv2
import numpy as np
from PIL import ImageFont
from PyQt5.QtCore import Qt, QTimer, QThread, pyqtSignal, QCoreApplication
from PyQt5.QtWidgets import (QApplication, QMainWindow, QFileDialog,
QMessageBox, QWidget, QHeaderView,
QTableWidgetItem, QAbstractItemView)
from ultralytics import YOLO
# 自定义模块导入
sys.path.append('UIProgram')
from UIProgram.UiMain import Ui_MainWindow
from UIProgram.QssLoader import QSSLoader
from UIProgram.precess_bar import ProgressBar
import detect_tools as tools
import Config
class DetectionApp(QMainWindow):
def __init__(self, parent=None):
super().__init__(parent)
self.ui = Ui_MainWindow()
self.ui.setupUi(self)
# 初始化应用
self._setup_ui()
self._connect_signals()
self._load_stylesheet()
# 模型和资源初始化
self._init_detection_resources()
def _setup_ui(self):
"""初始化UI界面设置"""
self.display_width = 700
self.display_height = 500
self.source_path = None
self.camera_active = False
self.video_capture = None
# 配置表格控件
table = self.ui.tableWidget
table.verticalHeader().setSectionResizeMode(QHeaderView.Fixed)
table.verticalHeader().setDefaultSectionSize(40)
table.setColumnWidth(0, 80) # ID列
table.setColumnWidth(1, 200) # 路径列
table.setColumnWidth(2, 150) # 类别列
table.setColumnWidth(3, 90) # 置信度列
table.setColumnWidth(4, 230) # 位置列
table.setSelectionBehavior(QAbstractItemView.SelectRows)
table.verticalHeader().setVisible(False)
table.setAlternatingRowColors(True)
def _connect_signals(self):
"""连接按钮信号与槽函数"""
self.ui.PicBtn.clicked.connect(self._handle_image_input)
self.ui.comboBox.activated.connect(self._update_selection)
self.ui.VideoBtn.clicked.connect(self._handle_video_input)
self.ui.CapBtn.clicked.connect(self._toggle_camera)
self.ui.SaveBtn.clicked.connect(self._save_results)
self.ui.ExitBtn.clicked.connect(QCoreApplication.quit)
self.ui.FilesBtn.clicked.connect(self._process_image_batch)
def _load_stylesheet(self):
"""加载CSS样式表"""
style_file = 'UIProgram/style.css'
qss = QSSLoader.read_qss_file(style_file)
self.setStyleSheet(qss)
def _init_detection_resources(self):
"""初始化检测相关资源"""
# 加载YOLOv8模型
self.detector = YOLO('runs/detect/exp/weights/best.pt', task='detect')
self.detector(np.zeros((48, 48, 3))) # 预热模型
# 初始化字体和颜色
self.detection_font = ImageFont.truetype("Font/platech.ttf", 25, 0)
self.color_palette = tools.Colors()
# 初始化定时器
self.frame_timer = QTimer()
self.save_timer = QTimer()
def _handle_image_input(self):
"""处理单张图片输入"""
self._stop_video_capture()
file_path, _ = QFileDialog.getOpenFileName(
self, '选择图片', './', "图片文件 (*.jpg *.jpeg *.png)")
if not file_path:
return
self._process_single_image(file_path)
def _process_single_image(self, image_path):
"""处理并显示单张图片的检测结果"""
self.source_path = image_path
self.ui.comboBox.setEnabled(True)
# 读取并检测图片
start_time = time.time()
detection_results = self.detector(image_path)[0]
processing_time = time.time() - start_time
# 解析检测结果
boxes = detection_results.boxes.xyxy.tolist()
self.detection_boxes = [list(map(int, box)) for box in boxes]
self.detection_classes = detection_results.boxes.cls.int().tolist()
confidences = detection_results.boxes.conf.tolist()
self.confidence_scores = [f'{score * 100:.2f}%' for score in confidences]
# 更新UI显示
self._update_detection_display(detection_results, processing_time)
self._update_object_selection()
self._show_detection_details()
self._display_results_table(image_path)
def _update_detection_display(self, results, process_time):
"""更新检测结果显示"""
# 显示处理时间
self.ui.time_lb.setText(f'{process_time:.3f} s')
# 获取带标注的图像
annotated_img = results.plot()
self.current_result = annotated_img
# 调整并显示图像
width, height = self._calculate_display_size(annotated_img)
resized_img = cv2.resize(annotated_img, (width, height))
qimage = tools.cvimg_to_qpiximg(resized_img)
self.ui.label_show.setPixmap(qimage)
self.ui.label_show.setAlignment(Qt.AlignCenter)
self.ui.PiclineEdit.setText(self.source_path)
# 更新检测数量
self.ui.label_nums.setText(str(len(self.detection_classes)))
def _calculate_display_size(self, image):
"""计算适合显示的图像尺寸"""
img_height, img_width = image.shape[:2]
aspect_ratio = img_width / img_height
if aspect_ratio >= self.display_width / self.display_height:
width = self.display_width
height = int(width / aspect_ratio)
else:
height = self.display_height
width = int(height * aspect_ratio)
return width, height
def _update_object_selection(self):
"""更新目标选择下拉框"""
options = ['全部']
target_labels = [
f'{Config.names[cls_id]}_{idx}'
for idx, cls_id in enumerate(self.detection_classes)
]
options.extend(target_labels)
self.ui.comboBox.clear()
self.ui.comboBox.addItems(options)
def _show_detection_details(self, index=0):
"""显示检测目标的详细信息"""
if not self.detection_boxes:
self._clear_detection_details()
return
box = self.detection_boxes[index]
self.ui.type_lb.setText(Config.CH_names[self.detection_classes[index]])
self.ui.label_conf.setText(self.confidence_scores[index])
self.ui.label_xmin.setText(str(box[0]))
self.ui.label_ymin.setText(str(box[1]))
self.ui.label_xmax.setText(str(box[2]))
self.ui.label_ymax.setText(str(box[3]))
def _clear_detection_details(self):
"""清空检测详情显示"""
self.ui.type_lb.setText('')
self.ui.label_conf.setText('')
self.ui.label_xmin.setText('')
self.ui.label_ymin.setText('')
self.ui.label_xmax.setText('')
self.ui.label_ymax.setText('')
def _display_results_table(self, source_path):
"""在表格中显示检测结果"""
table = self.ui.tableWidget
table.setRowCount(0)
table.clearContents()
for idx, (box, cls_id, conf) in enumerate(zip(
self.detection_boxes, self.detection_classes, self.confidence_scores)):
row = table.rowCount()
table.insertRow(row)
# 添加表格项
items = [
QTableWidgetItem(str(row + 1)), # ID
QTableWidgetItem(source_path), # 路径
QTableWidgetItem(Config.CH_names[cls_id]), # 类别
QTableWidgetItem(conf), # 置信度
QTableWidgetItem(str(box)) # 位置坐标
]
# 设置文本居中
for item in [items[0], items[2], items[3]]:
item.setTextAlignment(Qt.AlignCenter)
# 添加到表格
for col, item in enumerate(items):
table.setItem(row, col, item)
table.scrollToBottom()
def _process_image_batch(self):
"""批量处理图片"""
self._stop_video_capture()
folder = QFileDialog.getExistingDirectory(self, "选择图片文件夹", "./")
if not folder:
return
self.source_path = folder
valid_extensions = {'jpg', 'png', 'jpeg', 'bmp'}
for filename in os.listdir(folder):
filepath = os.path.join(folder, filename)
if (os.path.isfile(filepath) and
filename.split('.')[-1].lower() in valid_extensions):
self._process_single_image(filepath)
QApplication.processEvents() # 保持UI响应
def _update_selection(self):
"""更新用户选择的检测目标显示"""
selection = self.ui.comboBox.currentText()
if selection == '全部':
boxes = self.detection_boxes
display_img = self.current_result
self._show_detection_details(0)
else:
idx = int(selection.split('_')[-1])
boxes = [self.detection_boxes[idx]]
display_img = self.detector(self.source_path)[0][idx].plot()
self._show_detection_details(idx)
# 更新显示
width, height = self._calculate_display_size(display_img)
resized_img = cv2.resize(display_img, (width, height))
qimage = tools.cvimg_to_qpiximg(resized_img)
self.ui.label_show.clear()
self.ui.label_show.setPixmap(qimage)
self.ui.label_show.setAlignment(Qt.AlignCenter)
def _handle_video_input(self):
"""处理视频输入"""
if self.camera_active:
self._toggle_camera()
video_path = self._get_video_path()
if not video_path:
return
self._start_video_processing(video_path)
self.ui.comboBox.setEnabled(False)
def _get_video_path(self):
"""获取视频文件路径"""
path, _ = QFileDialog.getOpenFileName(
self, '选择视频', './', "视频文件 (*.avi *.mp4)")
if path:
self.source_path = path
self.ui.VideolineEdit.setText(path)
return path
return None
def _start_video_processing(self, video_path):
"""开始处理视频流"""
self.video_capture = cv2.VideoCapture(video_path)
self.frame_timer.start(1)
self.frame_timer.timeout.connect(self._process_video_frame)
def _stop_video_capture(self):
"""停止视频捕获"""
if self.video_capture:
self.video_capture.release()
self.frame_timer.stop()
self.camera_active = False
self.ui.CaplineEdit.setText('摄像头未开启')
self.video_capture = None
def _process_video_frame(self):
"""处理视频帧"""
ret, frame = self.video_capture.read()
if not ret:
self._stop_video_capture()
return
# 执行目标检测
start_time = time.time()
results = self.detector(frame)[0]
processing_time = time.time() - start_time
# 解析结果
self.detection_boxes = results.boxes.xyxy.int().tolist()
self.detection_classes = results.boxes.cls.int().tolist()
self.confidence_scores = [f'{conf * 100:.2f}%' for conf in results.boxes.conf.tolist()]
# 更新显示
self._update_detection_display(results, processing_time)
self._update_object_selection()
self._show_detection_details()
self._display_results_table(self.source_path)
def _toggle_camera(self):
"""切换摄像头状态"""
self.camera_active = not self.camera_active
if self.camera_active:
self.ui.CaplineEdit.setText('摄像头开启')
self.video_capture = cv2.VideoCapture(0)
self._start_video_processing(0)
self.ui.comboBox.setEnabled(False)
else:
self.ui.CaplineEdit.setText('摄像头未开启')
self.ui.label_show.clear()
self._stop_video_capture()
def _save_results(self):
"""保存检测结果"""
if not self.video_capture and not self.source_path:
QMessageBox.information(self, '提示', '没有可保存的内容,请先打开图片或视频!')
return
if self.camera_active:
QMessageBox.information(self, '提示', '无法保存摄像头实时视频!')
return
if self.video_capture:
self._save_video_result()
else:
self._save_image_result()
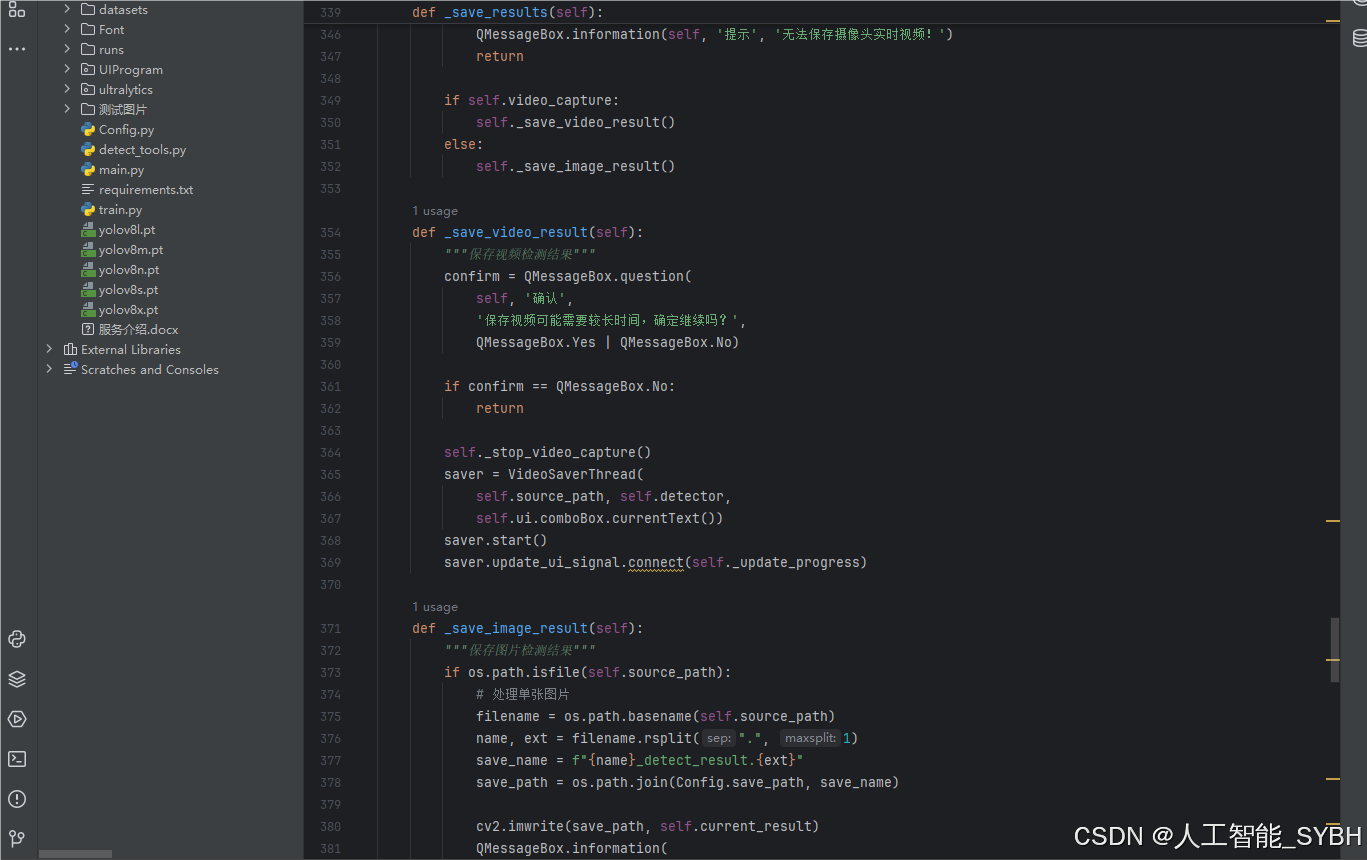
def _save_video_result(self):
"""保存视频检测结果"""
confirm = QMessageBox.question(
self, '确认',
'保存视频可能需要较长时间,确定继续吗?',
QMessageBox.Yes | QMessageBox.No)
if confirm == QMessageBox.No:
return
self._stop_video_capture()
saver = VideoSaverThread(
self.source_path, self.detector,
self.ui.comboBox.currentText())
saver.start()
saver.update_ui_signal.connect(self._update_progress)
def _save_image_result(self):
"""保存图片检测结果"""
if os.path.isfile(self.source_path):
# 处理单张图片
filename = os.path.basename(self.source_path)
name, ext = filename.rsplit(".", 1)
save_name = f"{name}_detect_result.{ext}"
save_path = os.path.join(Config.save_path, save_name)
cv2.imwrite(save_path, self.current_result)
QMessageBox.information(
self, '完成',
f'图片已保存至: {save_path}')
else:
# 处理文件夹中的图片
valid_exts = {'jpg', 'png', 'jpeg', 'bmp'}
for filename in os.listdir(self.source_path):
if filename.split('.')[-1].lower() in valid_exts:
filepath = os.path.join(self.source_path, filename)
name, ext = filename.rsplit(".", 1)
save_name = f"{name}_detect_result.{ext}"
save_path = os.path.join(Config.save_path, save_name)
results = self.detector(filepath)[0]
cv2.imwrite(save_path, results.plot())
QMessageBox.information(
self, '完成',
f'所有图片已保存至: {Config.save_path}')
def _update_progress(self, current, total):
"""更新保存进度"""
if current == 1:
self.progress_dialog = ProgressBar(self)
self.progress_dialog.show()
if current >= total:
self.progress_dialog.close()
QMessageBox.information(
self, '完成',
f'视频已保存至: {Config.save_path}')
return
if not self.progress_dialog.isVisible():
return
percent = int(current / total * 100)
self.progress_dialog.setValue(current, total, percent)
QApplication.processEvents()
class VideoSaverThread(QThread):
"""视频保存线程"""
update_ui_signal = pyqtSignal(int, int)
def __init__(self, video_path, model, selection):
super().__init__()
self.video_path = video_path
self.detector = model
self.selection = selection
self.active = True
self.colors = tools.Colors()
def run(self):
"""执行视频保存"""
cap = cv2.VideoCapture(self.video_path)
fourcc = cv2.VideoWriter_fourcc(*'XVID')
fps = cap.get(cv2.CAP_PROP_FPS)
size = (
int(cap.get(cv2.CAP_PROP_FRAME_WIDTH)),
int(cap.get(cv2.CAP_PROP_FRAME_HEIGHT)))
filename = os.path.basename(self.video_path)
name, _ = filename.split('.')
save_path = os.path.join(
Config.save_path,
f"{name}_detect_result.avi")
writer = cv2.VideoWriter(save_path, fourcc, fps, size)
total_frames = int(cap.get(cv2.CAP_PROP_FRAME_COUNT))
current_frame = 0
while cap.isOpened() and self.active:
current_frame += 1
ret, frame = cap.read()
if not ret:
break
# 执行检测
results = self.detector(frame)[0]
frame = results.plot()
writer.write(frame)
self.update_ui_signal.emit(current_frame, total_frames)
# 释放资源
cap.release()
writer.release()
def stop(self):
"""停止保存过程"""
self.active = False
if __name__ == "__main__":
app = QApplication(sys.argv)
window = DetectionApp()
window.show()
sys.exit(app.exec_())七、项目
演示与介绍视频:
基于深度学习的石油泄漏检测系统(YOLOv8+YOLO数据集+UI界面+Python项目源码+模型)_哔哩哔哩_bilibili
基于深度学习的石油泄漏检测系统(YOLOv8+YOLO数据集+UI界面+Python项目源码+模型)

魔乐社区(Modelers.cn) 是一个中立、公益的人工智能社区,提供人工智能工具、模型、数据的托管、展示与应用协同服务,为人工智能开发及爱好者搭建开放的学习交流平台。社区通过理事会方式运作,由全产业链共同建设、共同运营、共同享有,推动国产AI生态繁荣发展。
更多推荐

 17
17 0
0- 0


 已为社区贡献69条内容

所有评论(0)