【6PACK代码注解】测试过程数据处理eval_dataset_nocs.py
6PACK代码注解
文章目录
前言
【6PACK全记录】6-PACK论文学习及复现记录
一、初始化__init__
输入参数:
mode---模式train/val
root----根路径
add_noise----是否添加噪声(评估时不添加)
num_pts-----点云点数
cate_id-----当前评估类别id
count-----所取样本数
real_obj_name_list
self.real_obj_name_list = os.listdir('{0}/data_list/real_{1}/{2}/'.format(self.root, self.mode, self.cate_id))
即该list为几个文件名,每个文件名是1个实例的名称,文件中有1个list.txt,里面是该实例所在图片(出自一个视频的不同帧)的地址。如下图所示:
list存实例名(文件名):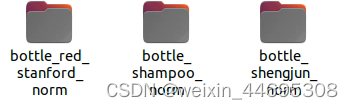
文件中list.txt的内容: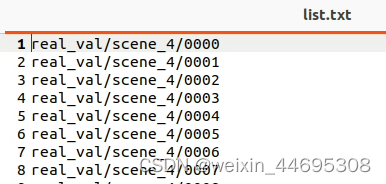
real_obj_list
for item in self.real_obj_name_list:
            print(item)
            self.real_obj_list[item] = []

            input_file = open('{0}/data_list/real_{1}/{2}/{3}/list.txt'.format(self.root, self.mode, self.cate_id, item), 'r')

            while 1:
                input_line = input_file.readline()
                if not input_line:
                    break
                if input_line[-1:] == '\n':
                    input_line = input_line[:-1]
                self.real_obj_list[item].append('{0}/data/{1}'.format(self.root, input_line))
            input_file.close()
字典,保存不同实例所在所有图片的绝对地址。
参数self.index 为目标视频中有目标实例的帧在real_obj_list[self.choose_obj]的idx。其将在getfirst()中确定首帧,在projection()中更新。
其他参数与dataset_nocs.py基本一致,这里不再说明
二、相关函数
2.1 getfirst()
该函数找目标视频中出现目标实例的第一帧,并返回该帧的真实位姿。代码实现如下:
def getfirst(self, choose_obj, video_id):
        self.choose_obj = choose_obj
        self.video_id = video_id

        #在目标实例出现的所有帧里,找目标视频的第一帧,K为该帧在real_obj_list[self.choose_obj]的idx
        for k in range(0, len(self.real_obj_list[self.choose_obj])):
            if self.video_id in self.real_obj_list[self.choose_obj][k].split('/'):
                self.index = k
                break

        #该帧的真实位姿
        current_r, current_t, _ = self.get_pose(self.real_obj_list[self.choose_obj][self.index], self.choose_obj)

        return current_r, current_t
2.2 getone()
该函数获取目标视频中某一帧(由self.index确定)的信息,包含:
img_fr----目标帧中的color_crop
choose_fr----点云index
cloud_fr----归一化后的点云
anchor_box----3维锚点网格(世界坐标)
scale---归一化系数
注意输入只有 current_r, current_t,因为在getfirst函数获取这两个值的时候已经将choose_obj、choose_video传给self.choose_obj和self.video_id,无需再输入。
代码实现如下:
def getone(self, current_r, current_t):
        #current_r, current_t在eval中先通过getfirst()得到,该过程中已经修改self.choose_obj、self.video_id,故不需要再传入目标实例和目标视频
        choose_obj = self.choose_obj
        choose_frame = self.real_obj_list[self.choose_obj][self.index]#所选帧的地址(index将在projection()中更新)

        split_name = choose_frame.split('/')#逐级目录名list
        for it in split_name:
            if it[:5] == 'scene':
                video_name = it#视频名称

        print(video_name, self.choose_obj, self.index)

        if video_name != self.video_id:
            print(video_name, self.video_id)
            return 0

        img_fr, choose_fr, cloud_fr, target = self.get_frame(choose_frame, choose_obj, False, current_r, current_t)

        anchor_box, scale = self.get_anchor_box(target)
        cloud_fr = self.change_to_scale(scale, cloud_fr)


        return self.norm(torch.from_numpy(img_fr.astype(np.float32))).unsqueeze(0), \
               torch.LongTensor(choose_fr.astype(np.int32)).unsqueeze(0), \
               torch.from_numpy(cloud_fr.astype(np.float32)).unsqueeze(0), \
               torch.from_numpy(anchor_box.astype(np.float32)).unsqueeze(0), \
               torch.from_numpy(scale.astype(np.float32)).unsqueeze(0)
2.3 projection()
该函数主要实现保存功能,记录当前帧的位姿R、T和当前帧的最小误差。
输入参数:
- path:写入地址
- Kp:关键点坐标
- current_r, current_t:当前位姿
- scale:归一化系数
- www:目标锚点idx
- add_on:index是否更新(即当前帧是否得到结果)
- score:当前最小误差
函数根据功能主要分为两部分:
1.数据保存:
该部分代码将当前帧的R、T和误差写入一个文件,值得注意的是,add_on=True,说明此后将对下一帧操作,即当前的RT和score就是此帧的最终结果,写入_pose.txt文件。
否则,说明此后还会对这一帧操作,现在只是暂存,故存在_pose_False.txt文件。
代码实现如下:
def projection(self, path, Kp, current_r, current_t, scale, www, add_on, score):
        img = np.array(Image.open('{0}_color.png'.format(self.real_obj_list[self.choose_obj][self.index])))

        cam_cx = self.cam_cx_2
        cam_cy = self.cam_cy_2
        cam_fx = self.cam_fx_2
        cam_fy = self.cam_fy_2
        cam_scale = 1.0

        target_r = current_r
        target_t = current_t

        target = []
        input_file = open('{0}/model_scales/{1}.txt'.format(self.root, self.choose_obj), 'r')
        for i in range(8):
            input_line = input_file.readline()
            if input_line[-1:] == '\n':
                input_line = input_line[:-1]
            input_line = input_line.split(' ')
            target.append([float(input_line[0]), float(input_line[1]), float(input_line[2])])
        input_file.close()
        target = np.array(target)
        #得到实例边框(8,3)

        limit = search_fit(target)#边框各维度最值(6个数)
        bbox = self.build_frame(limit[0], limit[1], limit[2], limit[3], limit[4], limit[5])
        #实例边框建造网格【1168,3】
        anchor_box, scale = self.get_anchor_box(bbox)
        #建造归一化锚点网络
        ####上述得到的bbox、anchor都是基于model_scales文件,是世界系的
        anchor_box = anchor_box * scale#反归一化,原始锚点网络
        bbox = np.dot(bbox, target_r.T) + target_t##根据当前RT推相机系的bbox
        bbox[:, 0] *= -1.0
        bbox[:, 1] *= -1.0

        anchor_box = np.dot(anchor_box, target_r.T) + target_t#根据当前RT推相机系的锚点
        anchor_box[:, 0] *= -1.0
        anchor_box[:, 1] *= -1.0

        target = self.enlarge_bbox(copy.deepcopy(target))

        target = Kp.detach().cpu().numpy()[0] * 1000.0#关键点
        kkk = np.dot(target, target_r.T) + target_t#相机系关键点坐标

        if not add_on:#不更新index,此后还对这一帧操作,所有先暂存为_False.txt
            fw = open('{0}_{1}_pose_False.txt'.format(path, self.index), 'w')
        else:#更新index,本帧最终结果
            fw = open('{0}_{1}_pose.txt'.format(path, self.index), 'w')

        for it in target_r:
            fw.write('{0} {1} {2}\n'.format(it[0], it[1], it[2]))
        it = target_t
        fw.write('{0} {1} {2}\n'.format(it[0], it[1], it[2]))
        fw.write('{0}\n'.format(score))
        fw.close()
        #写入位姿R、T和score
2.标记功能
该部分代码通过改变关键点、锚点附近几个像素的颜色,在图像中标记这些点,代码如下:
#修改关键点附近的颜色--在图中标记关键点
        kkk[:, 0] *= -1.0
        kkk[:, 1] *= -1.0#相机系3维坐标
        for tg in kkk:
            y = int(tg[0] * cam_fx / tg[2] + cam_cx)#转为图片中的2维坐标
            x = int(tg[1] * cam_fy / tg[2] + cam_cy)

            if x - 3 < 0 or x + 3 > 479 or y - 3 < 0 or y + 3 > 639:
                continue


            for xxx in range(x-3, x+4):
                for yyy in range(y-3, y+4):
                    img[xxx][yyy] = self.color[0]

        #在图中标记网格点
        for tg in bbox:
            y = int(tg[0] * cam_fx / tg[2] + cam_cx)
            x = int(tg[1] * cam_fy / tg[2] + cam_cy)

            if x - 3 < 0 or x + 3 > 479 or y - 3 < 0 or y + 3 > 639:
                continue

            for xxx in range(x-2, x+3):
                for yyy in range(y-2, y+3):
                    img[xxx][yyy] = self.color[1]

        #在图中标记目标锚点
        tg = anchor_box[www]#目标锚点

        y = int(tg[0] * cam_fx / tg[2] + cam_cx)
        x = int(tg[1] * cam_fy / tg[2] + cam_cy)

        if x - 5 >= 0 and x + 5 <= 479 and y - 5 >= 0 and y + 5 <= 639:
            for xxx in range(x-4, x+5):
                for yyy in range(y-4, y+5):
                    img[xxx][yyy] = self.color[2]

        if add_on:
            self.index += 1
2.4 其他函数功能简述
具体实现可见源代码注释,基本与dataset_nocs.py一致
| 函数名 | 作用 |
|---|---|
| divide_scale(scale, pts) | 根据归一化范围scale;输出点的归一化坐标,使得各维度距离中心最远点的坐标为1或-1 |
| get_anchor_box(ori_bbox) | 生成锚点网格,输入为实例的边界框,输出ans, scale,ans为每个维度有5个锚点的归一化锚点网格坐标,scale为他的归一化参数 |
| change_to_scale(scale, cloud_fr, cloud_to) | 根据scale将点云cloud_fr, cloud_to归一化再输出 |
| enlarge_bbox(target) | 将边框放大;输入为实例边框的2个对角顶点或者8个顶点,输出为放大后的边框 |
| load_depth(depth_path) | 加载目标深度信息,注意我们的深度图中,背景是蓝色通道,目标深度用G+R |
| get_pose( choose_frame, choose_obj) | 获取给定实例的位姿ans_r, ans_t以及该实例的索引ans_idx;输入分别为目标实例所在图片的路径和目标实例名称 |
| re_scale(target_fr, target_to) | 输出target_fr和ans_scale,用于将fr、to范围统一,将target_to的相关数据*ans_scale即得到与target_fr范围一致的数据 |
| get_2dbbox(cloud, cam_cx, cam_cy, cam_fx, cam_fy, cam_scale) | 获取像素平面坐标系(r,c)下图像中实例的2维边框;输入中cloud是真实世界坐标系(x,y,z)下的点云坐标,其余为相机内参,变换关系见6D位姿估计学习 |
| search_fit(points) | 找到points各个维度的最值,例如xmax、xmin |
| get_frame( choose_frame, choose_obj, syn_or_real,current_r, current_t) | 获取画面帧choose_frame的相关信息。输出内容:img:color_crop,即图片(可能有虚拟背景)中处于2维边框的部分;choose:点云对应的索引值;cloud:相机坐标系中的点云;target:世界坐标系3维边框边界; |
| build_frame(min_x, max_x, min_y, max_y, min_z, max_z) | 根据输入的极值范围,构造网格,各维度点间距1 |
三、添加输出
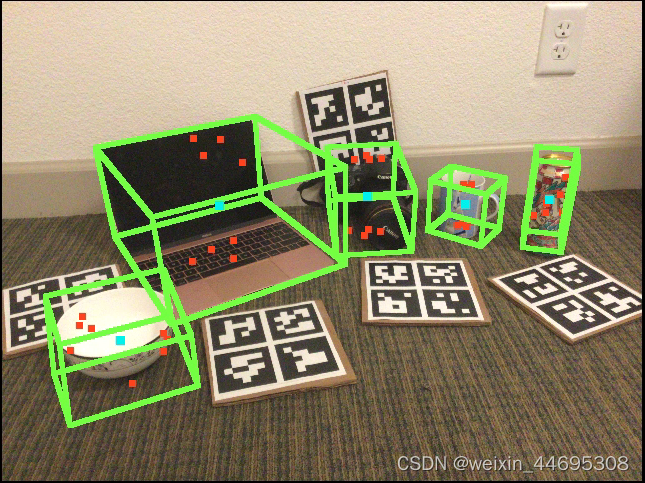
3.1 keypints&bbox图
为了估计后关键点、目标锚点和边框在图中画出,在projection()函数中添加如下代码,使得标记后的图像保存在原路径中
def projection(self, path, Kp, current_r, current_t, scale, www, add_on, score):
        #img = np.array(Image.open('{0}_color.png'.format(self.real_obj_list[self.choose_obj][self.index])))
        img_dir='{0}_color.png'.format(self.real_obj_list[self.choose_obj][self.index])
        img = np.array(Image.open(img_dir))

.....

if add_on:
            self.index += 1
            Image.fromarray(img).save(img_dir)
输出结果如下:
位姿图
在上述if add_on:代码块之前插入如下代码,依次绘制物体世界系中XYZ轴在像素平面中的映射点,分别用红、绿、蓝色表示:
 ####################
        # 尝试在图中标记坐标轴
        #已知limit[0]到limit[5]分别是bbox的min_x, max_x, min_y, max_y, min_z, max_z
        #tg是物体坐标系原点 [X,Y,Z]
        tg = anchor_box[www]#目标锚点(相机系下)
        tg[0] *= -1.0
        tg[1] *= -1.0
        tg=np.dot((tg-target_t),target_r)#变换到物体世界系中,理想的话应该是[0,0,0]

        obj_x=[]
        lenx=limit[1]-limit[0]
        lenx=0.4*lenx
        for i in np.arange(float(int(tg[0])),float(int(tg[0]+lenx)),1.0):
            obj_x.append([i,tg[1],tg[2]])

        obj_x = np.dot(obj_x, target_r.T) + target_t#变换至相机系
        obj_x[:, 0] *= -1.0
        obj_x[:, 1] *= -1.0

        for ppp in obj_x:
            y=int(ppp[0]*cam_fx/ppp[2]+cam_cx)
            x=int(ppp[1]*cam_fy/ppp[2]+cam_cy)

            if x - 3 < 0 or x + 3 > 479 or y - 3 < 0 or y + 3 > 639:
                continue

            for xxx in range(x-2, x+3):
                for yyy in range(y-2, y+3):
                    img[xxx][yyy] = self.color1[0]

        obj_y=[]
        leny=limit[3]-limit[2]
        leny=0.4*leny
        for i in np.array(float(int(tg[1])),float(int(tg[1]+leny)),1.0):
            obj_y.append([tg[0],i,tg[2]])

        obj_y = np.dot(obj_y, target_r.T) + target_t#变换至相机系
        obj_y[:, 0] *= -1.0
        obj_y[:, 1] *= -1.0

        for ppp in obj_y:
            y=int(ppp[0]*cam_fx/ppp[2]+cam_cx)
            x=int(ppp[1]*cam_fy/ppp[2]+cam_cy)

            if x - 3 < 0 or x + 3 > 479 or y - 3 < 0 or y + 3 > 639:
                continue

            for xxx in range(x-2, x+3):
                for yyy in range(y-2, y+3):
                    img[xxx][yyy] = self.color1[1]

        obj_z=[]
        lenz=limit[5]-limit[4]
        lenz=0.4*lenz
        for i in np.array(float(int(tg[2])),float(int(tg[2]+lenz)),1.0):
            obj_z.append([tg[0],tg[1],i])

        obj_z = np.dot(obj_z, target_r.T) + target_t#变换至相机系
        obj_z[:, 0] *= -1.0
        obj_z[:, 1] *= -1.0

        for ppp in obj_z:
            y=int(ppp[0]*cam_fx/ppp[2]+cam_cx)
            x=int(ppp[1]*cam_fy/ppp[2]+cam_cy)

            if x - 3 < 0 or x + 3 > 479 or y - 3 < 0 or y + 3 > 639:
                continue

            for xxx in range(x-2, x+3):
                for yyy in range(y-2, y+3):
                    img[xxx][yyy] = self.color1[3]
其中self.color1在__init__中定义为self.color1=np.array([[255,0,0],[0,255,0],[0,0,255]])。tg是目标锚点,即最接近质心的锚点坐标(相机系下)。绘制思路是先将tg变换到物体世界系,理想的话应该是[0,0,0],或者可以省略这一步,直接用[0,0,0]代替。然后根据世界系下的边框最值limit,界定绘制的坐标长度,这里取XYZ方向到质心距离的0.4倍。由此得到世界系下的XYZ轴点。
将坐标轴点变换到相机系,在利用相机内参将其映射到二维像素平面中,用不同颜色绘制出来即可。
输出结果: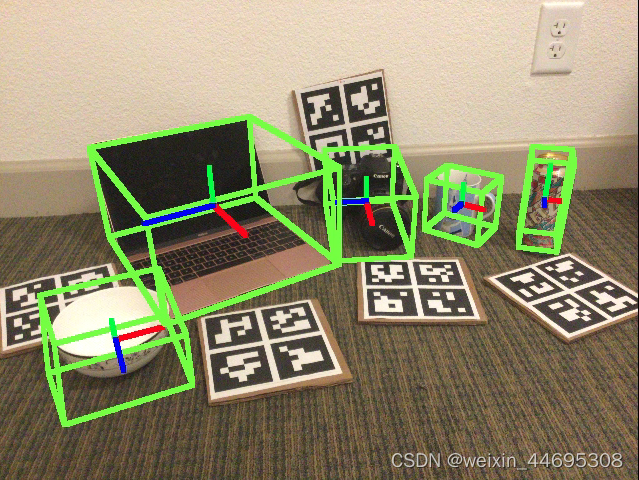

魔乐社区(Modelers.cn) 是一个中立、公益的人工智能社区,提供人工智能工具、模型、数据的托管、展示与应用协同服务,为人工智能开发及爱好者搭建开放的学习交流平台。社区通过理事会方式运作,由全产业链共同建设、共同运营、共同享有,推动国产AI生态繁荣发展。
更多推荐


 2
2 0
0- 0


 已为社区贡献2条内容

所有评论(0)