springboot整合netty和sleuth和MDC生成traceId
springboot整合netty,利用slf4j的MDC来生成traceId做链路追踪,sleuth配合使用【sleuth和MDC可选择不使用,那就不需要编写aop和注解,不需要引入aop和sleuth】。1:所需要依赖的jar(根据自己需求选择)<!--版本管理--><dependencyManagement><dependencies><depend
springboot整合netty,利用slf4j的MDC来生成traceId做链路追踪,sleuth配合使用【sleuth和MDC可选择不使用,那就不需要编写aop和注解,不需要引入aop和sleuth】。
1:所需要依赖的jar(根据自己需求选择)
 <!--    版本管理        -->
    <dependencyManagement>
        <dependencies>
            <dependency>
                <groupId>org.springframework.boot</groupId>
                <artifactId>spring-boot-dependencies</artifactId>
                <version>2.3.5.RELEASE</version>
                <scope>import</scope>
                <type>pom</type>
            </dependency>

            <dependency>
                <groupId>org.springframework.cloud</groupId>
                <artifactId>spring-cloud-dependencies</artifactId>
                <version>Hoxton.SR12</version>
                <scope>import</scope>
                <type>pom</type>
            </dependency>
        </dependencies>
    </dependencyManagement>
      <dependencies>
        <!--    链路追踪    -->
        <dependency>
            <groupId>org.springframework.cloud</groupId>
            <artifactId>spring-cloud-starter-sleuth</artifactId>
        </dependency>

        <dependency>
            <groupId>org.springframework.boot</groupId>
            <artifactId>spring-boot-starter</artifactId>
        </dependency>
        <dependency>
            <groupId>org.projectlombok</groupId>
            <artifactId>lombok</artifactId>
        </dependency>
        <dependency>
            <groupId>com.alibaba</groupId>
            <artifactId>fastjson</artifactId>
            <version>1.2.73</version>
        </dependency>
        <!--    netty    -->
        <dependency>
            <groupId>io.netty</groupId>
            <artifactId>netty-all</artifactId>
        </dependency>
        <dependency>
            <groupId>org.springframework.boot</groupId>
            <artifactId>spring-boot-starter-web</artifactId>
        </dependency>
        <dependency>
            <groupId>io.springfox</groupId>
            <artifactId>springfox-swagger-ui</artifactId>
            <version>2.9.2</version>
        </dependency>
        <dependency>
            <groupId>io.springfox</groupId>
            <artifactId>springfox-swagger2</artifactId>
            <version>2.9.2</version>
        </dependency>
        <dependency>
            <groupId>org.apache.commons</groupId>
            <artifactId>commons-lang3</artifactId>
        </dependency>
		<!--    aop    -->
        <dependency>
            <groupId>org.springframework.boot</groupId>
            <artifactId>spring-boot-starter-aop</artifactId>
        </dependency>
        <dependency>
            <groupId>org.springframework.boot</groupId>
            <artifactId>spring-boot-configuration-processor</artifactId>
            <optional>true</optional>
        </dependency>
    </dependencies>
2:编写一个netty服务
这里有两种springboot初始化启动nettyserver,这里选择实现 ApplicationRunner,还有很多方法可以参考网上教程
@Slf4j
@Component
public class NettyServer implements ApplicationRunner {

    private final NettyChannelHandler nettyChannelHandler;


    public NettyServer(NettyChannelHandler nettyChannelHandler) {
        this.nettyChannelHandler = nettyChannelHandler
    }

    @Override
    public void run(ApplicationArguments args) throws Exception {
        NioEventLoopGroup boss = new NioEventLoopGroup(1);
        // 根据CPU算默认值
        NioEventLoopGroup work = new NioEventLoopGroup();
        ServerBootstrap sb = new ServerBootstrap();
        sb.group(boss, work);
        sb.channel(NioServerSocketChannel.class);
        sb.childHandler(nettyChannelHandler);
        // 这里可以配置到yml,再获取
        ChannelFuture future = sb.bind(80);
        future.sync();
        log.info("spring 启动 netty..................");
    }
}
3:编写一个服务器handler
这里只需要实现ChannelHandler的类即可,不过一般采用实现 ChannelInitializer<>的方式
@Component
public class NettyChannelHandler extends ChannelInitializer<NioSocketChannel> {

    private final ServerInboundHandler serverInboundHandler;

    public NettyChannelHandler(ServerInboundHandler serverInboundHandler) {
        this.serverInboundHandler = serverInboundHandler;
    }

    @Override
    protected void initChannel(NioSocketChannel ch) throws Exception {
        // 识别换行符为一个消息【具体需要和客户端定专有的协议,如果客户端发送消息没有携带\r\n,服务器将无法识别一个消息】
		//ch.pipeline().addLast(new LineBasedFrameDecoder(1024));
        ch.pipeline().addLast(new LoggingHandler());
        ch.pipeline().addLast(serverInboundHandler);
    }
}
4:编写一个入站处理器
一般选择是继承ChannelInboundHandlerAdapter类,这里面有一些默认的处理逻辑
注意:这里 @ChannelHandler.Sharable不能缺少,缺少的话,只能接入一个客户端,因为这个inbound是和客户端绑定的(个人理解),这里CHANNEL_MAP的key为ChannelId对象获取的短channelId字符串,当然你可以获取长的,
@Slf4j
@Component
@ChannelHandler.Sharable
public class ServerInboundHandler extends ChannelInboundHandlerAdapter {
    private final MessageServer messageServer;

    public static Map<String, ChannelHandlerContext> CHANNEL_MAP = new ConcurrentHashMap<>();

    public ServerInboundHandler(MessageServer messageServer) {
        this.messageServer = messageServer;
    }

    @Override
    public void channelActive(ChannelHandlerContext ctx) throws Exception {
        log.info("客户端初始化 name:{},ip:{}", ctx.name(), ctx.channel().remoteAddress().toString());
        // 这里获取的是短的,你也还可以获取长的
        String channelId = ctx.channel().id().asShortText();
        if (!CHANNEL_MAP.containsKey(channelId)) {
            CHANNEL_MAP.put(channelId, ctx);
        }
        super.channelActive(ctx);
    }

    @Override
    public void channelInactive(ChannelHandlerContext ctx) throws Exception {
        log.info("客户端断开连接 name:{},ip:{}", ctx.name(), ctx.channel().remoteAddress().toString());
        String channelId = ctx.channel().id().asShortText();
        CHANNEL_MAP.remove(channelId);
        super.channelInactive(ctx);
    }

    @MDCLog(name = "有消息写入通道")
    @Override
    public void channelRead(ChannelHandlerContext ctx, Object msg) throws Exception {
        ByteBuf buf = (ByteBuf) msg;
        log.info("收到消息 data:{}", ((ByteBuf) msg).toString(StandardCharsets.UTF_8));
        // 【0】创建新的buf进行恢复
        ByteBuf respBuf = ctx.alloc().buffer();
        // 【1】处理消息的业务
        messageServer.handleMessage(buf);
        // 【2】可以交给其他服务处理消息,再写入回复【针对需要消息应答的机制,如果不需要应答可忽略】
        respBuf.writeBytes("回复".getBytes(StandardCharsets.UTF_8));
        // 注意:不要使用ctx的writeAndFlush,他不是从尾开始扫描,无法写入
        ctx.channel().writeAndFlush(respBuf);
        super.channelRead(ctx, msg);
    }

    @Override
    public void exceptionCaught(ChannelHandlerContext ctx, Throwable cause) throws Exception {
        log.error("netty 服务器出现异常");
        super.exceptionCaught(ctx, cause);
    }

    /**
     * <p>用于 通知所有的客户端、根据业务需求用,配合 ctx上下文map配套使用</p>
     * @param channelId 通道id
     * @param msg 消息
     */
    @MDCLog(name = "write log")
    public void channelWrite(String channelId, String msg) {
        log.info("发送消息 channelId:{} msg:{}", channelId, msg);
        ChannelHandlerContext ctx = CHANNEL_MAP.get(channelId);
        if (msg != null) {
            ctx.channel().writeAndFlush(msg.getBytes(StandardCharsets.UTF_8));
        }
    }
}
5:编写一个注解切入点
这一步的操作,主要是为了解决,netty通道写入消息的时候,日志没有traceId,查日志无法追踪,出问题不好定位 这个注解name并没实质的作用,有待业务需求开发
@Target(ElementType.METHOD)
@Retention(value = RetentionPolicy.RUNTIME)
@Documented
public @interface MDCLog {
    String name();
}
6:编写Aspect切点
在Before中之所以判断MDC.get(“X-B3-TraceId”)是不是空,是因为服务器写入到客户端的时候,往往是别的服务调用netty服务接口写入的,那么在走http调用的时候,如果配置了sleuth,就会自动生成traceId,neety 的 eventGroup thread只需要拿来直接用即可,用完再删除【当然可以不删除,看下文注释】
@Aspect
@Slf4j
@Component
public class MDCAspect {

    @Pointcut("@annotation(com.gyg.netty.aop.MDCLog)")
    public void annotationPointcut() {
    }

    @Before("annotationPointcut()")
    public void aspectBefore(JoinPoint joinPoint) {
        MethodSignature methodSignature = (MethodSignature) joinPoint.getSignature();
        Method method = methodSignature.getMethod();
        MDCLog mdcLog = method.getAnnotation(MDCLog.class);
        String name = mdcLog.name();
        // 【0】这里会打印上一次traceId
        log.info("进入 before 拦截 name:{}", name);
        // 处理切入业务【这里做日志 traceId 生成】,根据日志框架格式插入相关的key
        // 这里是slf4j,key采用X-B3-TraceId,在日志配置中可以看到相关配置
        // 这里最好再配置一个 After用来删除 traceId
        // 【每次用完即删,但是因为覆盖问题,也可以不删除,不删除【0】的位置会出现上一次traceId】
        if (StringUtils.isEmpty(MDC.get("X-B3-TraceId"))) {
            MDC.put("X-B3-TraceId", UUID.randomUUID().toString().replace("-", "").substring(0, 16));
        }
    }

    @After("annotationPointcut()")
    public void aspectAfter(JoinPoint joinPoint) {
        log.info("after 触发");
        MDC.clear();
    }

}
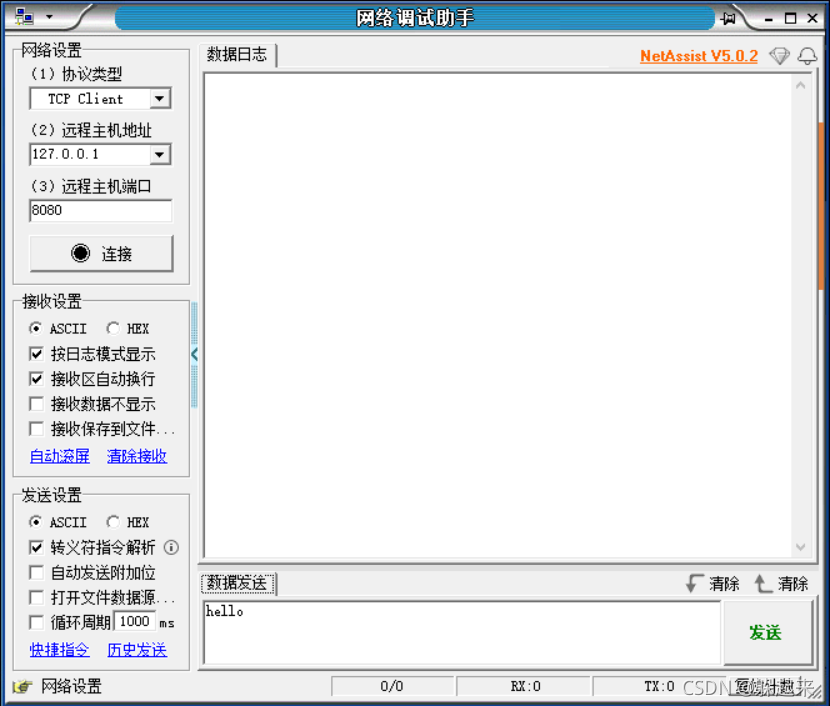
7:测试连接并写入服务器
采用netassist工具模拟一个客户端
8:模拟服务端发送
采用MVC模式,简单发送一个
@Slf4j
@RestController
@RequestMapping("/")
public class TestController {

    private final ServerInboundHandler serverInboundHandler;

    public TestController(ServerInboundHandler serverInboundHandler) {
        this.serverInboundHandler = serverInboundHandler;
    }

    @PostMapping
    public void write(@RequestParam String message, @RequestParam String channelId) {
        log.info("收到写入命令");
        serverInboundHandler.channelWrite(channelId, message);
    }
}
如果你需要,打印netty自身的日志(字节流的那个),可以在NettyChannelHandler中如下配置
    @Override
    protected void initChannel(NioSocketChannel ch) throws Exception {
        // 识别换行符为一个消息【具体需要和客户端定专有的协议,这里是通用】
        //  ch.pipeline().addLast(new LineBasedFrameDecoder(1024));
        ch.pipeline().addLast(new LoggingHandler());
        ch.pipeline().addLast(serverInboundHandler);
        // 字节流日志
        ch.pipeline().addLast(new LoggingHandler());
    }
源码已经放入github
源码地址
**
谢谢观看
**

魔乐社区(Modelers.cn) 是一个中立、公益的人工智能社区,提供人工智能工具、模型、数据的托管、展示与应用协同服务,为人工智能开发及爱好者搭建开放的学习交流平台。社区通过理事会方式运作,由全产业链共同建设、共同运营、共同享有,推动国产AI生态繁荣发展。
更多推荐


 17
17 0
0- 0


 已为社区贡献2条内容

所有评论(0)