监督+无监督、机器学习+深度学习 寻找普通苹果与其他苹果
根据original_data 样本,建立模型,对test_data的图片进行普通/其他苹果判断1. 数据增强,扩充确认为普通苹果的样本数量+ 特征提取,使用VGG16模型提取图像特征+ 图像批量处理+ Kmeans模型尝试普通/其他苹果聚类+ 基于标签数据矫正结果,并可视化+ Meanshift模型提升模型表现+ 数据降维PCA处理,提升模型表现
·
实战
根据original_data 样本,建立模型,对test_data的图片进行普通/其他苹果判断
- 数据增强,扩充确认为普通苹果的样本数量
- 特征提取,使用VGG16模型提取图像特征
- 图像批量处理
- Kmeans模型尝试普通/其他苹果聚类
- 基于标签数据矫正结果,并可视化
- Meanshift模型提升模型表现
- 数据降维PCA处理,提升模型表现
特点: 样本少,部分标注(且都是正样本)、负样本类别不可穷尽、图像处理
样本
原数据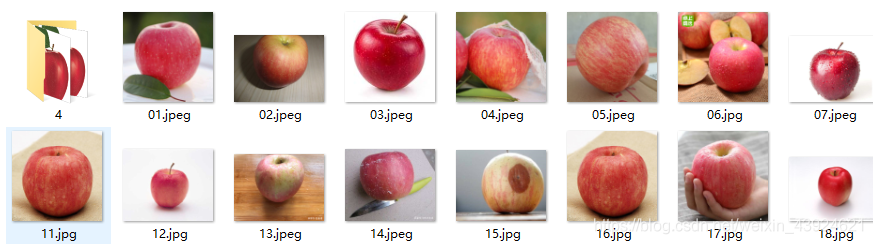 普通苹果 都是一样的
#数据增强
from keras.preprocessing.image import ImageDataGenerator
path = """E:\PycharmProjects\Learning\dataset\\original_data"""
dst_path = """E:\PycharmProjects\Learning\dataset\\gen_data"""

datagen = ImageDataGenerator(rotation_range=10,width_shift_range=0.1,
                             height_shift_range=0.02,horizontal_flip=True,
                             vertical_flip=True)
gen = datagen.flow_from_directory(path,target_size=(224,224),
                                  batch_size=2,save_to_dir=dst_path,
                                  save_prefix="gen",save_format="jpg")
#224,224 VGG 输入的大小
for i in range(100):
    gen.next()
数据增强是对普通苹果的图片进行了旋转/平移等操作,生成的新数据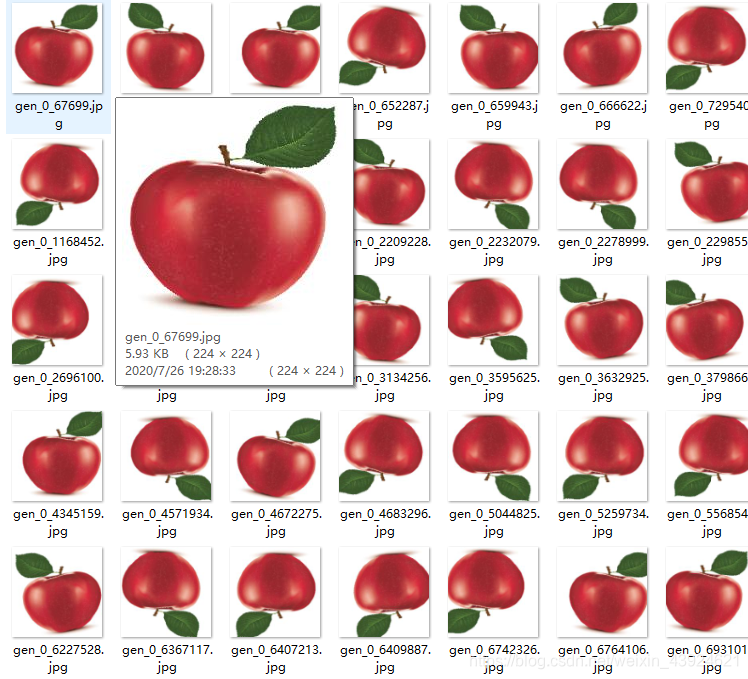
将新数据和原始数据都放到 train_data 文件夹
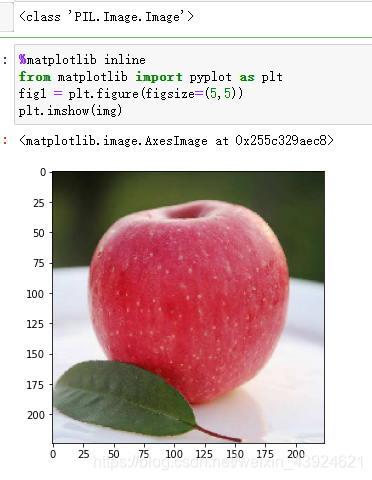
单张图片展示 特征提取
from keras.preprocessing.image import load_img,img_to_array
img_path = "E:\PycharmProjects\Learning\dataset\\train_data\\01.jpeg"
img = load_img(img_path,target_size=(224,224))
print(type(img))

%matplotlib inline
from matplotlib import pyplot as plt
fig1 = plt.figure(figsize=(5,5))
plt.imshow(img)
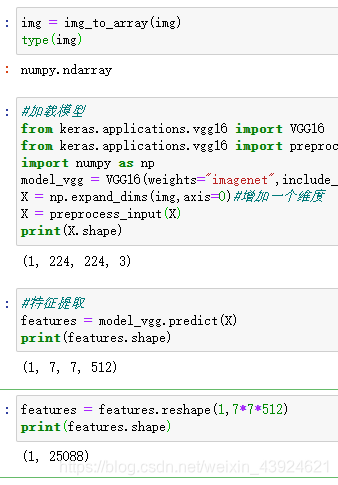
img = img_to_array(img)
type(img)
#加载模型
from keras.applications.vgg16 import VGG16
from keras.applications.vgg16 import preprocess_input
import numpy as np
model_vgg = VGG16(weights="imagenet",include_top=False)
X = np.expand_dims(img,axis=0)#增加一个维度
X = preprocess_input(X)
print(X.shape)
#特征提取
features = model_vgg.predict(X)
print(features.shape)
features = features.reshape(1,7*7*512)
print(features.shape)
扩充为批量提取
先读取train_data下的所有文件
import os
folder = """E:\PycharmProjects\Learning\dataset\\train_data"""
dirs = os.listdir(folder)
print(dirs)
img_path = []
for i in dirs:
    #if os.path.splitext(i)[1]==".jpg":
    img_path.append(i)
img_path = [folder +"\\"+i for i in img_path]
print(img_path)
#特征提取方法
def modelProcess(img_path,model):
    img = load_img(img_path,target_size=(224,224))
    img = img_to_array(img)
    X = np.expand_dims(img,axis=0)#增加一个维度
    X = preprocess_input(X)
    X_VGG = model.predict(X)
    X_VGG = X_VGG.reshape(1,7*7*512)
    return X_VGG
features_train = np.zeros([len(img_path),7*7*512])
for i in range(len(img_path)):
    features_i = modelProcess(img_path[i],model_vgg)
    print("preprocessed:",img_path[i])
    features_train[i] = features_i
print("Done")
print(features_train.shape)
X = features_train
(228, 25088)
30个苹果中有10个是普通苹果 200个是数据增强的
Kmeans聚类
from sklearn.cluster import KMeans
cnn_kmeans = KMeans(n_clusters=2,max_iter=2000)
cnn_kmeans.fit(X)
#预测
y_predict_kmeans = cnn_kmeans.predict(X)
print(y_predict_kmeans)
#统计
from collections import Counter
print(Counter(y_predict_kmeans))
Counter({0: 121, 1: 107})
分出了两类 数量分别是121 和107 说明分的不是很好
#假设普通苹果id为1
normal_apple_id = 1
#看看训练集效果
fig2 = plt.figure(figsize=(10,40))
for i in range(45):
    for j in range(5):
        img = load_img(img_path[i*5+j])
        plt.subplot(45,5,i*5+j+1)
        plt.title("apple" if y_predict_kmeans[i*5+j] == normal_apple_id else "other")
        plt.imshow(img)
        plt.axis("off")
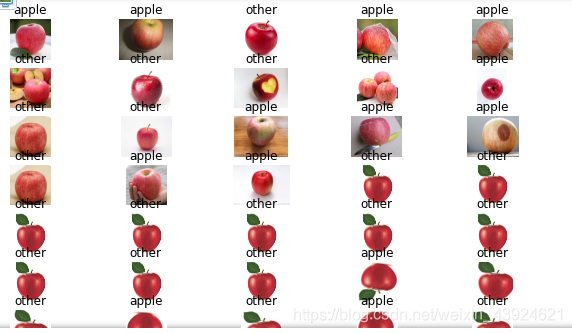 不大行
不大行
预测测试集
#载入数据
import os
folder_test = """E:\PycharmProjects\Learning\dataset\\test_data"""
dirs_test = os.listdir(folder_test)
img_path_test = []
for i in dirs_test:
    #if os.path.splitext(i)[1]==".jpg":
    img_path_test.append(i)
img_path_test = [folder_test +"\\"+i for i in img_path_test]
print(img_path_test)

#数据处理
features_test = np.zeros([len(img_path_test),7*7*512])
for i in range(len(img_path_test)):
    features_i = modelProcess(img_path_test[i],model_vgg)
    print("preprocessed:",img_path_test[i])
    features_test[i] = features_i
print("Done")

X_test = features_test
print(X_test.shape)
#预测
y_predict_kmeans_test = cnn_kmeans.predict(X_test)
print(y_predict_kmeans_test)
#画图 测试集的
fig3 = plt.figure(figsize=(10,10))
for i in range(3):
    for j in range(4):
        img = load_img(img_path[i*4+j])
        plt.subplot(3,4,i*4+j+1)
        plt.title("apple" if y_predict_kmeans[i*4+j] == normal_apple_id else "other")
        plt.imshow(img)
        plt.axis("off")
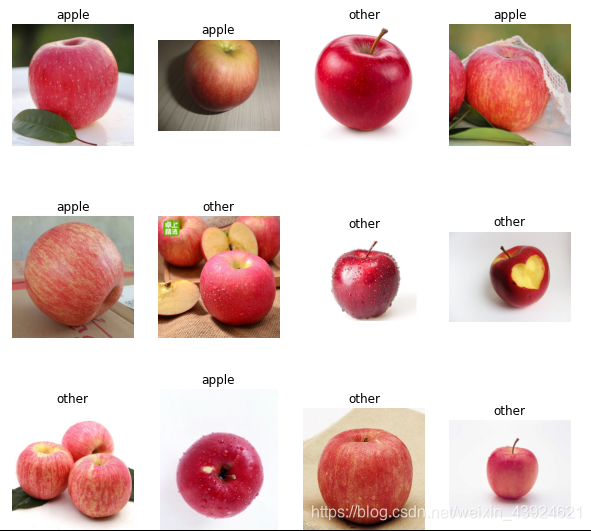 效果不太好
效果不太好
meanshift 聚类
from sklearn.cluster import MeanShift,estimate_bandwidth

bw = estimate_bandwidth(X,n_samples = 140)
print(bw)

cnn_ms = MeanShift(bandwidth = bw)
cnn_ms.fit(X)

#预测
y_predict_ms = cnn_ms.predict(X)
print(y_predict_ms)

#统计
from collections import Counter
print(Counter(y_predict_ms))

标签0的数据比较多 标记为普通苹果
normal_apple_id = 0
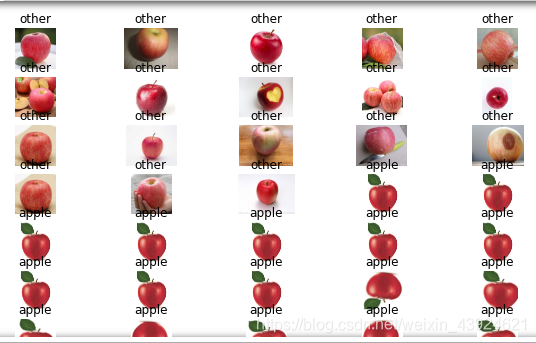
fig4 = plt.figure(figsize=(10,40))
for i in range(45):
    for j in range(5):
        img = load_img(img_path[i*5+j])
        plt.subplot(45,5,i*5+j+1)
        plt.title("apple" if y_predict_ms[i*5+j] == normal_apple_id else "other")
        plt.imshow(img)
        plt.axis("off")
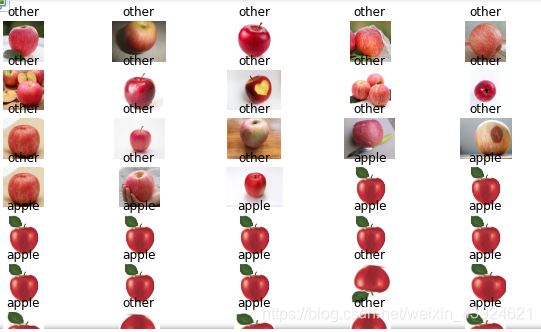 效果好一些
效果好一些
#预测 测试集
y_predict_ms_test = cnn_ms.predict(X_test)
print(y_predict_kmeans_test)
#画图 测试集的
fig3 = plt.figure(figsize=(10,10))
for i in range(4):
    for j in range(5):
        img = load_img(img_path[i*5+j])
        plt.subplot(4,5,i*5+j+1)
        plt.title("apple" if y_predict_ms_test[i*5+j] == normal_apple_id else "other")
        plt.imshow(img)
        plt.axis("off")
PCA 主成分分析
from sklearn.preprocessing import StandardScaler
stds = StandardScaler()
X_norm = stds.fit_transform(X)
#PCA analusis
from sklearn.decomposition import PCA
pca = PCA(n_components=200)
X_pca = pca.fit_transform(X_norm)
#降维之后的主成分
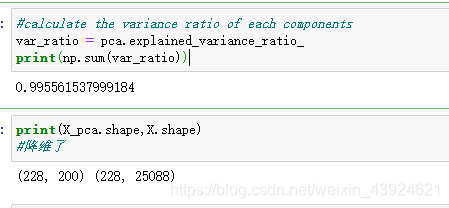
#calculate the variance ratio of each components
var_ratio = pca.explained_variance_ratio_
print(np.sum(var_ratio))
print(X_pca.shape,X.shape)
#降维了
#再meanshift
from sklearn.cluster import MeanShift,estimate_bandwidth

bw = estimate_bandwidth(X_pca,n_samples = 140) #用处理后的数据
print(bw)

cnn_pca_ms = MeanShift(bandwidth = bw)
cnn_pca_ms.fit(X_pca)

#预测
y_predict_pca_ms = cnn_pca_ms.predict(X_pca)
print(y_predict_pca_ms)
#统计
from collections import Counter
print(Counter(y_predict_pca_ms))

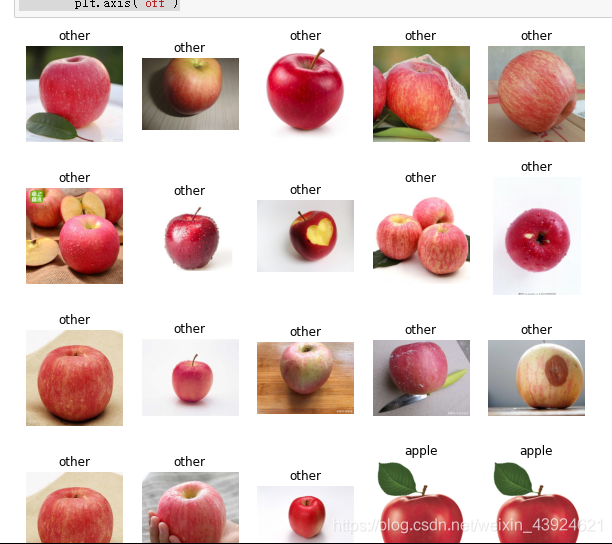
normal_apple_id = 0
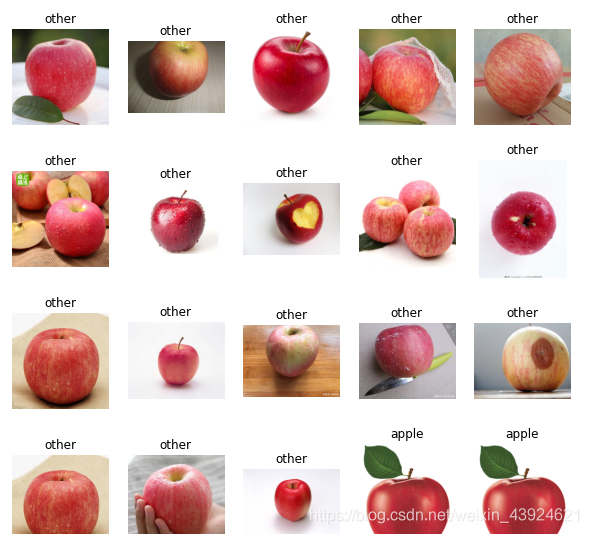
fig4 = plt.figure(figsize=(10,40))
for i in range(45):
    for j in range(5):
        img = load_img(img_path[i*5+j])
        plt.subplot(45,5,i*5+j+1)
        plt.title("apple" if y_predict_pca_ms[i*5+j] == normal_apple_id else "other")
        plt.imshow(img)
        plt.axis("off")
效果比Kmeans的好
再预测测试集
#数据转换
X_norm_test = stds.transform(X_test)
X_pca_test = pca.transform(X_norm_test)
#预测 测试集
y_predict_pca_ms_test = cnn_pca_ms.predict(X_pca_test)
print(y_predict_pca_ms_test)
#画图 测试集的
fig3 = plt.figure(figsize=(10,10))
for i in range(4):
    for j in range(5):
        img = load_img(img_path[i*5+j])
        plt.subplot(4,5,i*5+j+1)
        plt.title("apple" if y_predict_pca_ms_test[i*5+j] == normal_apple_id else "other")
        plt.imshow(img)
        plt.axis("off")
总结
通过数据处理,将主要信息留下,效果更好
- 通过搭建混合模型,实现监督+无监督、机器+深度学习技术的有机结合,并在少样本的情况下建立起了有效区分的模型
- 针对少样本任务,掌握生成新数据的数据增强。
- VGG16模型拆分,提取图像特征
- 图像批量处理
- 无监督聚类算法:KMeans、Meanshift,并通过标签数据分布实现数据类别矫正
- PCA降维,剔除数据中的噪音信息、降低模型复杂度、减少模型训练时间提高模型表现

魔乐社区(Modelers.cn) 是一个中立、公益的人工智能社区,提供人工智能工具、模型、数据的托管、展示与应用协同服务,为人工智能开发及爱好者搭建开放的学习交流平台。社区通过理事会方式运作,由全产业链共同建设、共同运营、共同享有,推动国产AI生态繁荣发展。
更多推荐
 4
4 0
0- 0


 已为社区贡献1条内容

所有评论(0)