PHP之 发布项目到阿里云远程服务器
一,宝塔配置php运行环境
1.1 安装宝塔和php环境
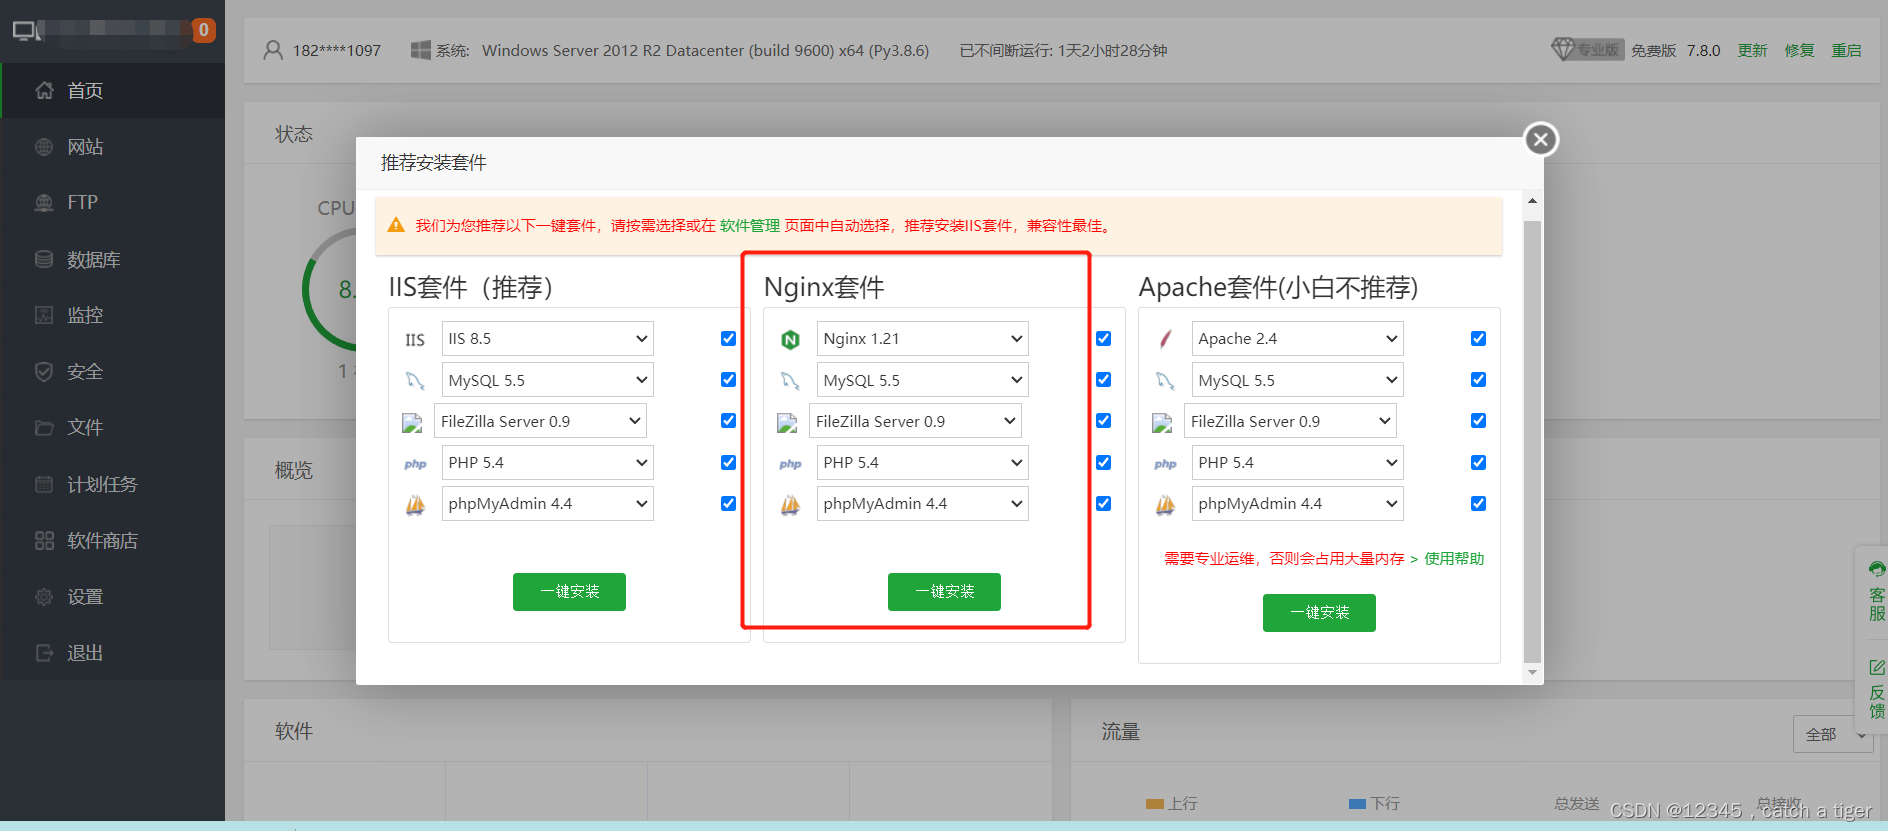
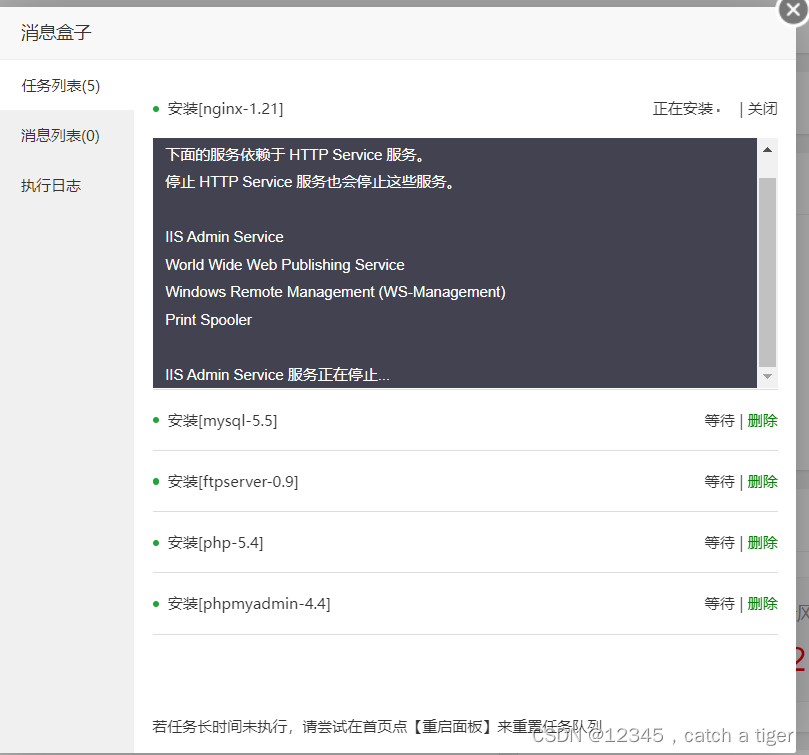
安装成功
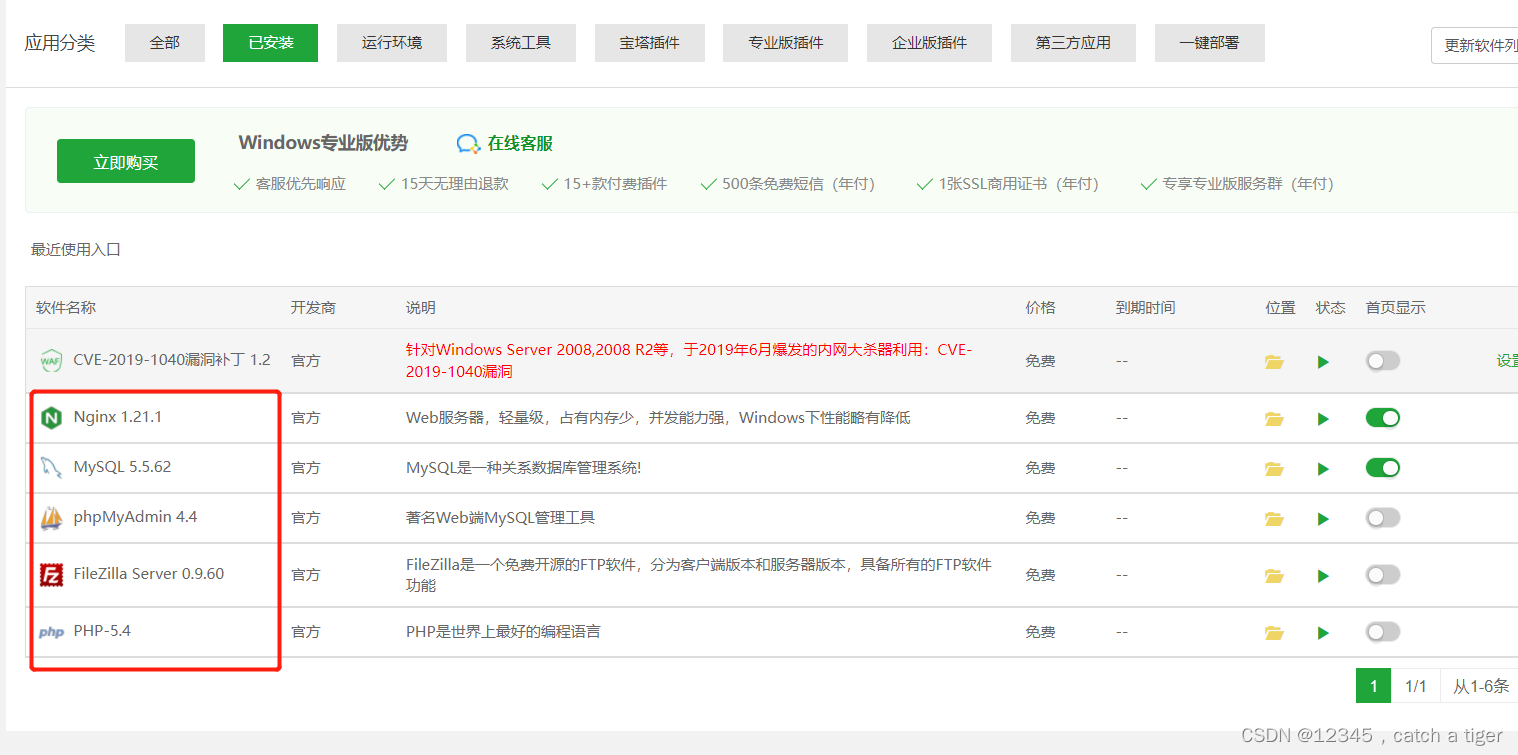
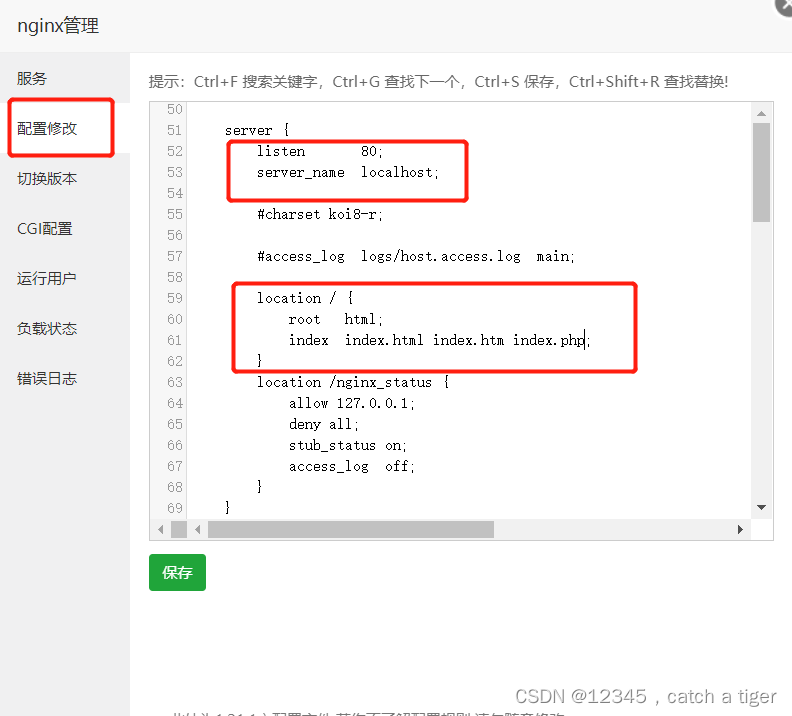
1.2 配置nginx
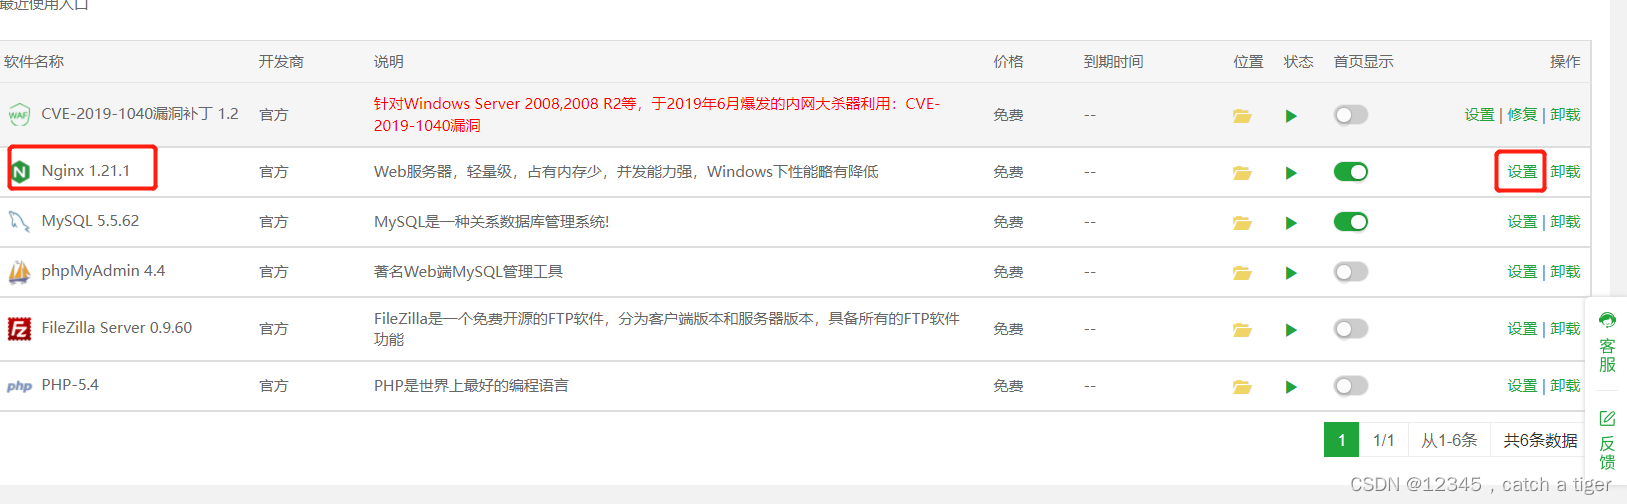
配置主机,端口和默认页面
二,配置网站,FTP,MYSQL,PHPmyadmin
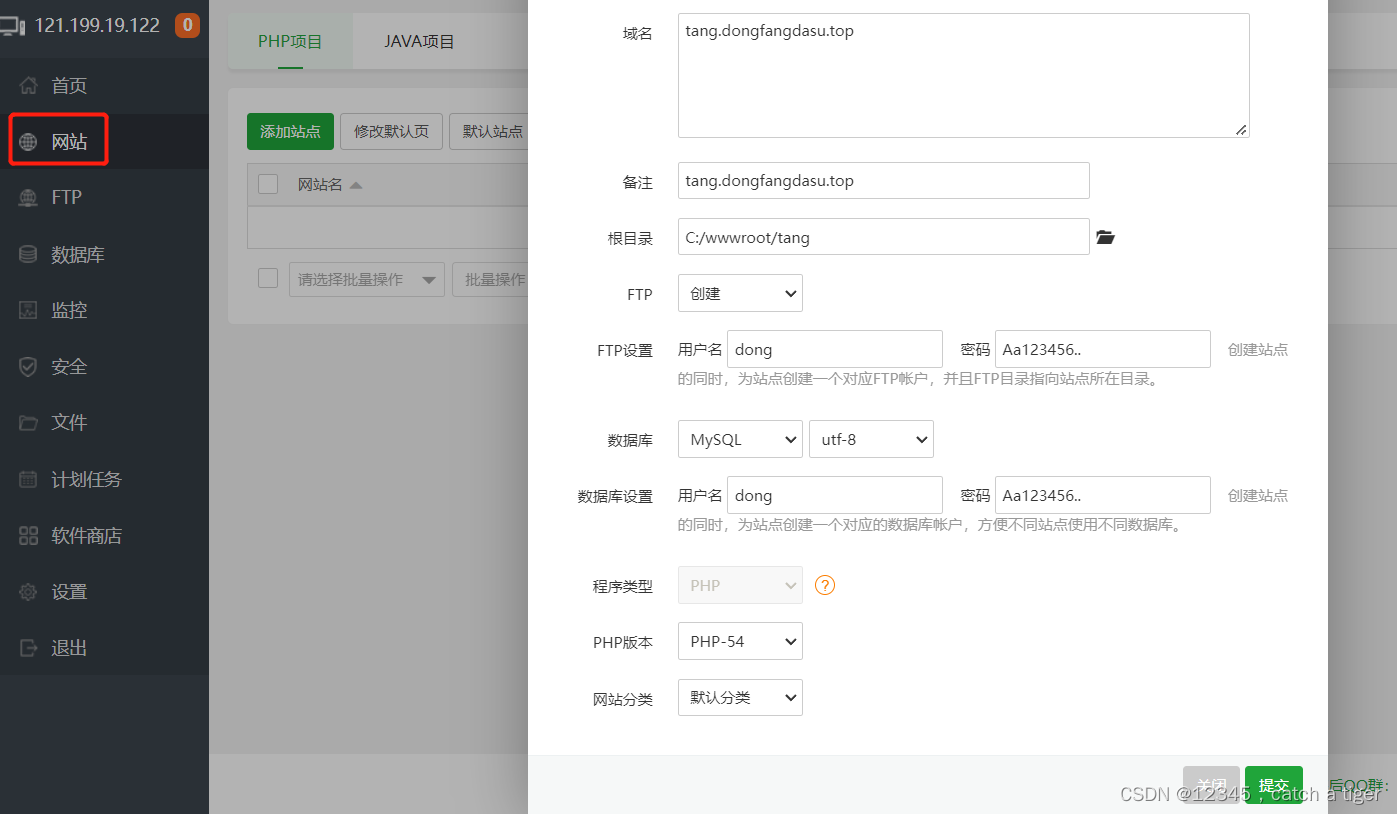
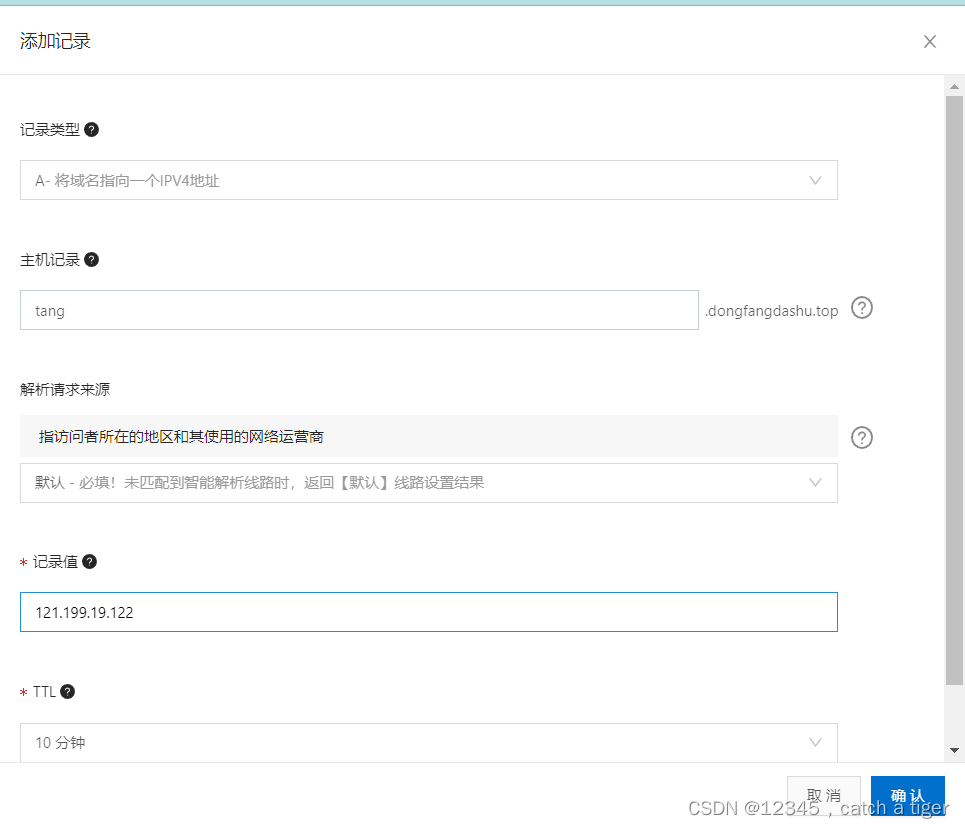
2.1 添加网站,并解析域名
添加tang的域名解析
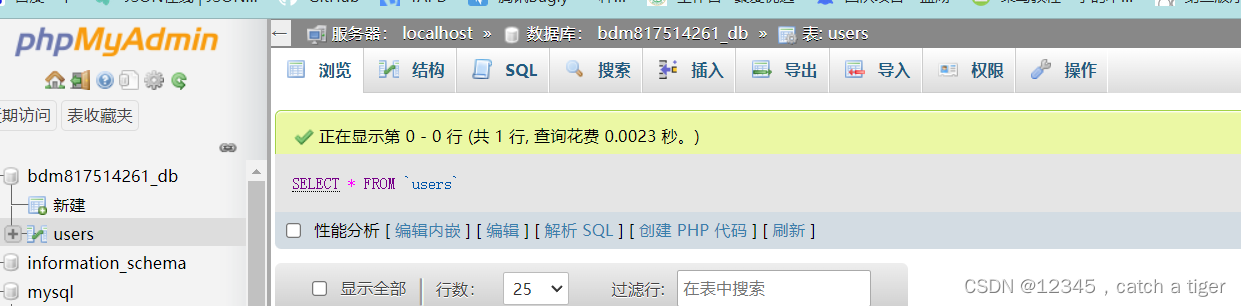
2.2 连接phpmyadmin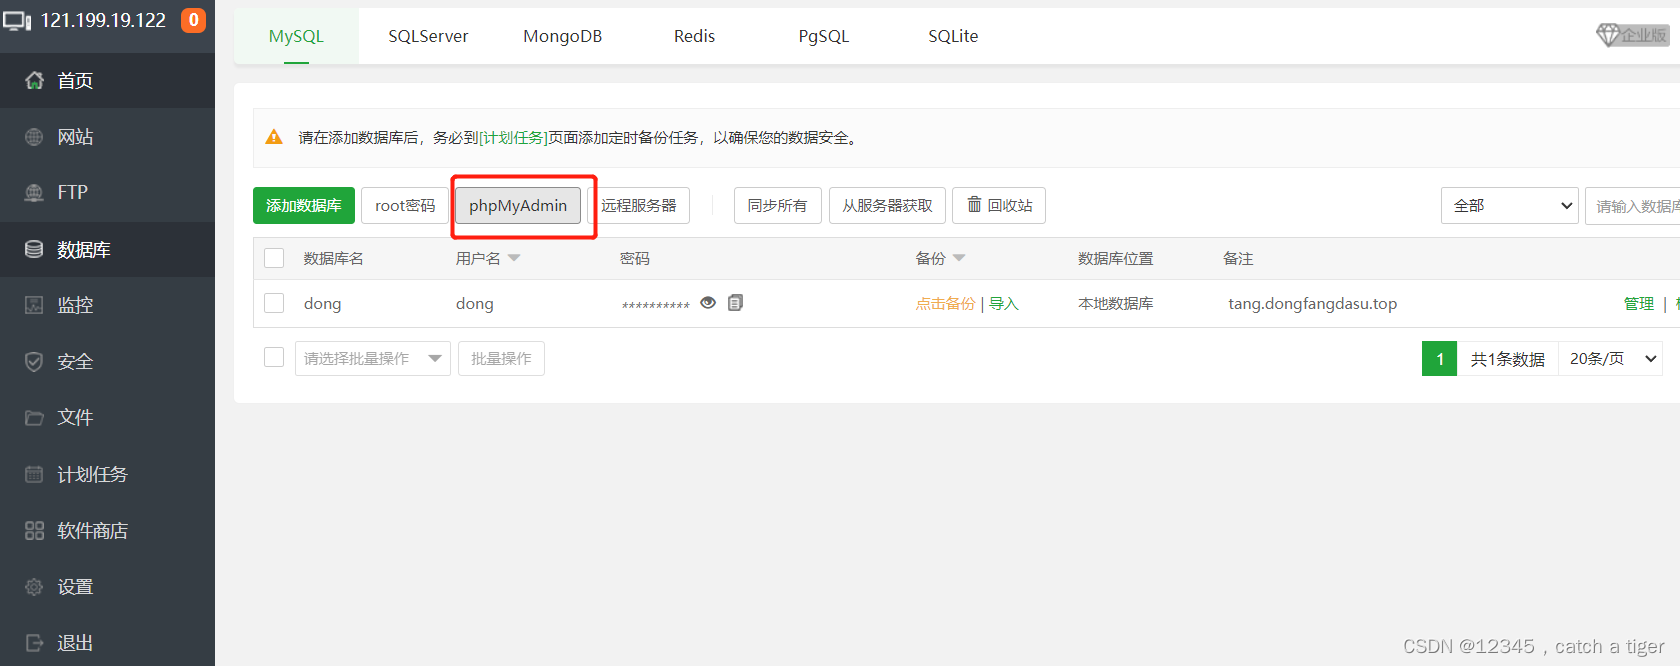
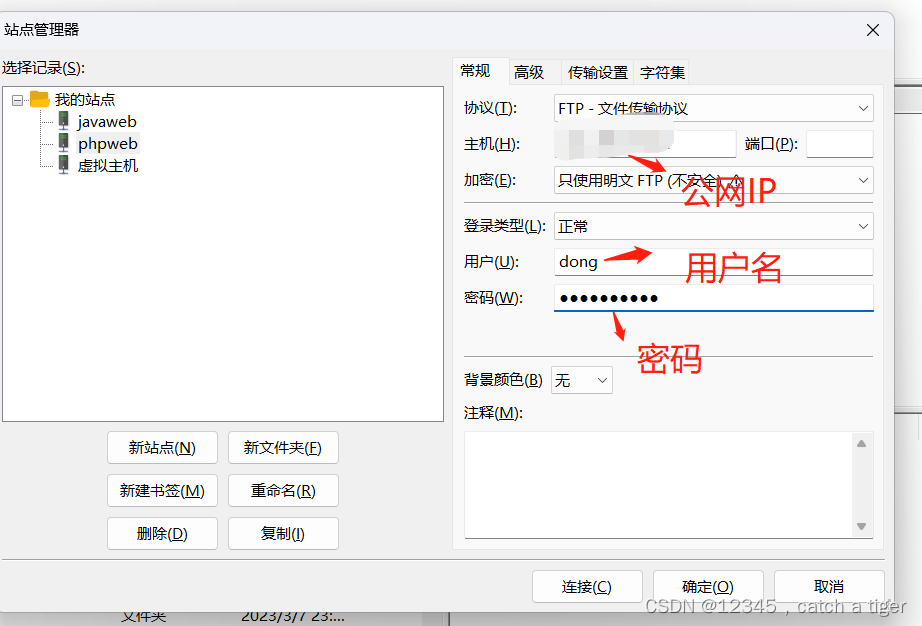
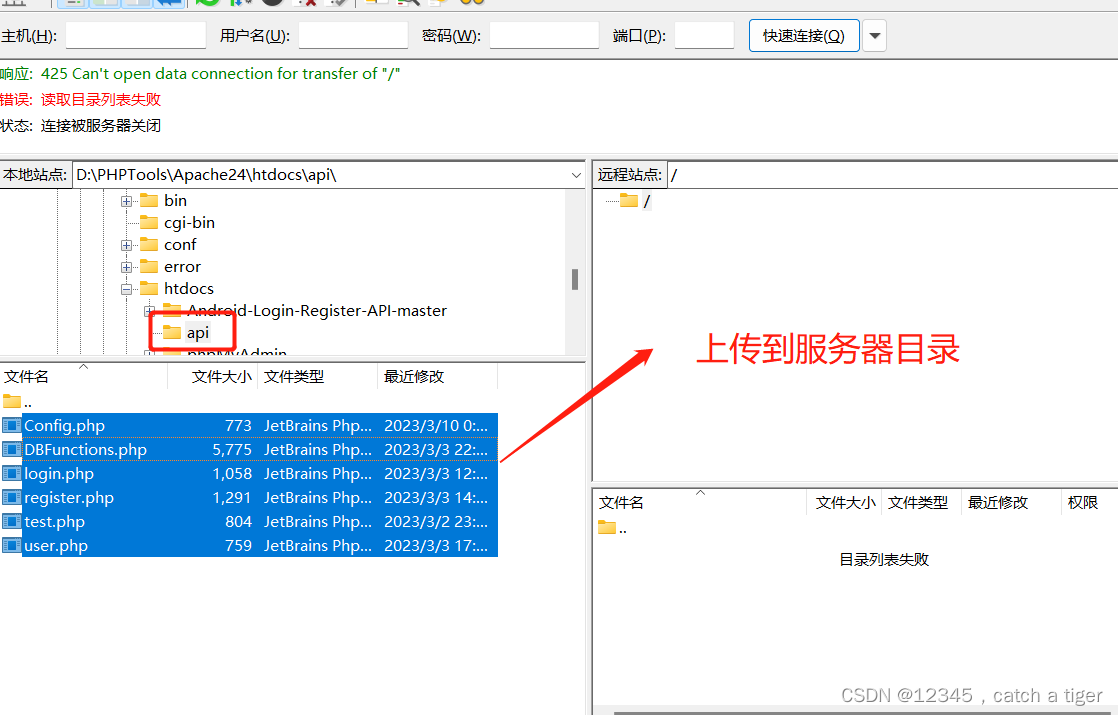
2.3 连接FTP并上传文件到服务器
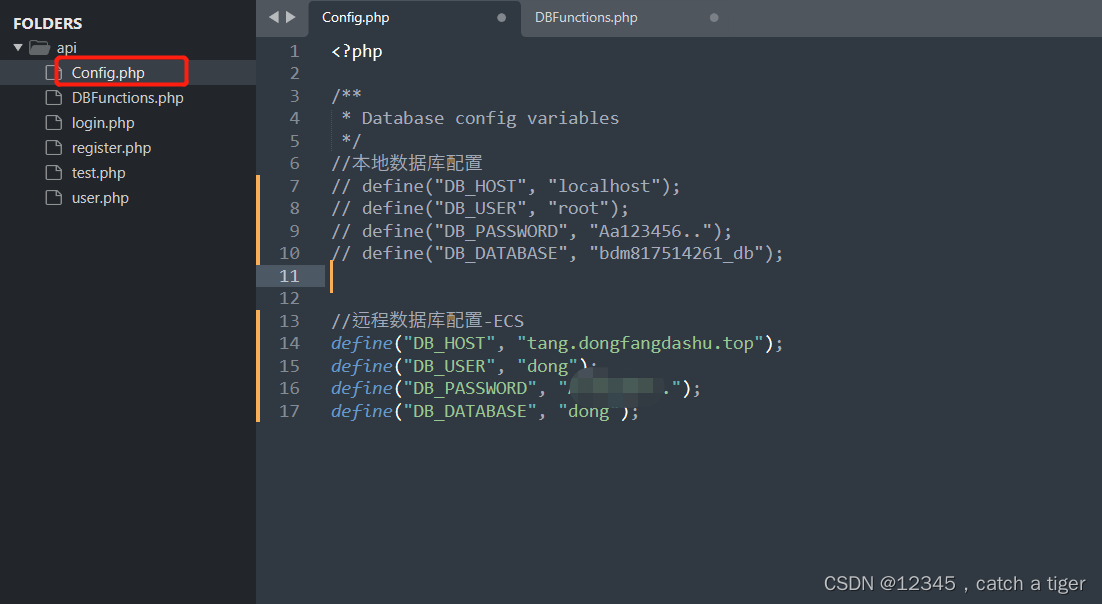
修改远程服务器配置
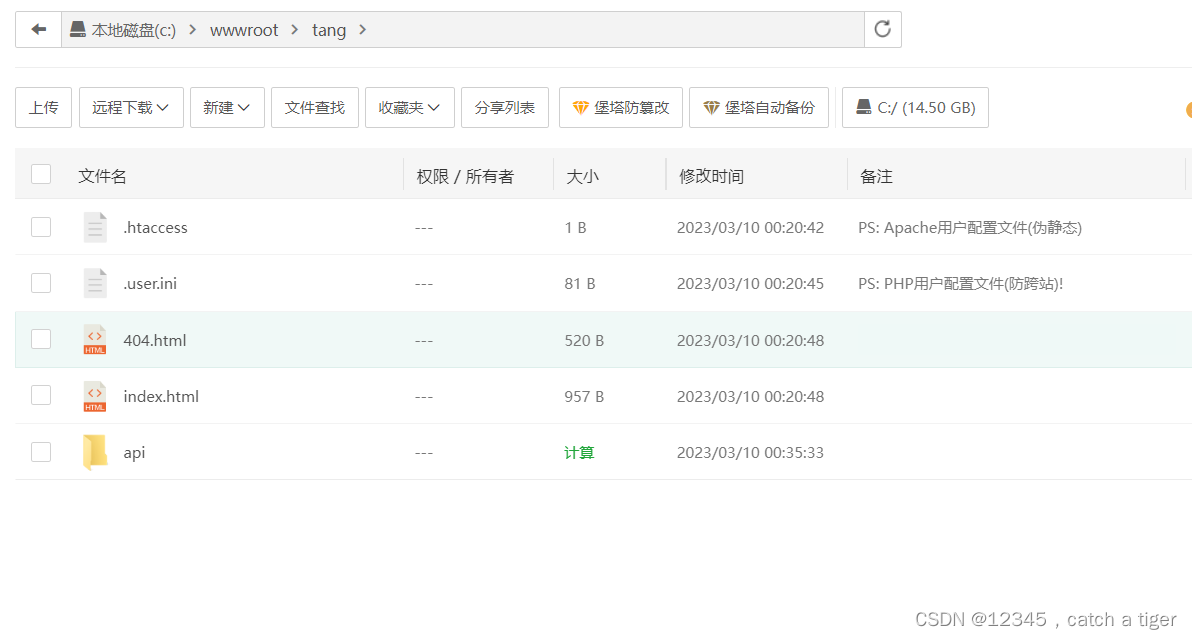
2.5 访问报404
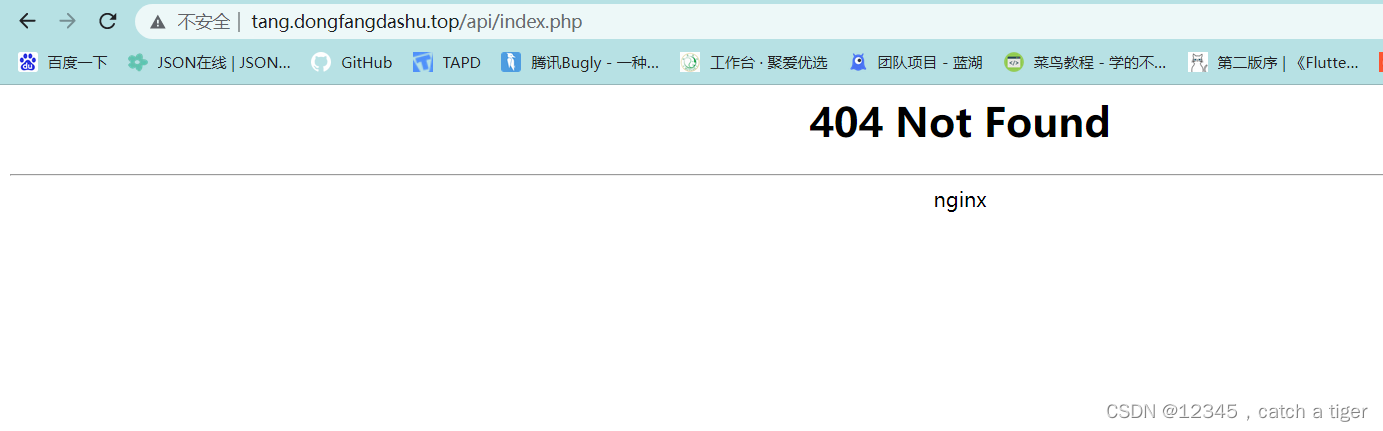
第一步需要注释掉默认的nginx配置文件种的server
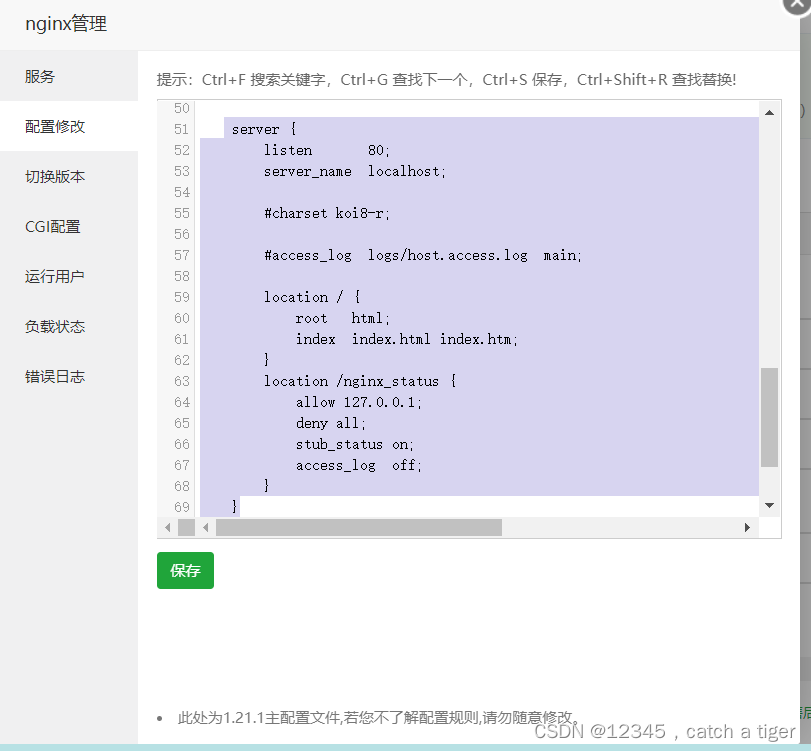
完整的nginx配置文件
worker_processes auto;
worker_rlimit_nofile 51200;
events
{
	worker_connections 51200;
	multi_accept on;
}
http {
		include       mime.types;
		#include luawaf.conf;
		include proxy.conf;
        default_type  application/octet-stream;

        server_names_hash_bucket_size 512;
        client_header_buffer_size 32k;
        large_client_header_buffers 4 32k;
        client_max_body_size 50m;

        sendfile   on;
        tcp_nopush on;

        keepalive_timeout 60;

        tcp_nodelay on;

        fastcgi_connect_timeout 300;
        fastcgi_send_timeout 300;
        fastcgi_read_timeout 300;
        fastcgi_buffer_size 64k;
        fastcgi_buffers 4 64k;
        fastcgi_busy_buffers_size 128k;
        fastcgi_temp_file_write_size 256k;
		fastcgi_intercept_errors on;

        gzip on;
        gzip_min_length  1k;
        gzip_buffers     4 16k;
        gzip_http_version 1.1;
        gzip_comp_level 2;
        gzip_types     text/plain application/javascript application/x-javascript text/javascript text/css application/xml;
        gzip_vary on;
        gzip_proxied   expired no-cache no-store private auth;
        gzip_disable   "MSIE [1-6]\.";

        limit_conn_zone $binary_remote_addr zone=perip:10m;
		limit_conn_zone $server_name zone=perserver:10m;

        server_tokens off;
        access_log off;

    server {
        listen       80;
        server_name  localhost;

        #charset koi8-r;

        #access_log  logs/host.access.log  main;

        location / {
            root   html;
            index  index.html index.htm;
        }
		location /nginx_status {
        	allow 127.0.0.1;
            deny all;
            stub_status on;
            access_log  off;
        }
    }
    include vhost/*.conf;
    #加载vhost目录下的虚拟主机配置文件
}
第二步在网站的配置文件里面新增支持php的location
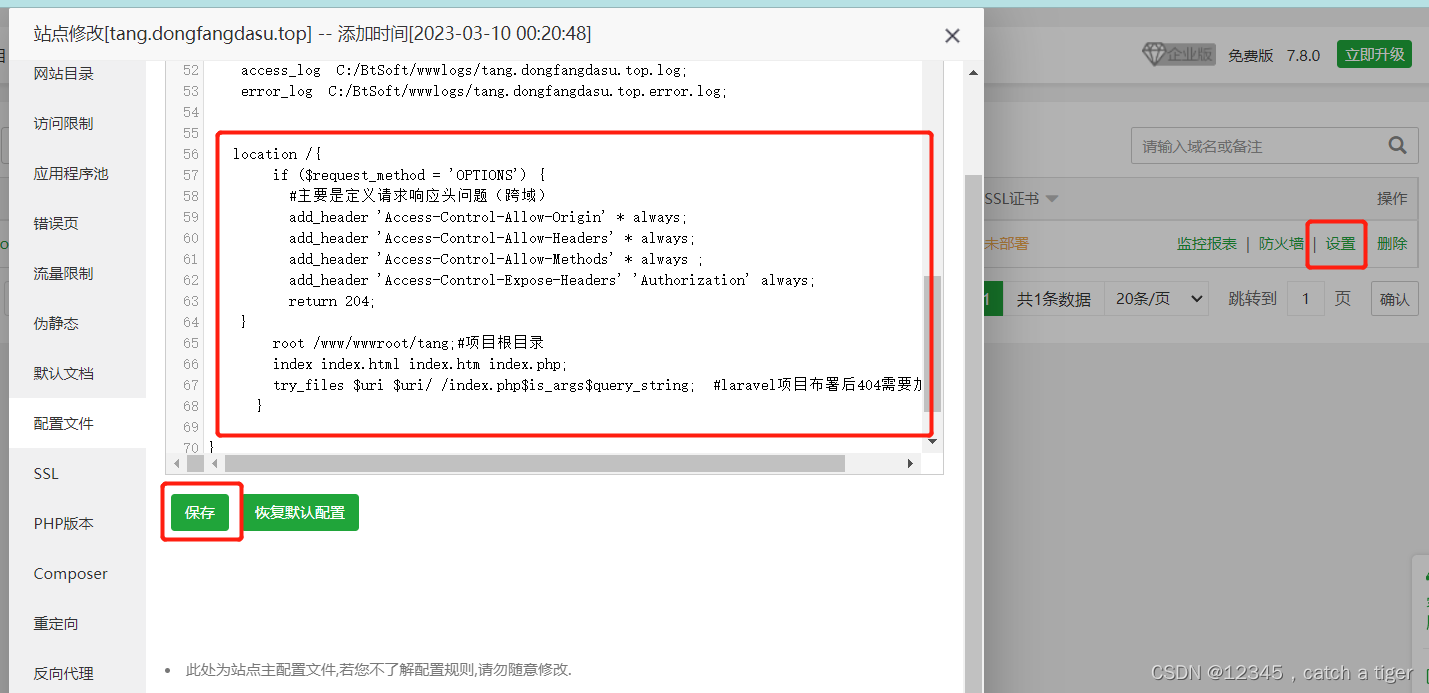
完整的网站配置文件
server
{
    listen 80;
    server_name tang.dongfangdasu.top;
    index index.php index.html index.htm default.php default.htm default.html;
    root c:/wwwroot/tang;

	#START-ERROR-PAGE
	#error_page 403 /403.html;
	error_page 404 /404.html;
    #error_page 502 /502.html;
	#END-ERROR-PAGE

    #HTTP_TO_HTTPS_START
    #HTTP_TO_HTTPS_END

    #LIMIT_INFO_START
    #LIMIT_INFO_END

    #SSL-INFO-START
    #SSL-INFO-END

    #反代清理缓存配置
    location ~ /purge(/.*) {
        proxy_cache_purge cache_one $1$is_args$args;
    }
    #proxy 反向代理
    include proxy/tang.dongfangdasu.top/*.conf;

    #PHP-INFO-START
    include php/54.conf;
    #PHP-INFO-END

    #REWRITE-START
    include rewrite/tang.dongfangdasu.top/*.conf;
    #REWRITE-END

    #redirect 重定向
    include redirect/tang.dongfangdasu.top/*.conf;

    #禁止访问的文件或目录
    location ~ ^/(\.user.ini|\.htaccess|\.git|\.svn|\.project|LICENSE|README.md)
    {
        return 404;
    }

    #一键申请SSL证书验证目录相关设置
    location ~ \.well-known{
        allow all;
    }

	access_log  C:/BtSoft/wwwlogs/tang.dongfangdasu.top.log;
    error_log  C:/BtSoft/wwwlogs/tang.dongfangdasu.top.error.log;


   location /{
        if ($request_method = 'OPTIONS') {
          #主要是定义请求响应头问题(跨域)
          add_header 'Access-Control-Allow-Origin' * always;
          add_header 'Access-Control-Allow-Headers' * always;
          add_header 'Access-Control-Allow-Methods' * always ;
          add_header 'Access-Control-Expose-Headers' 'Authorization' always;
          return 204;
    }
        root /www/wwwroot/tang;#项目根目录
        index index.html index.htm index.php;
        try_files $uri $uri/ /index.php$is_args$query_string;  #laravel项目布署后404需要加上
      }

}
如果是linux系统服务器,配置有点不一样:
添加网站之后,Nginx配置重置为默认,不需要在Nginx里面添加额外的php支持,直接在网站配置文件末尾添加PHP支持即可
  location / {
        try_files $uri $uri/ /index.php?$query_string;
    }
    #PHP配置
    location ~ \.php$ {
        #include snippets/fastcgi-php.conf;
        #fastcgi_pass unix:/run/php/php7.0-fpm.sock;
        include fastcgi.conf;
        fastcgi_pass  unix:/tmp/php-cgi-70.sock;
  }
这时候可以连上php,但有报错,提示不允许连接数据库,那我们来调试
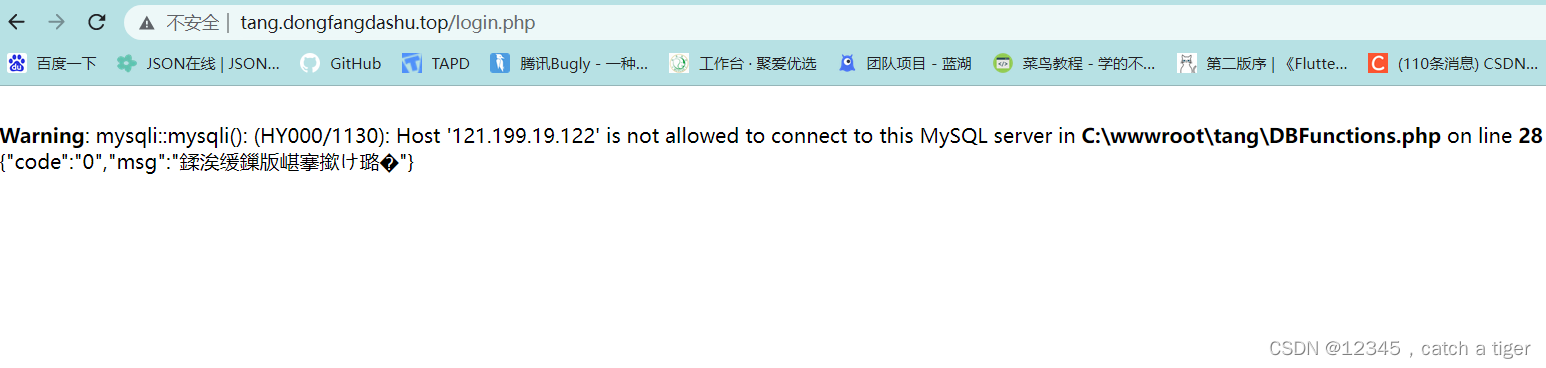
报错修改mysql配置,把root用户的Host修改为%。
1、连接服务器: mysql -u root -p
2、看当前所有数据库:show databases;
3、进入mysql数据库:use mysql;
4、查看mysql数据库中所有的表:show tables;
5、查看user表中的数据:select Host, User,Password from user;
6、修改user表中的:update user set Host='%' where User='root';
7、最后刷新一下:flush privileges;
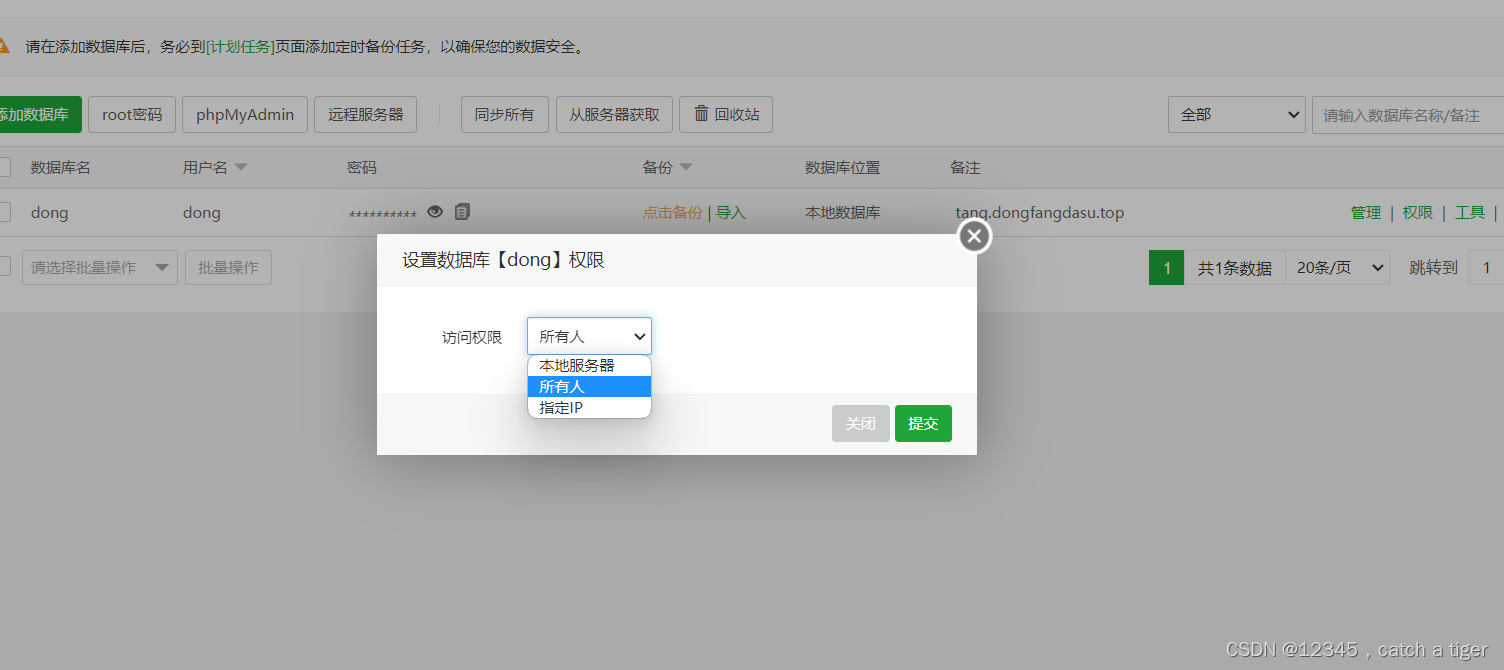
通过宝塔修改数据库权限为所有人
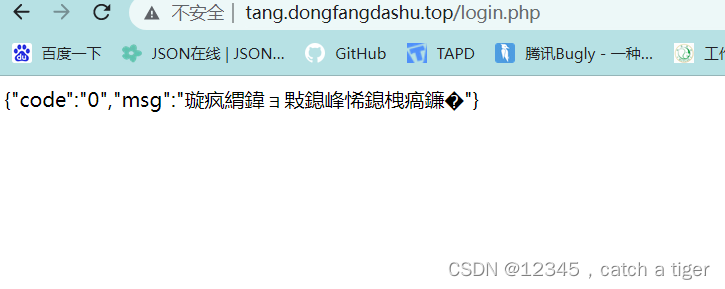
可以看到不再报不能访问问题:
四,html+JS接口调试
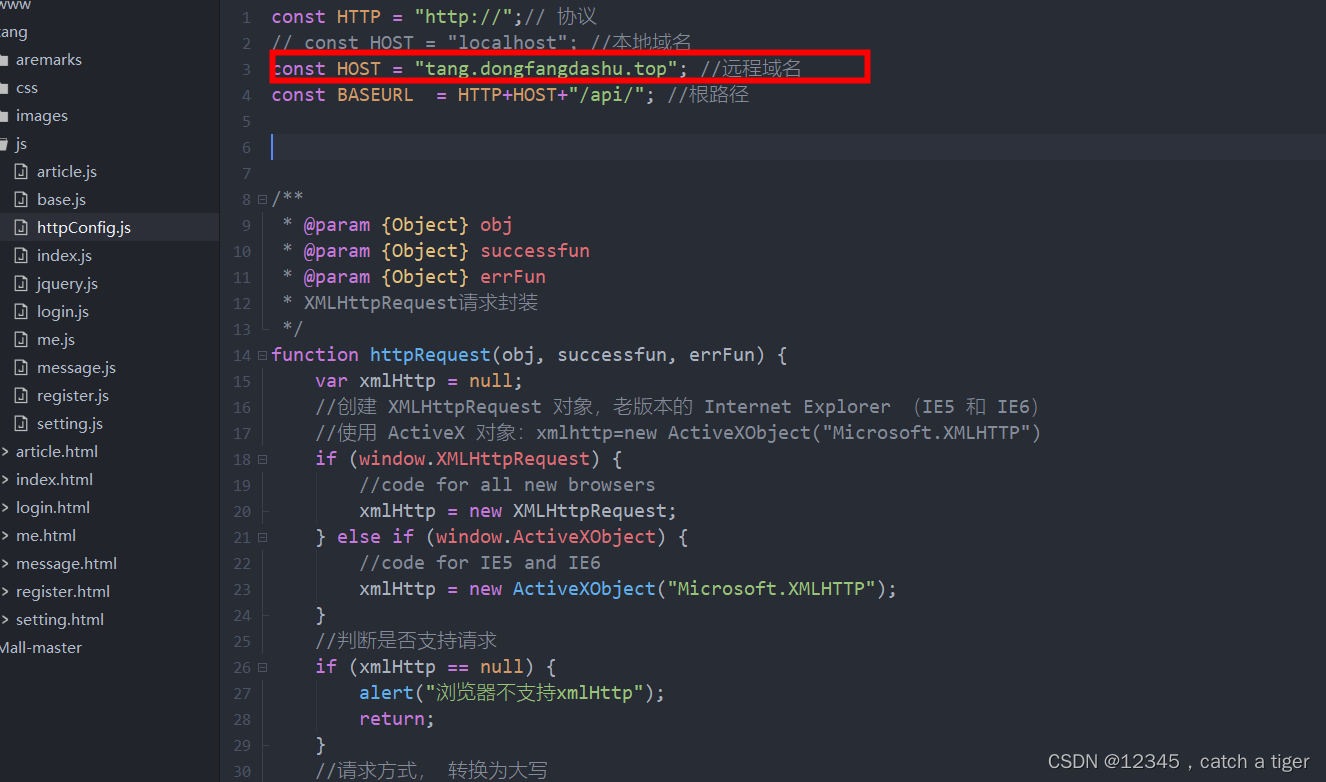
4.1 连接远程域名,这部分源码在html那几章节中,可以去参考下
注册
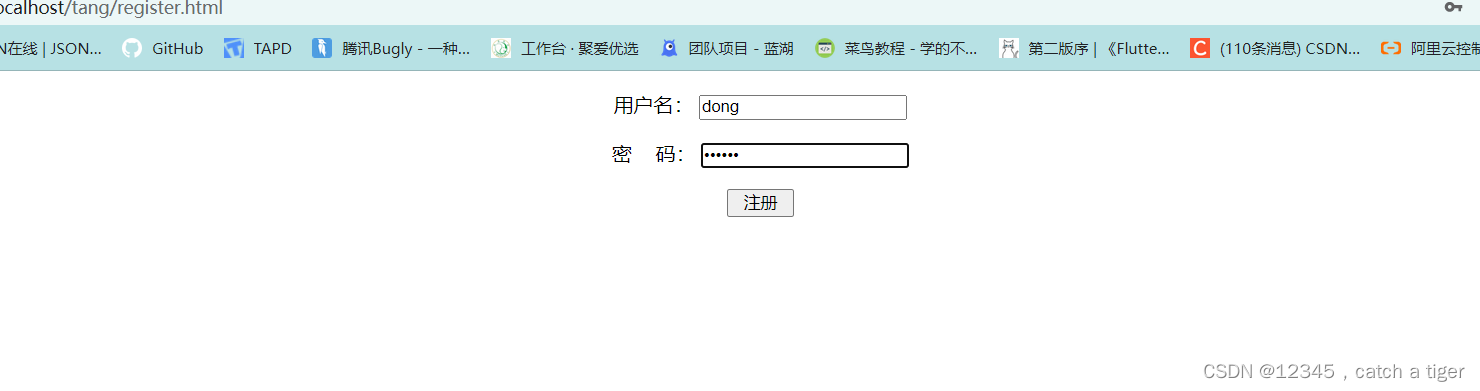
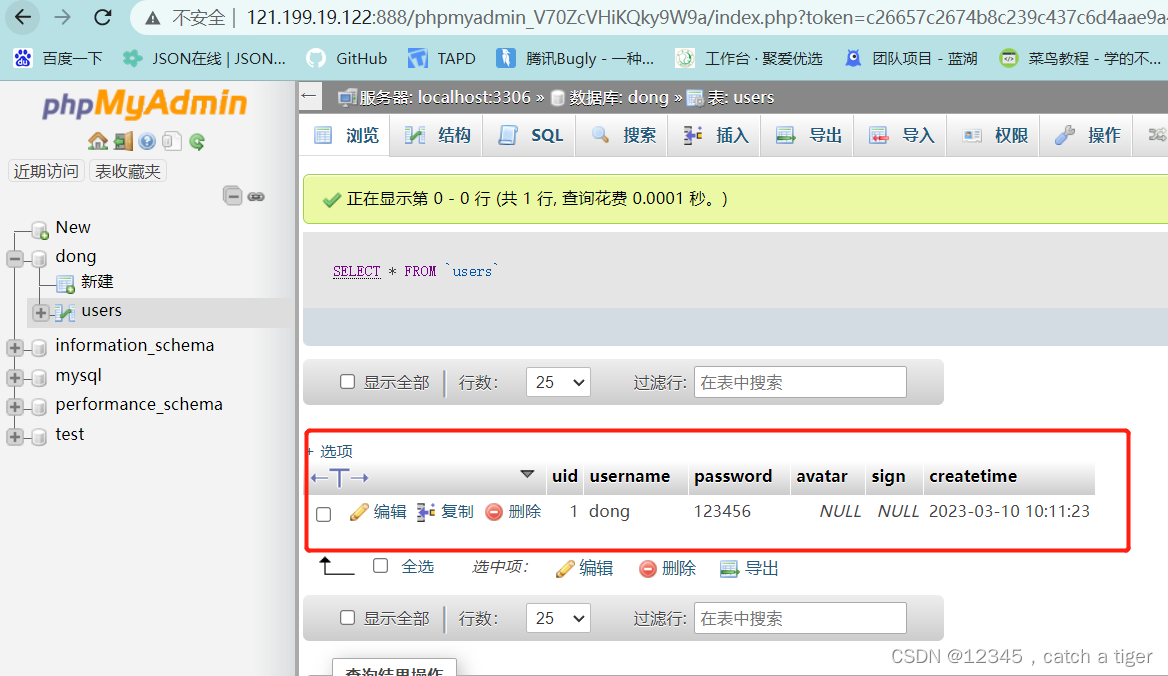
我们看到已经注册成功
五,注意:
当然也可以不通过宝塔,自己单独下载相关软件,或者下载phpStudy这些集成软件,方法根正常windows系统配置流程没什么区别
六,php省略后缀,隐藏php后缀
1、在apache服务器下htdocs根目录下创建文件.htaccess,编辑以下内容:
RewriteEngine On
RewriteCond %{REQUEST_FILENAME} !-d
RewriteCond %{REQUEST_FILENAME}\.php -f
RewriteRule ^(.*)$ $1.php [L]
2、修改apache配置文件:/usr/local/httpd/conf/httpd.conf
开启rewrite模块:LoadModule rewrite_module modules/mod_rewrite.so
保证:Allowoverride ALL(配置文件有多个,请注意上下文)
3、重启apache:/usr/local/httpd/bin/apachectl restart

魔乐社区(Modelers.cn) 是一个中立、公益的人工智能社区,提供人工智能工具、模型、数据的托管、展示与应用协同服务,为人工智能开发及爱好者搭建开放的学习交流平台。社区通过理事会方式运作,由全产业链共同建设、共同运营、共同享有,推动国产AI生态繁荣发展。
更多推荐


 1
1 0
0- 0


 已为社区贡献2条内容

所有评论(0)