华为云上部署Seafile私人网盘
本教程的服务器采用华为云x86架构云主机。系统为centos7.6,搭配Mariadb数据库。
华为云上部署Seafile私人网盘
本教程的服务器采用华为云x86架构云主机。系统为centos7.6,搭配Mariadb数据库
一、环境的准备
1、安装Nginx
在本次部署上不需要
yum install nginx -y
安装成功配置nginx反向代理。
安装完成过开启并设置开机自启动
systemctl start nginx #启动
systemctl enable nginx # 设置开机自启动

2、安装Mariadb(Mysql)
yum安装Mariadb
yum install mariadb-server -y
安装成功
systemctl start mariadb.service #启动
systemctl enable mariadb.service # 设置开机自启动

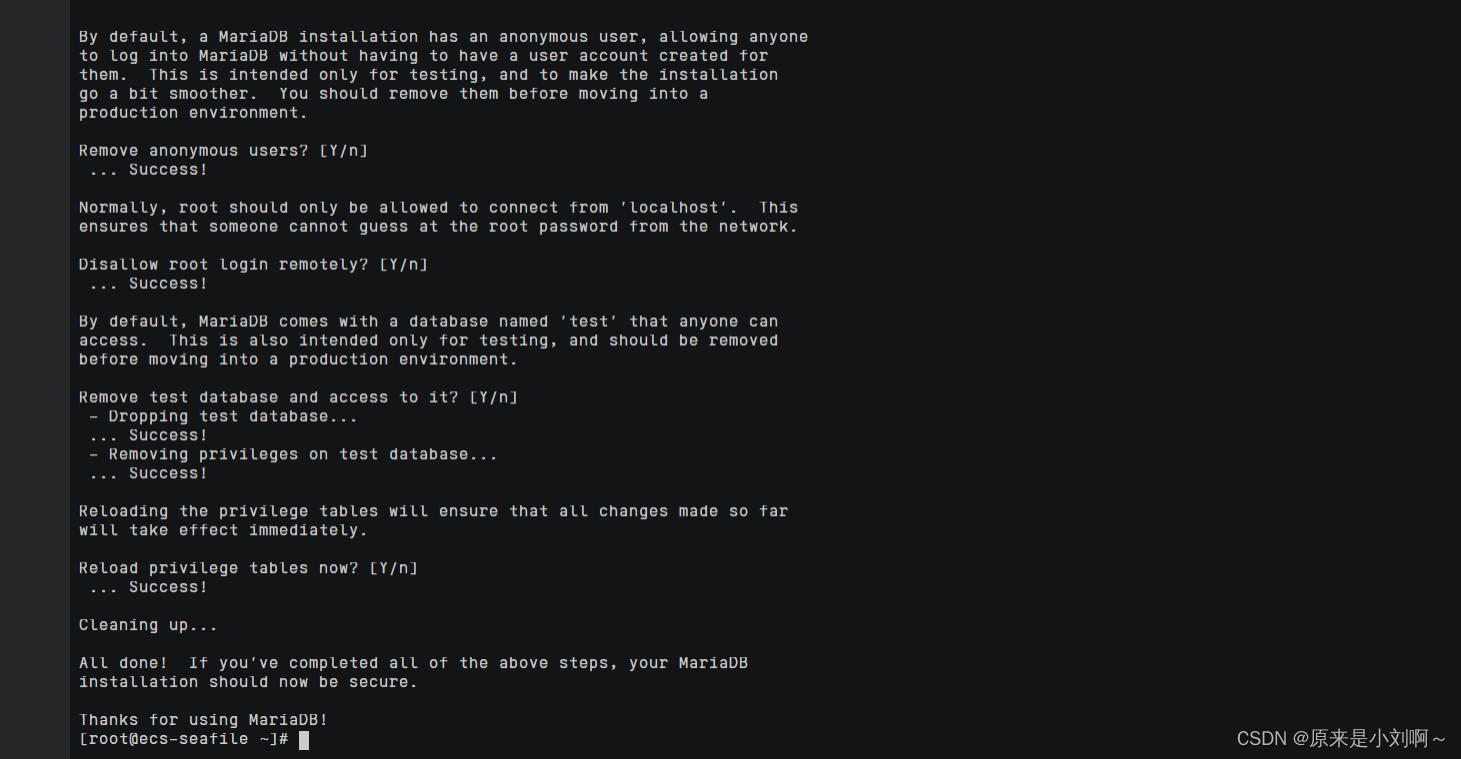
进行数据库初始化(设置root的密码,后续安装Seafile时需要)
mysql_secure_installation
初始化选项设置

Enter current password for root (enter for none): #初次运行直接回车

Set root password? [Y/n] #是否设置root用户密码,直接回车

New password:  #设置root用户的密码(数据库的根密码)

Re-enter new password: #再输入一次你设置的密码

Remove anonymous users? [Y/n] #是否删除匿名用户,直接回车

Disallow root login remotely? [Y/n] #是否禁止root远程登录,这里选择允许。

Remove test database and access to it? [Y/n] #是否删除test数据库,直接回车

Reload privilege tables now? [Y/n] #是否重新加载权限表,直接回车
3、安装其他的其他依赖组件
yum install -y python-setuptools python-imaging python-ldap MySQL-python python-memcached python-urllib3
安装完成
二、安装Seafile服务器端(Linux)
1、下载seafile安装文件
下载方式有很多,可以在本机上去官网下载下载利用wincap软件,将文件传输到linux服务器的opt文件夹里
如果云主机绑定了公网IP,建议使用wget安装。
这里建议下载7.0.x版本,因为seafile 9.0.x 版本不支持在 Centos 系统 tar 包部署,支持 Docker 方式部署
wget https://seafile-downloads.oss-cn-shanghai.aliyuncs.com/seafile-server_7.0.5_x86-64.tar.gz
下载成功
mkdir /opt/seafile       #创建目录
mv seafile-server_* /opt/seafile            #将下载好的文件移动到seafile目录下
cd /opt/seafile    #进入seafile目录
tar -xzf seafile-server_*  #解压文件
解压完成
mkdir installed  #创建目录
mv seafile-server_* installed  #将安装包移动到install目录
到此步文件的目录
├── installed
│   └── seafile-server_7.0.5_x86-64.tar.gz
└── seafile-server-7.0.5
    ├── reset-admin.sh
    ├── runtime
    ├── seafile
    ├── seafile.sh
    ├── seahub
    ├── seahub.sh
    ├── setup-seafile-mysql.sh
    └── upgrade
这样设计目录的好处在于
和 seafile 相关的配置文件都可以放在 /opt/seafile/conf 目录下,便于集中管理.
后续升级时,你只需要解压最新的安装包到 /opt/seafile 目录下.
2、安装Seafile
进入解压后的文件夹
cd seafile-server-7.0.5/
运行安装脚本
./setup-seafile-mysql.sh #运行安装脚本并回答预设的问题
[root@ecs-seafile seafile-server-7.0.5]# ./setup-seafile-mysql.sh #运行安装脚本并回答预设问题
Checking python on this machine ...
  Checking python module: python-mysqldb ... Done.

-----------------------------------------------------------------
This script will guide you to setup your seafile server using MySQL.
Make sure you have read seafile server manual at

        https://github.com/haiwen/seafile/wiki

Press ENTER to continue
-----------------------------------------------------------------
What is the name of the server? It will be displayed on the client.
3 - 15 letters or digits
[ server name ] pdsu

What is the ip or domain of the server?
For example: www.mycompany.com, 192.168.1.101
[ This server's ip or domain ] 120.46.189.121

Where do you want to put your seafile data?
Please use a volume with enough free space
[ default "/opt/seafile/seafile-data" ]

Which port do you want to use for the seafile fileserver?
[ default "8082" ]
-------------------------------------------------------
Please choose a way to initialize seafile databases:
-------------------------------------------------------
[ server name ] :Seafile服务器的名字(3-15个字符)不能中文。
[ This server’s ip or domain ] :Seafile服务器的ip或者域名,这里使用云主机的公网ip。
[ default “/opt/seafile/seafile-data” ] :Seafile服务器文件的存放位置,这里默认 直接回车。
[ default “8082” ] :服务器的端口,用于同步文件这里选择默认。
进行到这一步, 你会被要求选择一种创建 Seafile 数据库的方式:
[1] Create new ccnet/seafile/seahub databases #如果选择1, 你需要提供根密码. 脚本程序会创建数据库和用户。
[2] Use existing ccnet/seafile/seahub databases  #如果选择2, 数据库应该已经被你(或者其他人)提前创建。
在这里我们选择1
What is the host of mysql server?
[ default "localhost" ] #如果你的数据库没有更改,默认即可
What is the port of mysql server?
[ default "3306" ] #数据库端口默认
What is the password of the mysql root user?
[ root password ] #输入数据库初始化的root用户密码
verifying password of user root ...  done
Enter the name for mysql user of seafile. It would be created if not exists.
[ default "seafile" ] 设置默认的seafile数据库名称,默认即可
Enter the password for mysql user "seafile":
[ password for seafile ] 设置seafile数据库的密码,自行设置
Enter the database name for ccnet-server:
[ default "ccnet-db" ] 默认,直接回车
Enter the database name for seafile-server:
[ default "seafile-db" ] 默认,直接回车
Enter the database name for seahub:
[ default "seahub-db" ] 默认,直接回车
完成上述后,会有如下提示界面:
然后回车开始配置,创建完成后提示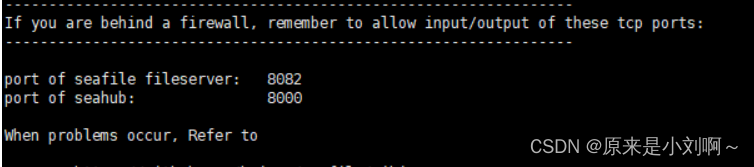
现在你的目录结构看起来应该是这样:
seafile
├── ccnet               # configuration files
│   ├── mykey.peer
│   ├── PeerMgr
│   └── seafile.ini
├── conf
│   └── ccnet.conf
│   └── seafile.conf
│   └── seahub_settings.py
│   └── gunicorn.conf
├── installed
│   └── seafile-server_7.0.0_x86-64.tar.gz
├── seafile-data
├── seafile-server-7.0.0  # active version
│   ├── reset-admin.sh
│   ├── runtime
│   ├── seafile
│   ├── seafile.sh
│   ├── seahub
│   ├── seahub.sh
│   ├── setup-seafile-mysql.sh
│   └── upgrade
├── seafile-server-latest  # symbolic link to seafile-server-7.0.0
├── seahub-data
│   └── avatars
至此,seafile安装完成!
三、Seafile配置
1、启动seafile服务
切换到seafile的文件目录
cd /opt/seafile/seafile-server-latest
在 seafile-server-latest 目录下,运行如下命令
启动 Seafile服务
./seafile.sh start # 启动 Seafile 服务
启动成功,如下图所示
启动 Seahub 网站
./seahub.sh start # 启动 Seahub 网站
启动成功,第一次启动会提示设置管理员账户相关信息。
What is the email for the admin account?
[ admin email ] #设置管理员账户邮箱
What is the password for the admin account?
[ admin password ] # 设置管理员密码
[ admin password again]# 确认管理员密码

到此Seafile服务已经安装完成
但是在7.0.x 版本之后,8000端口默认监听在127.0.0.1地址上,这意味着您无法直接通过8000端口访问Seafile服务。建议您配置nginx反向代理。
或者直接修改配置文件
2、修改配置文件
首先需要关闭服务
还是在seafile-server-latest问价夹下进行
 ./seafile.sh stop
 ./seahub.sh  stop
修改文件
vim /opt/seafile/conf/gunicorn.conf
将bind = "127.0.0.1:8000"改为将bind = “0.0.0.0:8000”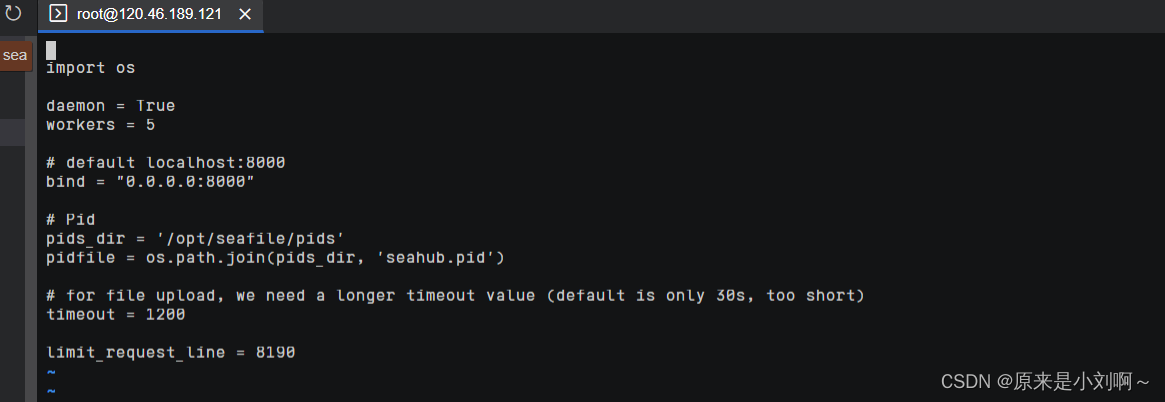
:wq保存退出
重新启动服务
 ./seafile.sh start
 ./seahub.sh  start
在本机浏览器直接输入主机地址,就可以访问了,
http://x.x.x.x:8000/
登陆成功后进入网盘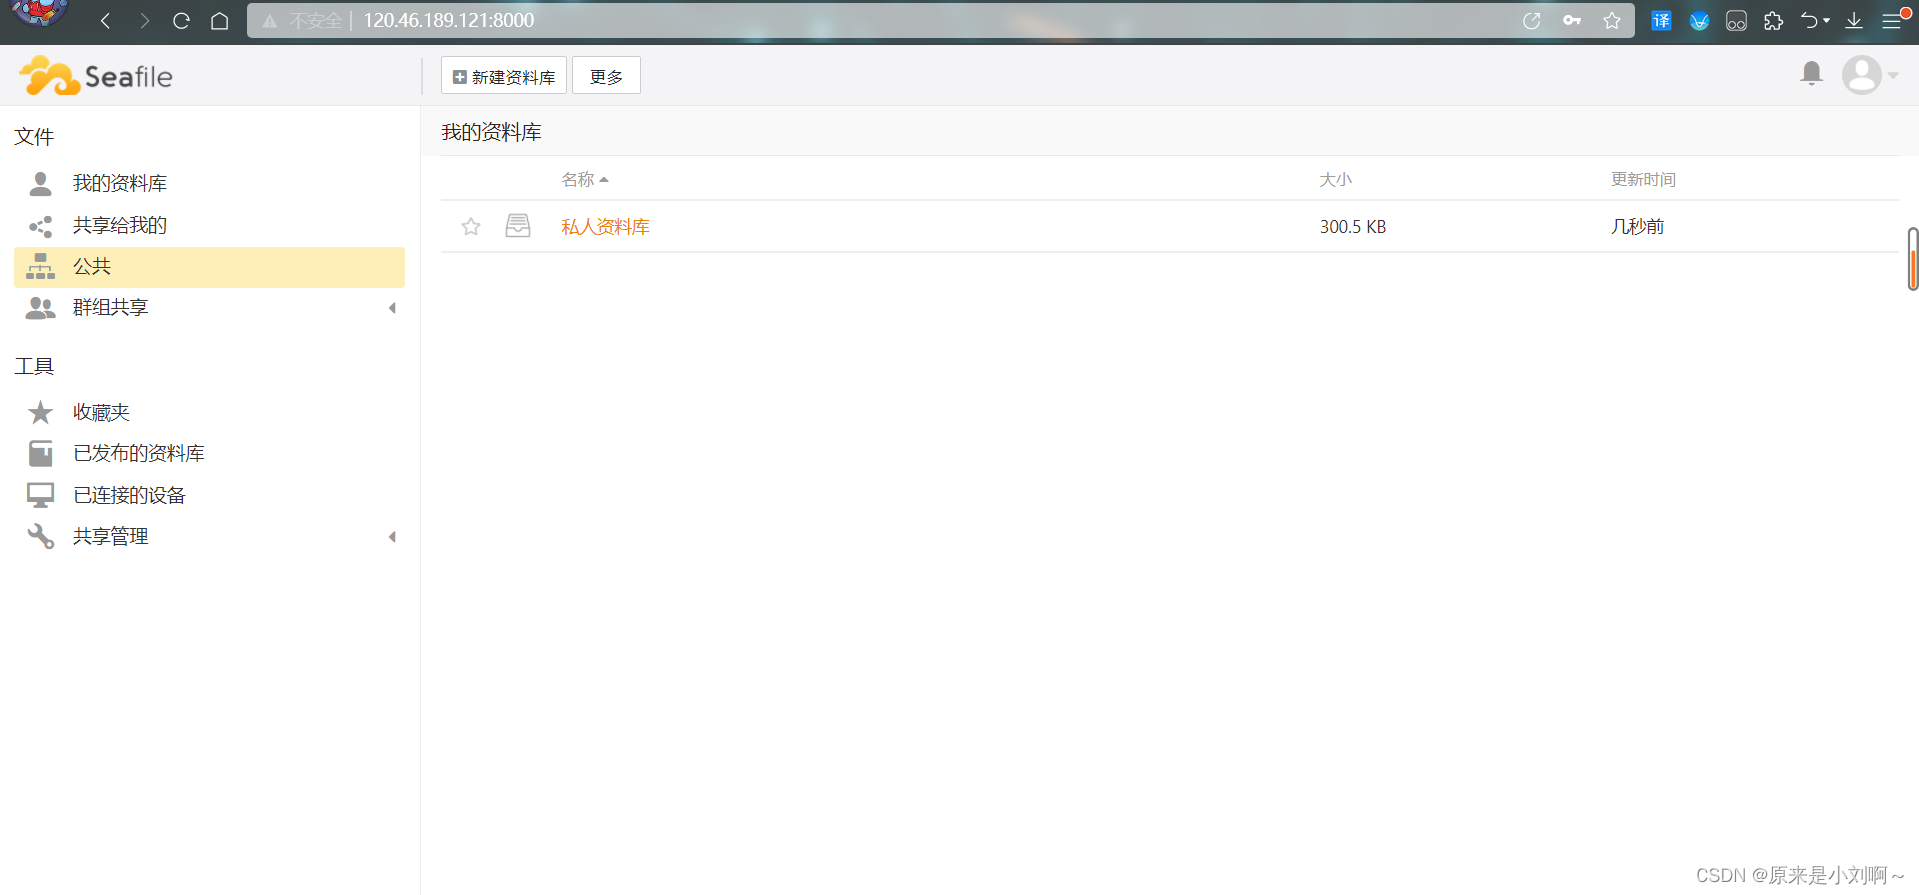
如果访问不成功,在安全组配置中放通8000,8002端口
参考> https://cloud.seafile.com/published/seafile-manual-cn/deploy/using_mysql.md

魔乐社区(Modelers.cn) 是一个中立、公益的人工智能社区,提供人工智能工具、模型、数据的托管、展示与应用协同服务,为人工智能开发及爱好者搭建开放的学习交流平台。社区通过理事会方式运作,由全产业链共同建设、共同运营、共同享有,推动国产AI生态繁荣发展。
更多推荐

 3
3 0
0- 0


 已为社区贡献1条内容

所有评论(0)