LLM+文生图:离线部署、中文提示、急速生成
本文介绍了一种基于中文大模型和FLUX.1文生图模型的图像生成系统。该系统通过中文LLM将用户输入的中文提示词转换为专业英文提示词,再输入到FLUX.1模型生成图像
基本原理:FLUX.1是比较流行的文生图模型,但其提示词只能是英文。因此,我们加了一个中文大模型来进行提示词转换+优化,将我们输入的中文转换为专业的英文提示词,然后送入FLUX.1来生成我们需要的图像。
1. 环境配置
1.1 HuggingFace
需要先配置HuggingFace的镜像、Access Tokens等内容,详情参考我的另一篇博客:HuggingFace如何拉取模型-CSDN博客。
1.2 Ollama
Ollama可以快速安装部署各种LLM,供我们使用。其提供了api方式、python调用等多种使用方式。我们这里会基于python来使用Ollama安装的LLM。
如何安装部署Ollama以及其基本用法,可以参考我的这篇文章:Ollama: 大模型本地部署&远程调用&Python接口_omalla-CSDN博客。
2. 编写代码
2.1 中文提示词转英文提示词
命名为:t2i_prompt_gen.py。
import logging
import json

from ollama import generate


class PromptGenerator(object):
    def __init__(self, model_name='qwen2.5'):
        self.model_name = model_name

    def generate(self, text):
        prompt = """
                请根据用户输入的中文描述,生成一个用于文生图(text-to-image)的专业英文 prompt。生成的英文 prompt 应该具有以下特点:
                1. 详细且具体,包含足够的细节以生成高质量的图像。
                2. 使用专业且准确的英文表达,确保语义清晰。
                3. 包含场景、主体、风格、色彩等关键信息,以便生成符合用户期望的图像。
                4. 请直接输出 JSON 格式的内容,不要包含任何其他解释性文字以及和格式有关的字符。格式如下:
                {{
                  "prompt": "这里是生成的英文 prompt"
                }}
                用户输入的中文描述是:{}
            """
        response = generate(self.model_name, prompt.format(text))
        logging.info("原始输出:{}".format(response['response']))

        try:
            # 尝试解析返回的 JSON 数据
            result = json.loads(response['response'])
            logging.info("解析到的json: ", result)
            return result
        except json.JSONDecodeError:
            logging.info("返回的结果不是有效的 JSON 格式")

        return None
我们这里使用的是中文大语言模型,以方便处理我们的中文输入,并将其转化为专业的英文提示词。为了使用LLM,我们还需要一套提示词的提示词,如上述代码中第12行的prompt所示,这套提示词是单独用其他LLM生成的,当然,你也可以自己写。
利用上述代码,可以将用户输入的不规范的中文转化为专业英文提示词,并以json形式结构化返回。
2.2 文生图
需要安装:diffusers、torch。
命名为:t2i_algo.py。
import random
import cv2
import numpy as np
from PIL import Image

# # 设置环境变量以避免内存碎片化
# import os
# os.environ['PYTORCH_CUDA_ALLOC_CONF'] = 'expandable_segments:True'

from diffusers import FluxPipeline
import torch


class Text2Image(object):
    def __init__(self, model_name='black-forest-labs/FLUX.1-schnell', device='cpu', width=512, height=512,
                 guidance_scale=3.5, num_inference_steps=50, max_sequence_length=512):
        self.device = device
        self.model_name = model_name
        self.width = width
        self.height = height
        self.guidance_scale = guidance_scale
        self.num_inference_steps = num_inference_steps
        self.max_sequence_length = max_sequence_length

        self.pipeline = FluxPipeline.from_pretrained(
            self.model_name,
            torch_dtype=torch.bfloat16,
            # use_safetensors=True
        ).to(self.device)
        # self.pipeline.enable_model_cpu_offload()

    def generate(self, prompt, height=None, width=None,
                 guidance_scale=None, num_inference_steps=None, max_sequence_length=None):
        image = self.pipeline(
            prompt,
            height=self.height if height is None else height,
            width=self.width if width is None else width,
            guidance_scale=self.guidance_scale if guidance_scale is None else guidance_scale,
            num_inference_steps=self.num_inference_steps if num_inference_steps is None else num_inference_steps,
            max_sequence_length=self.max_sequence_length if max_sequence_length is None else max_sequence_length,
            # generator=torch.Generator(self.device).manual_seed(random.randint(0, 100))
        ).images[0]
        image_array = np.array(image)
        # 将 RGB 转换为 BGR
        image_bgr = cv2.cvtColor(image_array, cv2.COLOR_RGB2BGR)
        return image_bgr
上述代码提供了利用2.1得到的英文提示词来进行文生图的相关功能:
-
模型初始化:
-
在初始化方法
__init__中,设置模型名称、运行设备(如 CPU 或 GPU)、图像的宽度和高度、引导比例(guidance_scale)、推理步骤数(num_inference_steps)以及最大序列长度(max_sequence_length)。 -
加载预训练的文本到图像生成模型(使用
diffusers库中的FluxPipeline)。
-
-
图像生成:
-
generate方法接受一个文本提示(prompt),并使用预训练模型生成对应的图像。 -
方法允许用户自定义生成图像的尺寸(高度和宽度)、引导比例、推理步骤数和最大序列长度,这些参数可以在调用时覆盖初始化时设置的默认值。
-
-
图像处理:
-
生成的图像首先以 PIL 图像格式返回,然后转换为 NumPy 数组。
-
使用 OpenCV 将图像从 RGB 格式转换为 BGR 格式,因为 OpenCV 通常使用 BGR 格式处理图像。
-
2.3 gradio示例
为了方便演示,这里提供一个使用gradio写的示例程序:
import json
import os
import sys

sys.path.insert(0, os.getcwd())

import gradio as gr
import argparse
import numpy as np
import cv2


def create_image(prompt, use_prompt_optimization=True, width=512, height=512, guidance_scale=3.5, num_inference_steps=4, max_sequence_length=None):
    print(prompt, use_prompt_optimization,width, height, guidance_scale, num_inference_steps, max_sequence_length)
    width = np.clip(int(width), 224, 1024)
    height = np.clip(int(height), 224, 1024)
    num_inference_steps = np.clip(int(num_inference_steps), 1, 10)
    if use_prompt_optimization:
        while True:
            prompt_json = prompt_generator.generate(prompt)
            if prompt_json is not None:
                prompt = prompt_json['prompt']
                print(prompt)
                break
    img = text2image.generate(
        prompt, height=height, width=width, guidance_scale=guidance_scale,
        num_inference_steps=num_inference_steps, max_sequence_length=max_sequence_length
    )
    img = cv2.cvtColor(img, cv2.COLOR_BGR2RGB)

    # img = np.ones((height, width, 3), dtype=np.uint8) * 128
    # img[:, :, 1] = 0
    # print(img.shape)
    return img


def get_app():
    app = gr.Blocks()
    # 创建 Gradio 界面
    with app:
        gr.Markdown("""
        <div style="text-align: center;">
            <h1>文生图 Demo</h1>
            <h4>通过输入文本生成高质量的图像</h4>
        </div>
        """)
        with gr.Row():
            with gr.Column(scale=1):
                prompt_input = gr.Textbox(label="请输入提示词:", value="小鸟在树上唱歌")
                use_prompt_optimization_checkbox = gr.Checkbox(label="使用大模型优化提示词(中文prompt需勾选此项)", value=True)
                with gr.Row():
                    with gr.Column(scale=1):
                        width_input = gr.Number(label="宽:", value=512)
                    with gr.Column(scale=1):
                        height_input = gr.Number(label="高:", value=512)
                guidance_scale_input = gr.Number(label="引导尺度(值越大,结果与文本越相关;值越小,越具有创意和多样性):", value=3.5)
                num_inference_steps_input = gr.Number(label="推理步数:", value=4)
                # 生成按钮
                generate_button = gr.Button("生成")
            with gr.Column(scale=1):
                # 输出组件(这里我们暂时使用图像框来显示生成的图像)
                image_output = gr.Image(label="生成结果:", width=600)

        # 按钮点击事件
        generate_button.click(
            create_image,
            inputs=[prompt_input, use_prompt_optimization_checkbox, width_input, height_input, guidance_scale_input, num_inference_steps_input],
            outputs=[image_output]
        )
    return app


if __name__ == '__main__':
    parser = argparse.ArgumentParser(description='Image Quality Improvement Server.')
    parser.add_argument('--config', type=str, default='configs/default.json', help='the path of config file')
    args = parser.parse_args()

    config = json.load(open(args.config, 'r'))

    from t2i_prompt_gen import PromptGenerator
    from t2i_algo import Text2Image

    prompt_generator = PromptGenerator(**config['algo_kwargs']['prompt_generator_kwargs'])
    text2image = Text2Image(**config['algo_kwargs']['text2image_kwargs'])

    # 启动应用
    app = get_app()
    app.launch(
        # share=True,
        server_name=config['develop_configs']['gradio_config']['server_name'],
        server_port=config['develop_configs']['gradio_config']['server_port'],
    )
需要使用的配置文件如下(可保存到一个json文件中供上面的demo使用):
{
"develop_configs": {
"algo_server_config": {
"enable_wsgi": true,
"host": "0.0.0.0",
"port": 6000,
"debug": false
},
"project_config": {
"logfile_config": {
"backupCount": 5,
"level": 20
}
},
"gradio_config": {
"server_name": "0.0.0.0",
"server_port": 8880
}
},
"algo_kwargs": {
"prompt_generator_kwargs": {
"model_name": "qwen2.5"
},
"text2image_kwargs": {
"model_name": "black-forest-labs/FLUX.1-schnell",
"device": "cpu",
"width": 320,
"height": 240,
"guidance_scale": 3.5,
"num_inference_steps": 4,
"max_sequence_length": 512
},
"describe": "各算法的配置【如有】"
}
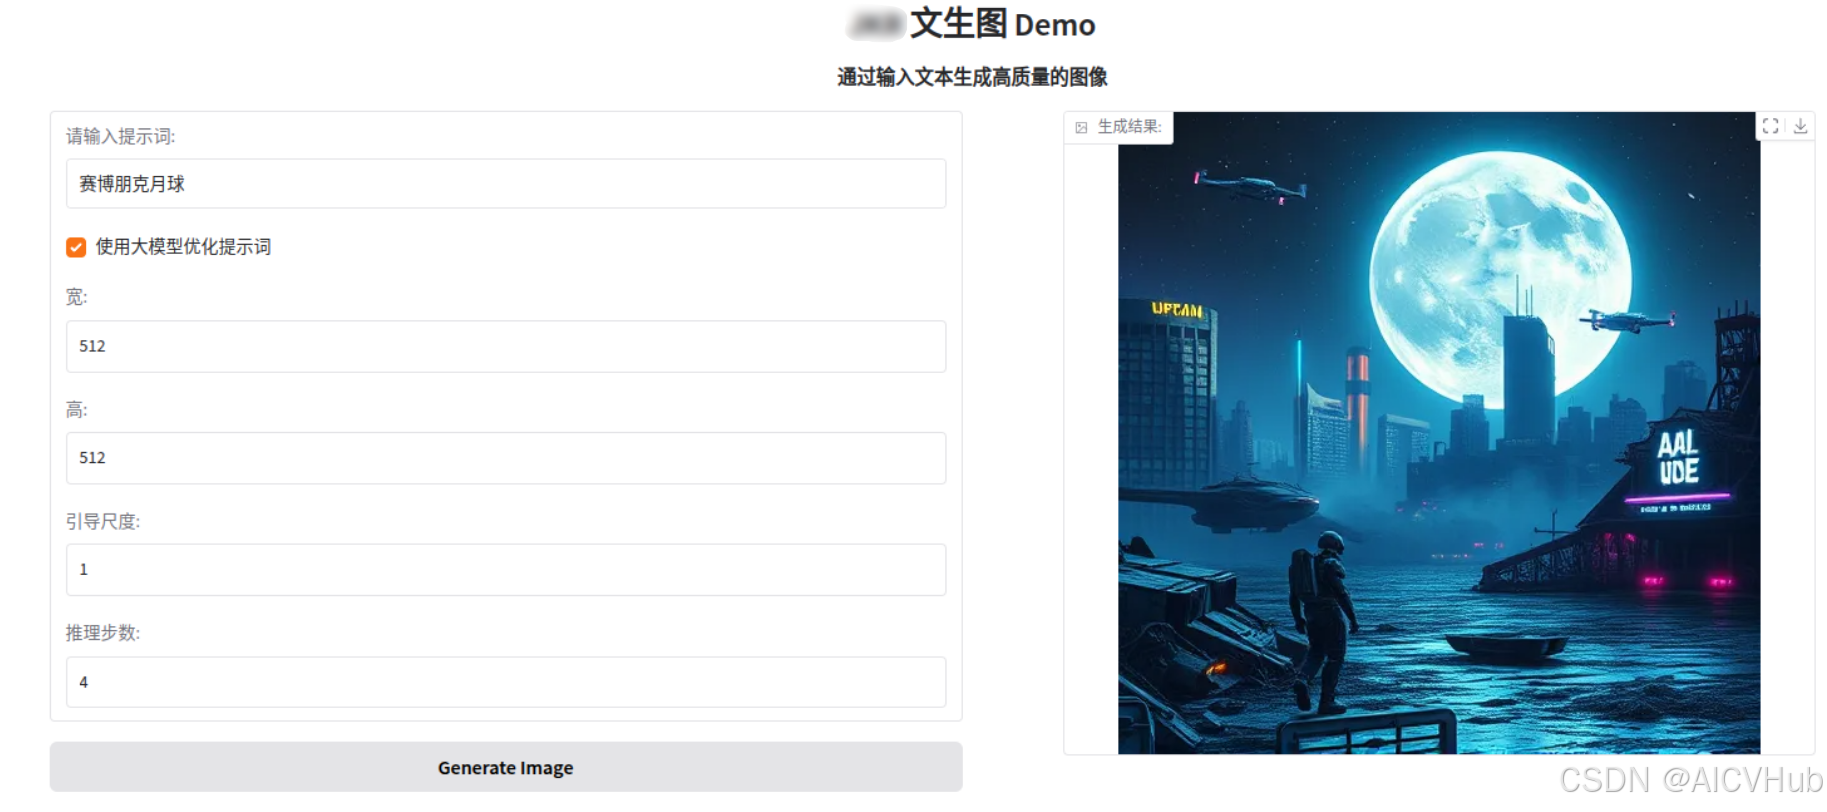
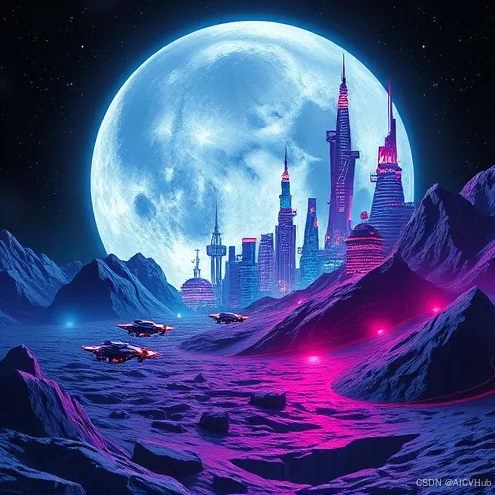
}启动后,就可以通过输入中文提示词,来获取生成的图像了。
比如,我们输入:赛博朋克月球,就可以得到:

魔乐社区(Modelers.cn) 是一个中立、公益的人工智能社区,提供人工智能工具、模型、数据的托管、展示与应用协同服务,为人工智能开发及爱好者搭建开放的学习交流平台。社区通过理事会方式运作,由全产业链共同建设、共同运营、共同享有,推动国产AI生态繁荣发展。
更多推荐


 25
25 0
0- 0


 已为社区贡献23条内容

所有评论(0)