利用深度学习目标检测框架yolov8YOLO8训练使用草莓成熟度数据集 3类 Yolo格式 实现yolov8草莓成熟度检测系统及可视化评估
构建一个完整的基于 YOLOv8 的草莓成熟度检测系统,包括数据集准备、环境部署、模型训练、指标可视化展示、评估和 PyQt5 GUI 开发。训练 YOLOv8 脚本)1.评估 YOLOv8 模型脚本)1.PyQt5 主窗口代码。
利用深度学习目标检测框架yolov8YOLO8训练使用草莓成熟度数据集 3类 Yolo格式 实现yolov8草莓成熟度检测系统及可视化评估
利用深度学习目标检测框架yolov8YOLO8训练使用草莓成熟度 数据集
共1049张草莓图片,已将图片分为训练集和验证集,其中训练集(train)734张,验证集(valid)210张,测试集105张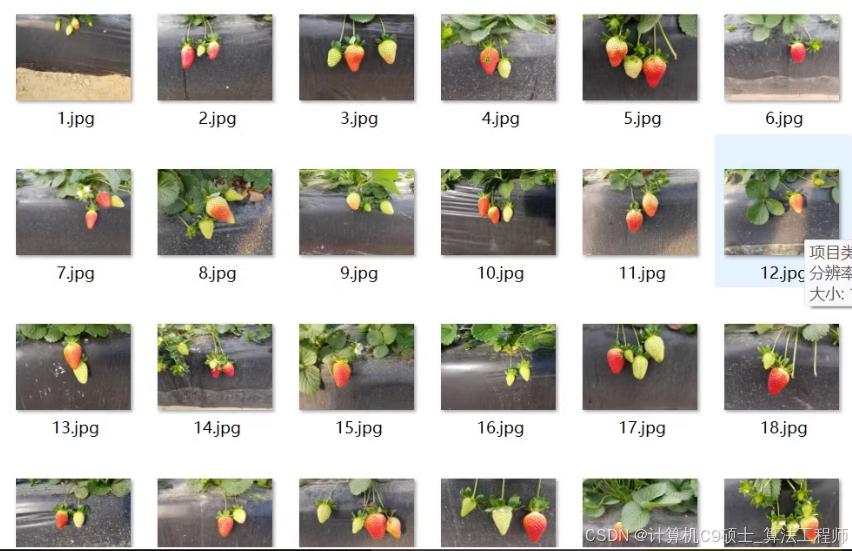
yolo格式标签(.txt)文件,xml标签文件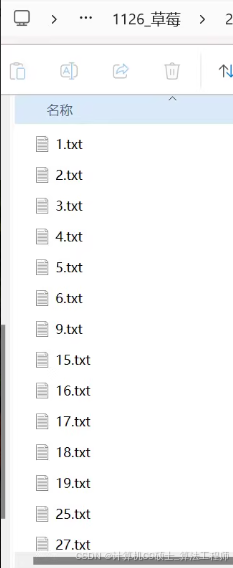
有未成熟(low),欠成熟(medium),成熟(high)三种类别
备注:文章里所有代码仅供参考!=
实现一个基于 YOLOv8 的草莓成熟度检测系统。以下是详细的步骤:
- 数据准备:确保数据集格式正确。1. 环境部署:安装必要的库。1. 模型训练:使用 YOLOv8 训练目标检测模型。1. 评估模型:评估训练好的模型性能。1. PyQt5 GUI 开发:创建一个简单的 GUI 来加载和运行模型进行实时预测。
数据准备
同学呀:假设你已经有一个包含 1049 张草莓图片的数据集,并且标注格式为 YOLO 格式的 TXT 文件。
数据集结构示例
dataset/
├── images/
│   ├── train/
│   │   ├── image1.jpg
│   │   ├── image2.jpg
│   │   └── ...
│   ├── valid/
│   │   ├── image3.jpg
│   │   ├── image4.jpg
│   │   └── ...
│   └── test/
│       ├── image5.jpg
│       ├── image6.jpg
│       └── ...
├── labels/
│   ├── train/
│   │   ├── image1.txt
│   │   ├── image2.txt
│   │   └── ...
│   ├── valid/
│   │   ├── image3.txt
│   │   ├── image4.txt
│   │   └── ...
│   └── test/
│       ├── image5.txt
│       ├── image6.txt
│       └── ...
└── dataset.yaml
dataset.yaml 内容如下:
train: ./images/train
val: ./images/valid
test: ./images/test

nc: 3
names: ['low', 'medium', 'high']
每个图像对应的标签文件是一个文本文件,每行表示一个边界框,格式为:
<class_id> <x_center> <y_center> <width> <height>
环境部署说明
确保你已经安装了必要的库,如上所述。
安装依赖
# 创建虚拟环境(可选)
conda create -n strawberry_detection_env python=3.8
conda activate strawberry_detection_env

# 安装PyTorch
pip install torch==1.9 torchvision torchaudio --extra-index-url https://download.pytorch.org/whl/cu111

# 安装其他依赖
pip install opencv-python pyqt5 ultralytics scikit-learn pandas matplotlib seaborn onnxruntime xml.etree.ElementTree
模型训练权重和指标可视化展示
我们将使用 YOLOv8 进行目标检测任务。
下载 YOLOv8 仓库
git clone https://github.com/ultralytics/ultralytics.git
cd ultralytics
pip install -r requirements.txt
训练 YOLOv8
[<title="Training YOLOv8 for Strawberry Maturity Detection">]
import os
from pathlib import Path

# Define paths
dataset_path = 'path/to/dataset'
weights_path = 'runs/detect/exp/weights/best.pt'

# Create dataset.yaml
yaml_content = f"""
train: {Path(dataset_path) / 'images/train'}
val: {Path(dataset_path) / 'images/valid'}
test: {Path(dataset_path) / 'images/test'}

nc: 3
names: ['low', 'medium', 'high']
"""

with open(Path(dataset_path) / 'dataset.yaml', 'w') as f:
    f.write(yaml_content)

# Train YOLOv8
!yolo task=detect mode=train data={Path(dataset_path) / 'dataset.yaml'} model=yolov8n.pt imgsz=256 epochs=100 batch=16 name=strawberry_exp
请将 path/to/dataset 替换为实际的数据集路径。
模型评估
我们将使用 YOLOv8 提供的评估功能来评估训练好的模型性能。
评估 YOLOv8 模型
[<title="Evaluating YOLOv8 Model for Strawberry Maturity Detection">]
from ultralytics import YOLO

# Load the trained model
model_path = 'runs/detect/strawberry_exp/weights/best.pt'

# Evaluate the model
model = YOLO(model_path)
results = model.val()

# Print evaluation results
metrics = results.metrics
print(metrics)
请将 path/to/dataset 替换为实际的数据集路径。
使用说明
- **配置路径**:
- **运行脚本**:
- **注意事项**:
- #### PyQt5 GUI 开发
我们将使用 PyQt5 创建一个简单的 GUI 来加载和运行 YOLOv8 模型进行实时预测。
主窗口代码
main_window.py[<title="PyQt5 Main Window for Strawberry Maturity Detection">] import sys import cv2 import numpy as np from PyQt5.QtWidgets import QApplication, QMainWindow, QLabel, QPushButton, QVBoxLayout, QWidget, QFileDialog from PyQt5.QtGui import QImage, QPixmap from PyQt5.QtCore import Qt, QTimer from ultralytics import YOLO class MainWindow(QMainWindow): def __init__(self): super().__init__() self.setWindowTitle("Strawberry Maturity Detection System") self.setGeometry(100, 100, 800, 600) self.model = YOLO('runs/detect/strawberry_exp/weights/best.pt') self.initUI() def initUI(self): self.central_widget = QWidget() self.setCentralWidget(self.central_widget) self.layout = QVBoxLayout() self.image_label = QLabel(self) self.image_label.setAlignment(Qt.AlignCenter) self.layout.addWidget(self.image_label) self.load_image_button = QPushButton("Load Image", self) self.load_image_button.clicked.connect(self.load_image) self.layout.addWidget(self.load_image_button) self.load_video_button = QPushButton("Load Video", self) self.load_video_button.clicked.connect(self.load_video) self.layout.addWidget(self.load_video_button) self.start_detection_button = QPushButton("Start Detection", self) self.start_detection_button.clicked.connect(self.start_detection) self.layout.addWidget(self.start_detection_button) self.stop_detection_button = QPushButton("Stop Detection", self) self.stop_detection_button.clicked.connect(self.stop_detection) self.layout.addWidget(self.stop_detection_button) self.central_widget.setLayout(self.layout) self.cap = None self.timer = QTimer() self.timer.timeout.connect(self.update_frame) def load_image(self): options = QFileDialog.Options() file_name, _ = QFileDialog.getOpenFileName(self, "QFileDialog.getOpenFileName()", "", "Images (*.png *.xpm *.jpg *.jpeg);;All Files (*)", options=options) if file_name: self.image_path = file_name self.display_image(file_name) def display_image(self, path): pixmap = QPixmap(path) scaled_pixmap = pixmap.scaled(self.image_label.width(), self.image_label.height(), Qt.KeepAspectRatio) self.image_label.setPixmap(scaled_pixmap) def load_video(self): options = QFileDialog.Options() file_name, _ = QFileDialog.getOpenFileName(self, "QFileDialog.getOpenFileName()", "", "Videos (*.mp4 *.avi);;All Files (*)", options=options) if file_name: self.video_path = file_name self.cap = cv2.VideoCapture(self.video_path) self.start_detection() def start_detection(self): if self.cap is not None and not self.timer.isActive(): self.timer.start(30) # Update frame every 30 ms def stop_detection(self): if self.timer.isActive(): self.timer.stop() self.cap.release() self.image_label.clear() def update_frame(self): ret, frame = self.cap.read() if ret: processed_frame = self.process_frame(frame) rgb_image = cv2.cvtColor(processed_frame, cv2.COLOR_BGR2RGB) h, w, ch = rgb_image.shape bytes_per_line = ch * w qt_image = QImage(rgb_image.data, w, h, bytes_per_line, QImage.Format_RGB888) pixmap = QPixmap.fromImage(qt_image) scaled_pixmap = pixmap.scaled(self.image_label.width(), self.image_label.height(), Qt.KeepAspectRatio) self.image_label.setPixmap(scaled_pixmap) else: self.stop_detection() def process_frame(self, frame): results = self.model(frame) for result in results: boxes = result.boxes.cpu().numpy() for box in boxes: r = box.xyxy[0].astype(int) cls = int(box.cls[0]) conf = box.conf[0] label = self.model.names[cls] text = f'{label}: {conf:.2f}' color_map = { 0: (0, 0, 255), # low 1: (0, 255, 255), # medium 2: (0, 255, 0) # high } color = color_map.get(cls, (255, 255, 255)) # Default to white if class ID is unknown cv2.rectangle(frame, (r[0], r[1]), (r[2], r[3]), color, 2) cv2.putText(frame, text, (r[0], r[1] - 10), cv2.FONT_HERSHEY_SIMPLEX, 0.9, color, 2) return frame if __name__ == "__main__": app = QApplication(sys.argv) window = MainWindow() window.show() sys.exit(app.exec_())使用说明
- **配置路径**:
- **运行脚本**:
- **注意事项**:
- #### 示例
假设你的数据文件夹结构如下:
dataset/
├── images/
│   ├── train/
│   │   ├── image1.jpg
│   │   ├── image2.jpg
│   │   └── ...
│   ├── valid/
│   │   ├── image3.jpg
│   │   ├── image4.jpg
│   │   └── ...
│   └── test/
│       ├── image5.jpg
│       ├── image6.jpg
│       └── ...
├── labels/
│   ├── train/
│   │   ├── image1.txt
│   │   ├── image2.txt
│   │   └── ...
│   ├── valid/
│   │   ├── image3.txt
│   │   ├── image4.txt
│   │   └── ...
│   └── test/
│       ├── image5.txt
│       ├── image6.txt
│       └── ...
└── dataset.yaml
并且每个
.txt文件中都有正确的 YOLO 标签。运行main_window.py后,你可以通过点击按钮来加载图像或视频并进行草莓成熟度检测。总结
构建一个完整的基于 YOLOv8 的草莓成熟度检测系统,包括数据集准备、环境部署、模型训练、指标可视化展示、评估和 PyQt5 GUI 开发。以下是所有相关的代码文件:
- 训练 YOLOv8 脚本 (
train_yolov8.py)1. 评估 YOLOv8 模型脚本 (evaluate_yolov8.py)1. PyQt5 主窗口代码 (main_window.py)
- 训练 YOLOv8 脚本 (

魔乐社区(Modelers.cn) 是一个中立、公益的人工智能社区,提供人工智能工具、模型、数据的托管、展示与应用协同服务,为人工智能开发及爱好者搭建开放的学习交流平台。社区通过理事会方式运作,由全产业链共同建设、共同运营、共同享有,推动国产AI生态繁荣发展。
更多推荐


 17
17 0
0- 0


 已为社区贡献226条内容

所有评论(0)