记录docker配置nginx+php:7.3-fpm的过程和一些踩坑经历
因为在网上搜索了好多篇博客都未能彻底解决问题,所以才写了这篇博客用于记录自己的踩坑历程和用于日后参考;因为是解决问题之后才写的博客,文中的命令也许会有差错,欢迎在评论区指正写的不好,希望我的踩坑经历能够帮助到您,蟹蟹(。・ω・。)
前言
想自己搭建靶场所以学习docker+nginx+php,但是这两天一直卡在配环境上,踩了许多的坑最终才完成环境的配置
参考了docker部署php和nginx环境_docker nginx php-CSDN博客
编辑文件如果不喜欢用vim,可以用vscode远程连接然后打开文件夹进行文件编辑等操作
参考:vscode连接远程服务器(傻瓜式教学)-CSDN博客
OS:centOS 7.9 64位
要点
- 最好是自己创建一个网络,把php容器和nginx容器都加入该网络中(做了这步就很神奇的可以解析php了)
- 自己创建目录结构尽量明了
- nginx容器的根目录路径和php容器的根目录路径要挂载到同一目录
- php.ini需要自己创建
- 挂载后根目录中要有index.html等默认页面,不然会报403(刚遇到让人一头雾水)
- nginx的default.conf和nginx.conf一定要配置正确
- 有问题多看日志,多拿错误日志信息问问ai(
过程
创建自己的网络
docker network create mynet后续php容器,nginx容器加入该网络
创建辅助容器
创建php和nginx两个容器,用于复制配置文件(仅仅用于辅助,我就没进行端口映射)
docker run -d --name nginx nginx
docker run -d --name php php:7.3-fpm
1.参数说明:-d 后台运行 --name 给容器取个名字
-
路径设置
使用docker cp命令:
将容器中路径的内容复制到docker host路径中
docker cp 容器名:路径 目的路径
nginx的配置文件位于/etc/nginx
nginx的日志文件位于/var/log
php配置文件位于/usr/local/etc/php

将nginx和php的配置文件复制到主机的/data下,nginx的日志文件复制到/data/nginx
mkdir /data
cd /data
#nginx
docker cp nginx:/etc/nginx ./
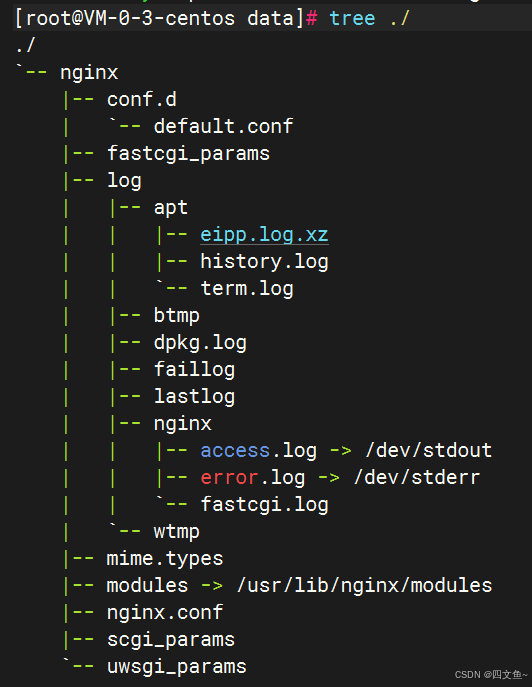
docker cp nginx:/var/log ./nginx用tree /data看一下目录层级有没有正确
如果没有安装tree
yum install tree
复制php配置文件

进入php容器,可以用:
php -i | grep php.ini
得到配置文件路径
/usr/local/etc/php
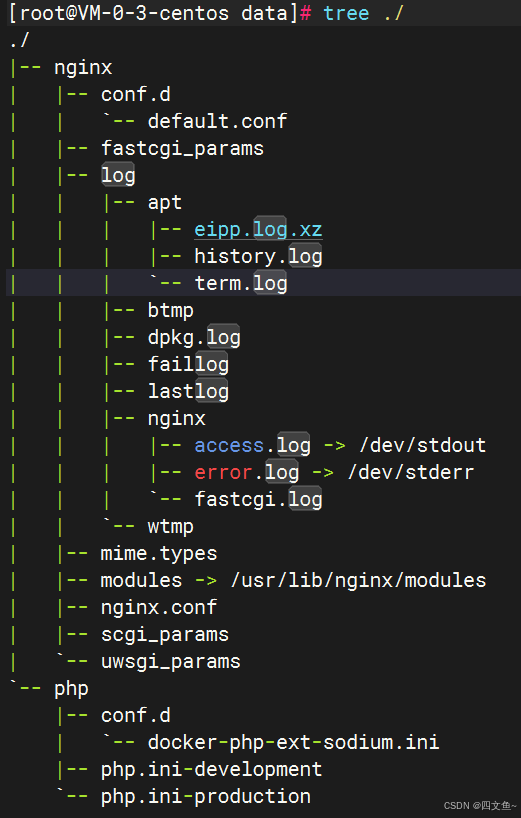
#php (工作路径处于/data下)
docker cp php:/usr/local/etc/php ./
做完以上操作后,目录层级结构如下:
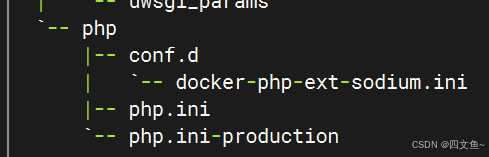
做完这些,我们需要将php.ini-development或者php.ini-production中的其中一个改成php.ini
#工作路径/data
mv ./php/php.ini-development ./php/php.ini
修改后如下
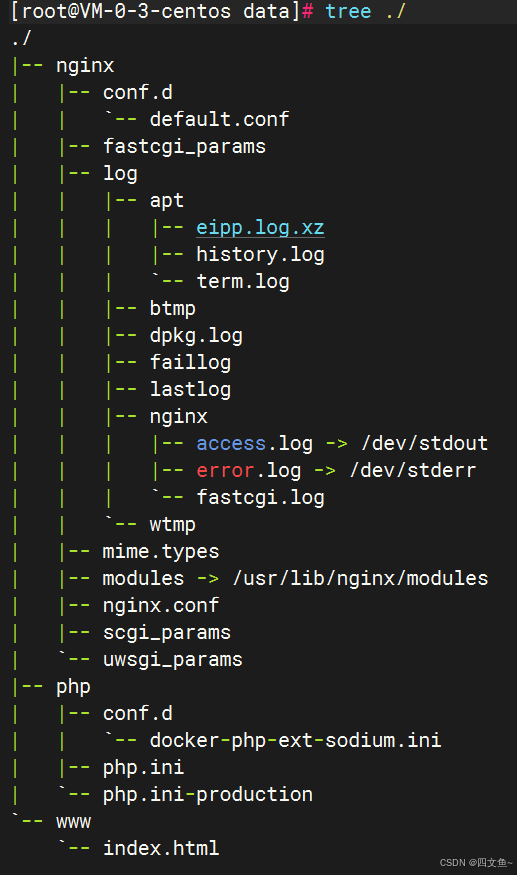
然后我们需要有一个工作目录用来挂载初始页面目录,并且放一个index.html进去(不然到时候会403)
mkdir ./www
touch ./www/index.html
目录层级如下
删除辅助容器
#加上-f就不用先停止容器
docker rm -f $(docker ps -aq)
创建新容器
nginx:
docker run \
-d --name nginx \
-p 80:80 \
-v /data/nginx/nginx.conf:/etc/nginx/nginx.conf \
-v /data/nginx/conf.d/default.conf:/etc/nginx/conf.d/default.conf \
-v /data/nginx/log:/var/log/nginx \
-v /data/www:/usr/share/nginx/www \
--network mynet \
nginx
1. 我新建了初始页面目录/usr/share/nginx/www(原本的初始页面目录为/usr/share /nginx/html),将它挂载到我们创建好的工作目录/data/www下
2. 配置文件一定要正确挂载
3. --network表示加入自己创建的网络mynet
php:
docker run \
-d --name php \
-p 9000:9000 \
-v /data/php/php.ini:/usr/local/etc/php/php.ini \
-v /data/www:/usr/share/nginx/www \
--network mynet \
php:7.3-fpm
1. php和nginx的初始页面必须挂载到同一路径
所以在php和nginx的容器内都新建了/usr/share/nginx/www
2. --network表示加入自己创建的网络mynet
修改配置文件
修改default.conf
#原本的default.conf
server {
    listen       80;
    listen  [::]:80;
    server_name  localhost;

    #access_log  /var/log/nginx/host.access.log  main;

    location / {
        root   /usr/share/nginx/html;
        index  index.html index.htm;
    }

    #error_page  404              /404.html;

    # redirect server error pages to the static page /50x.html
    #
    error_page   500 502 503 504  /50x.html;
    location = /50x.html {
        root   /usr/share/nginx/html;
    }

    # proxy the PHP scripts to Apache listening on 127.0.0.1:80
    #
    #location ~ \.php$ {
    #    proxy_pass   http://127.0.0.1;
    #}

    # pass the PHP scripts to FastCGI server listening on 127.0.0.1:9000
    #
    #location ~ \.php$ {
    #    root           html;
    #    fastcgi_pass   127.0.0.1:9000;
    #    fastcgi_index  index.php;
    #    fastcgi_param  SCRIPT_FILENAME  /scripts$fastcgi_script_name;
    #    include        fastcgi_params;
    #}

    # deny access to .htaccess files, if Apache's document root
    # concurs with nginx's one
    #
    #location ~ /\.ht {
    #    deny  all;
    #}
}
我们需要更改:
- 将root改为之前设置的初始页面路径/usr/share/nginx/www
- 在location \块中,index中增加index.php
- 将location ~ \.php$块中的fastcgi_pass改成 php容器名:9000
fastcgi_param那一行改成:fastcgi_param SCRIPT_FILENAME $document_root$fastcgi_script_name;
#修改后的default.conf
server {
    listen       80;
    listen  [::]:80;
    server_name  localhost;

    #access_log  /var/log/nginx/host.access.log  main;
    root /usr/share/nginx/www;
    location / {
        # root   /usr/share/nginx/html;
        # index  index.html index.htm;
        index index.php index.html;
    }

    #error_page  404              /404.html;

    # redirect server error pages to the static page /50x.html
    #
    error_page   500 502 503 504  /50x.html;
    location = /50x.html {
        # root   /usr/share/nginx/html;
    }

    # proxy the PHP scripts to Apache listening on 127.0.0.1:80
    #
    #location ~ \.php$ {
    #    proxy_pass   http://127.0.0.1;
    #}

    # pass the PHP scripts to FastCGI server listening on 127.0.0.1:9000
    #
    location ~ \.php$ {
    #    root           html;
       fastcgi_pass   php:9000;
       fastcgi_index  index.php;
    #    fastcgi_param  SCRIPT_FILENAME  /scripts$fastcgi_script_name;
        fastcgi_param SCRIPT_FILENAME $document_root$fastcgi_script_name;
       include        fastcgi_params;
    }

    # deny access to .htaccess files, if Apache's document root
    # concurs with nginx's one
    #
    #location ~ /\.ht {
    #    deny  all;
    #}
}
修改nginx.conf
在http块中把default.conf的内容复制进去
#nginx.conf

user  nginx;
worker_processes  auto;

error_log  /var/log/nginx/error.log notice;
pid        /var/run/nginx.pid;


events {
    worker_connections  1024;
}


http {
    include       /etc/nginx/mime.types;
    default_type  application/octet-stream;

    log_format  main  '$remote_addr - $remote_user [$time_local] "$request" '
                      '$status $body_bytes_sent "$http_referer" '
                      '"$http_user_agent" "$http_x_forwarded_for"';

    access_log  /var/log/nginx/access.log  main;

    sendfile        on;
    #tcp_nopush     on;

    keepalive_timeout  65;

    #gzip  on;

    include /etc/nginx/conf.d/*.conf;

    server {
    listen       80;
    listen  [::]:80;
    server_name  localhost;

    #access_log  /var/log/nginx/host.access.log  main;
    root /usr/share/nginx/www;
    location / {
        # root   /usr/share/nginx/html;
        # index  index.html index.htm;
        index index.php index.html;
        try_files $uri $uri/ /info.php?$query_string;
    }

    #error_page  404              /404.html;

    # redirect server error pages to the static page /50x.html
    #
    error_page   500 502 503 504  /50x.html;
    location = /50x.html {
        # root   /usr/share/nginx/html;
    }

    # proxy the PHP scripts to Apache listening on 127.0.0.1:80
    #
    #location ~ \.php$ {
    #    proxy_pass   http://127.0.0.1;
    #}

    # pass the PHP scripts to FastCGI server listening on 127.0.0.1:9000
    #
    location ~ \.php$ {
    #    root           html;
       fastcgi_pass   php:9000;
       fastcgi_index  index.php;
    #    fastcgi_param  SCRIPT_FILENAME  /scripts$fastcgi_script_name;
        fastcgi_param SCRIPT_FILENAME $document_root$fastcgi_script_name;
        access_log /var/log/nginx/fastcgi.log main;
        include        fastcgi_params;
    }

    # deny access to .htaccess files, if Apache's document root
    # concurs with nginx's one
    #
    #location ~ /\.ht {
    #    deny  all;
    #}
}
}
测试
目录挂载与端口映射
vscode打开/data/www/index.html
随便写点html进去
<!DOCTYPE html>
<html>

<head>
        <title>the nginx's page made by my index.html!</title>
        <style>
                html {
                        color-scheme: light dark;
                }

                body {
                        width: 35em;
                        margin: 0 auto;
                        font-family: Tahoma, Verdana, Arial, sans-serif;
                }
        </style>
</head>

<body>
        <h1>the nginx's page made by my index.html!</h1>
        <p>If you see this page, the nginx web server is successfully installed and
                working. Further configuration is required.</p>

        <p>For online documentation and support please refer to
                <a href="http://bilibili.com/">bilibili</a>.<br />
                Commercial support is available at
                <a href="http://bilibili.com/">bilibili.com</a>.
        </p>

        <p><em>Thank you for using nginx.</em></p>
</body>

</html> 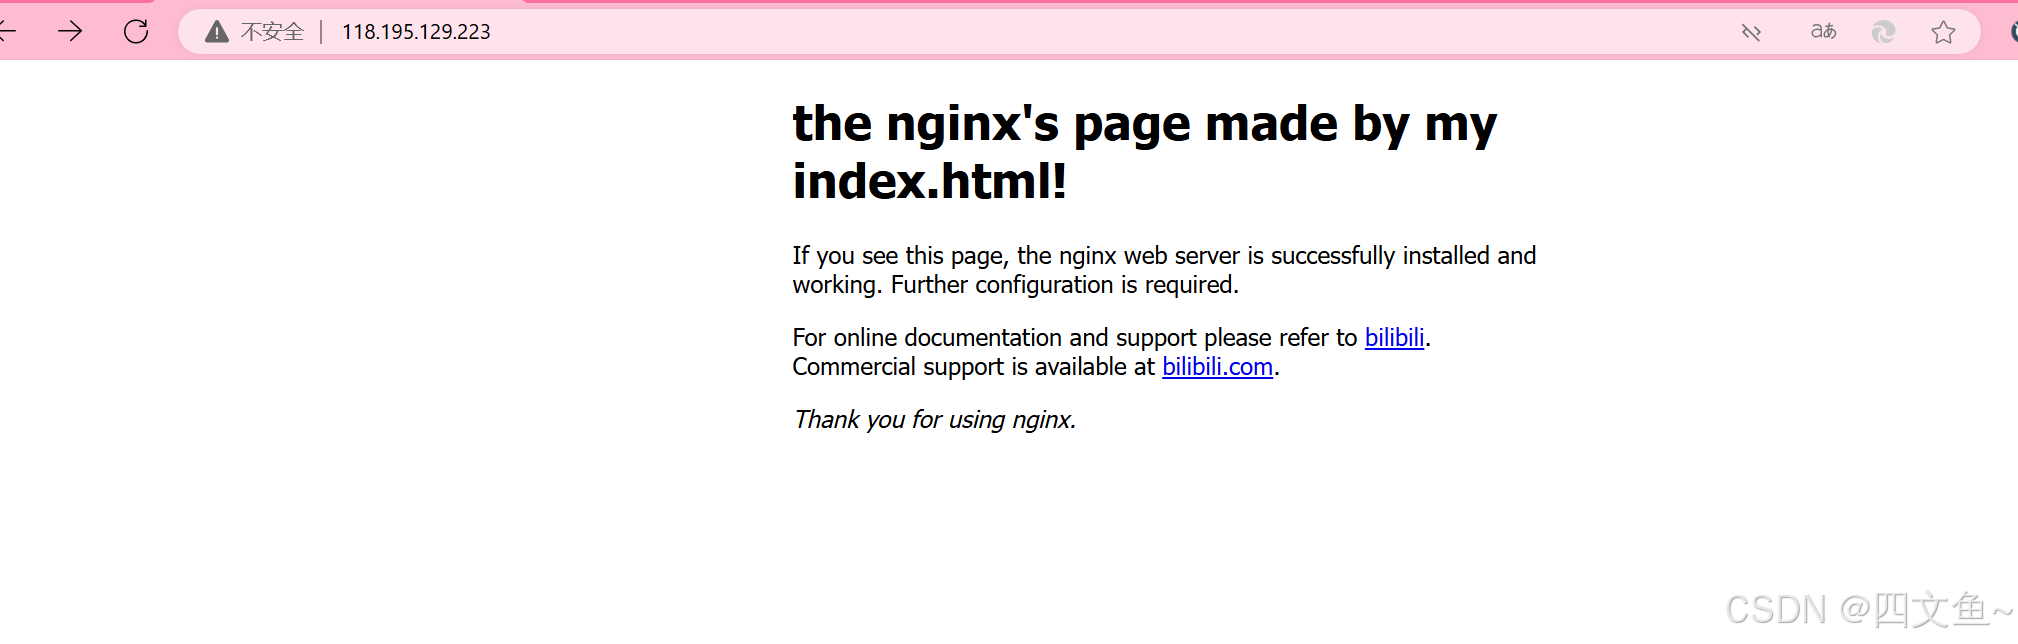
若正常显示,证明目录挂载没有出错
如果遇到403,检查有没有进行端口映射或者工作目录下是不是没有index.html
检查php能否被解析
创建index.php,写入
<?php phpinfo();?>如果在浏览器中输入:
http://你的dockerhost的ip:nginx端口/index.php
有以下结果

证明配置成功
出现的问题以及解决
- nginx容器挂载目录前可以正常访问初始页面,但是进行目录挂载后就显示403:是因为挂载的工作目录下没有index.html,相当于挂载了一个空的目录给nginx容器,就无法访问了
- 环境及路径都配置好了,访问本机ip也能正常显示挂载的index.html,但是访问php文件出现直接把php文件下载下来或者显示File not found:先查看nginx的日志看一看有没有报错,然后检查default.conf和nginx.conf有没有错误,看一下location /块下的index有没有加上index.php,如果容器使用自己创建的网络,配置文件的php块中的fastcgi_pass要写成php容器名:映射的容器端口,root设置为容器内的初始页面路径,astcgi_param那一行改成:fastcgi_param SCRIPT_FILENAME $document_root$fastcgi_script_name;
最后
因为在网上搜索了好多篇博客都未能彻底解决问题,所以才写了这篇博客用于记录自己的踩坑历程和用于日后参考;
因为是解决问题之后才写的博客,文中的命令也许会有差错,欢迎在评论区指正
写的不好,希望我的踩坑经历能够帮助到您,蟹蟹(。・ω・。)

魔乐社区(Modelers.cn) 是一个中立、公益的人工智能社区,提供人工智能工具、模型、数据的托管、展示与应用协同服务,为人工智能开发及爱好者搭建开放的学习交流平台。社区通过理事会方式运作,由全产业链共同建设、共同运营、共同享有,推动国产AI生态繁荣发展。
更多推荐


 45
45 0
0- 0


 已为社区贡献2条内容

所有评论(0)