使用Qwen-VL多模态大模型实现图片识别分析:详细教程与代码实战
本文介绍了基于阿里云Qwen-VL多模态大模型搭建图片识别分析系统的方法。首先通过环境配置和API密钥获取完成准备工作,然后详细展示了核心代码实现,包括单张图片分析和批量处理功能。文章还提供了多种实用提示词示例,并优化代码结构为工作流模式,包含图片校验、模型推理、结果解析等节点。最终系统能够准确识别图片内容并生成详细描述,为开发者提供了一套完整的AI视觉分析解决方案。
·
目录
引言
在人工智能飞速发展的今天,多模态大模型已经成为AI领域的热点技术。今天我将分享如何基于阿里云的Qwen-VL大模型,快速搭建一个图片识别分析系统。通过简单的Python代码,你就能让AI"看懂"图片内容并详细描述出来。
一、环境准备与依赖安装
1.1 安装必要的Python包
pip install dashscope python-dotenv
1.2 获取API密钥
前往阿里云DashScope平台(https://dashscope.aliyun.com/)注册账号并创建API Key。开通qwen-vl-max模型的权限。
1.3 创建配置文件
在项目根目录创建.env文件,添加你的API密钥:
Aliyun_API_KEY=你的API密钥
二、核心代码实现
下面是完整的代码实现,包含详细注释:
import os
from dotenv import load_dotenv
import dashscope
from dashscope import MultiModalConversation
# 加载环境变量
load_dotenv()
# 获取API密钥
api_key = os.getenv("Aliyun_API_KEY")
if not api_key:
raise ValueError("请在 .env 文件中设置 Aliyun_API_KEY")
dashscope.api_key = api_key
def analyze_image(image_path, prompt="请详细描述这张图片的内容。"):
"""
使用Qwen-VL多模态模型分析图片内容
参数:
image_path (str): 图片文件路径
prompt (str): 给模型的提示词
返回:
str: 图片分析结果
"""
# 处理Windows路径,确保是绝对路径并添加file://前缀
abs_path = os.path.abspath(image_path)
local_file_url = f"file://{abs_path}"
print(f"正在分析图片: {abs_path}")
print(f"使用的提示词: {prompt}")
# 构建多模态消息
messages = [
{
"role": "user",
"content": [
{"image": local_file_url},
{"text": prompt}
]
}
]
try:
# 调用qwen-vl-max模型
response = MultiModalConversation.call(
model='qwen-vl-max',
messages=messages
)
if response.status_code == 200:
print("\n=== 识别结果 ===")
if 'choices' in response.output and len(response.output.choices) > 0:
content = response.output.choices[0].message.content
# 处理返回内容(可能是列表或文本)
result_text = ""
if isinstance(content, list):
for item in content:
if 'text' in item:
result_text += item['text'] + "\n"
else:
result_text = content
print(result_text)
return result_text
else:
print("未获取到有效响应")
return None
else:
print(f"调用失败,状态码: {response.status_code}")
print(f"错误信息: {response.message}")
return None
except Exception as e:
print(f"发生异常: {str(e)}")
return None
def batch_analyze_images(image_folder, output_file="results.txt"):
"""
批量分析文件夹中的图片
参数:
image_folder (str): 图片文件夹路径
output_file (str): 输出结果文件
"""
supported_extensions = ['.jpg', '.jpeg', '.png', '.bmp', '.gif']
results = []
for filename in os.listdir(image_folder):
if any(filename.lower().endswith(ext) for ext in supported_extensions):
image_path = os.path.join(image_folder, filename)
print(f"\n{'='*50}")
print(f"分析图片: {filename}")
print('='*50)
result = analyze_image(image_path)
if result:
results.append(f"图片: {filename}\n分析结果:\n{result}\n{'-'*50}\n")
# 保存结果到文件
with open(output_file, 'w', encoding='utf-8') as f:
f.writelines(results)
print(f"\n所有分析结果已保存到: {output_file}")
if __name__ == "__main__":
# 示例1:分析单张图片
image_file = "一只鸭.jpg"
if os.path.exists(image_file):
# 使用默认提示词
analyze_image(image_file)
# 使用自定义提示词
custom_prompt = "请识别图片中的动物,描述其特征、颜色、姿态,并判断可能的环境。"
analyze_image(image_file, custom_prompt)
else:
print(f"找不到文件: {image_file}")
print("请准备测试图片或修改图片路径")
# 示例2:批量分析图片
# image_folder = "test_images"
# if os.path.exists(image_folder):
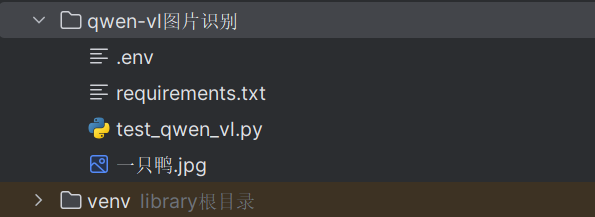
# batch_analyze_images(image_folder)文件列表:
三、功能扩展与实用示例
以下是一些实用的提示词示例,可根据不同场景使用:
# 1. 物品识别与计数
item_prompt = "请识别图片中的所有物品,并统计它们的数量。"

# 2. 场景理解
scene_prompt = "分析图片中的场景,包括时间、地点、天气、氛围等要素。"

# 3. 情感分析
emotion_prompt = "根据图片内容分析可能表达的情感或情绪。"

# 4. 创意描述
creative_prompt = "用富有诗意的语言描述这张图片。"

# 5. 技术分析
tech_prompt = "从摄影角度分析这张图片的构图、光线、色彩等元素。"

def specialized_analysis(image_path, analysis_type="detailed"):
    """专业化的图片分析"""
    prompts = {
        "detailed": "请详细描述这张图片的内容。",
        "objects": "请识别图片中的所有物体及其位置关系。",
        "scene": "描述图片中的场景和环境。",
        "creative": "用富有想象力的语言描述这张图片。",
        "technical": "从专业角度分析图片的构图、色彩等技术要素。"
    }

    prompt = prompts.get(analysis_type, prompts["detailed"])
    return analyze_image(image_path, prompt)
四、代码优化-创建图工作流
4.1 检验图片节点
class ImageValidationNode(BaseNode):
    """校验图片是否存在"""
    def execute(self, context: WorkflowContext) -> bool:
        image_path = context.get("image_path")
        if not image_path:
            logger.error("上下文中未找到 image_path")
            return False

        if not os.path.exists(image_path):
            logger.error(f"图片文件不存在: {image_path}")
            return False

        abs_path = os.path.abspath(image_path)
        context.set("abs_image_path", abs_path)
        context.set("image_url", f"file://{abs_path}")
        logger.info(f"图片校验通过: {abs_path}")
        return True
4.2 Qwen-vl 模型推理节点
class QwenVLInferenceNode(BaseNode):
    """调用 Qwen-VL 模型进行推理"""
    def execute(self, context: WorkflowContext) -> bool:
        image_url = context.get("image_url")
        prompt = context.get("prompt") or "请描述这张图片"

        logger.info(f"开始调用 Qwen-VL API, Prompt: {prompt}")

        messages = [
            {
                "role": "user",
                "content": [
                    {"image": image_url},
                    {"text": prompt}
                ]
            }
        ]

        try:
            response = MultiModalConversation.call(
                model='qwen-vl-max',
                messages=messages
            )

            if response.status_code == 200:
                context.set("raw_response", response)
                logger.info("API 调用成功")
                return True
            else:
                logger.error(f"API 调用失败: {response.code} - {response.message}")
                return False

        except Exception as e:
            logger.error(f"API 调用异常: {str(e)}")
            return False
4.3 解析并格式化节点
class ResultParsingNode(BaseNode):
    """解析并格式化输出结果"""
    def execute(self, context: WorkflowContext) -> bool:
        response = context.get("raw_response")
        if not response:
            return False

        result_text = ""
        if 'choices' in response.output and len(response.output.choices) > 0:
            content = response.output.choices[0].message.content
            if isinstance(content, list):
                for item in content:
                    if 'text' in item:
                        result_text += item['text']
            else:
                result_text = str(content)

        context.set("final_result", result_text)
        logger.info(f"解析完成,结果长度: {len(result_text)}")
        return True
4.4 创建图对象并添加边
def build_and_run_workflow(image_path: str, prompt: str):
    # 1. 创建图
    graph = WorkflowGraph("Qwen-VL-Image-Analysis-Flow")

    # 2. 创建节点
    node_validate = ImageValidationNode("Image Validation")
    node_inference = QwenVLInferenceNode("Qwen Inference")
    node_parser = ResultParsingNode("Result Parsing")
    node_output = OutputDisplayNode("Output Display")

    # 3. 构建连接关系 (线性流: Validate -> Inference -> Parser -> Output)
    node_validate.add_next(node_inference)
    node_inference.add_next(node_parser)
    node_parser.add_next(node_output)

    # 4. 设置起始节点
    graph.set_start_node(node_validate)

    # 5. 初始化上下文
    ctx = WorkflowContext()
    ctx.set("image_path", image_path)
    ctx.set("prompt", prompt)

    # 6. 运行
    graph.run(ctx)
五、效果展示
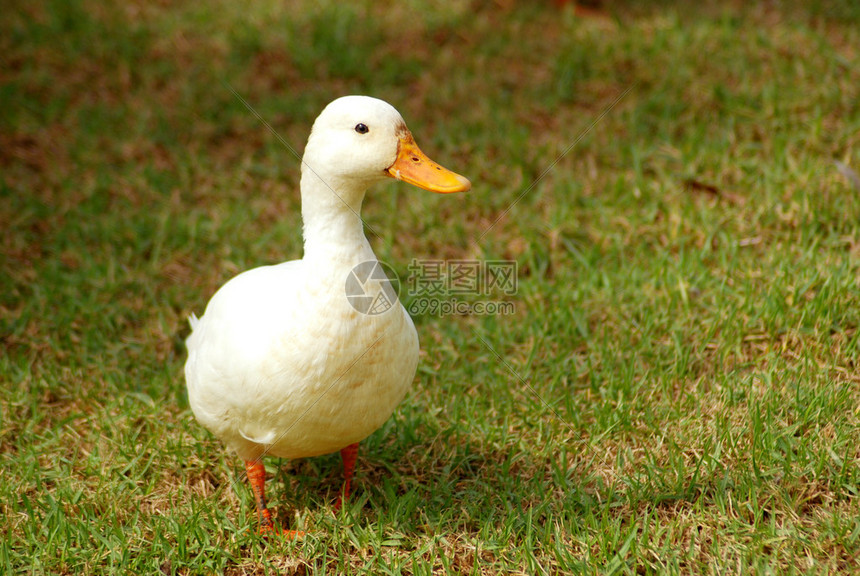
图片:
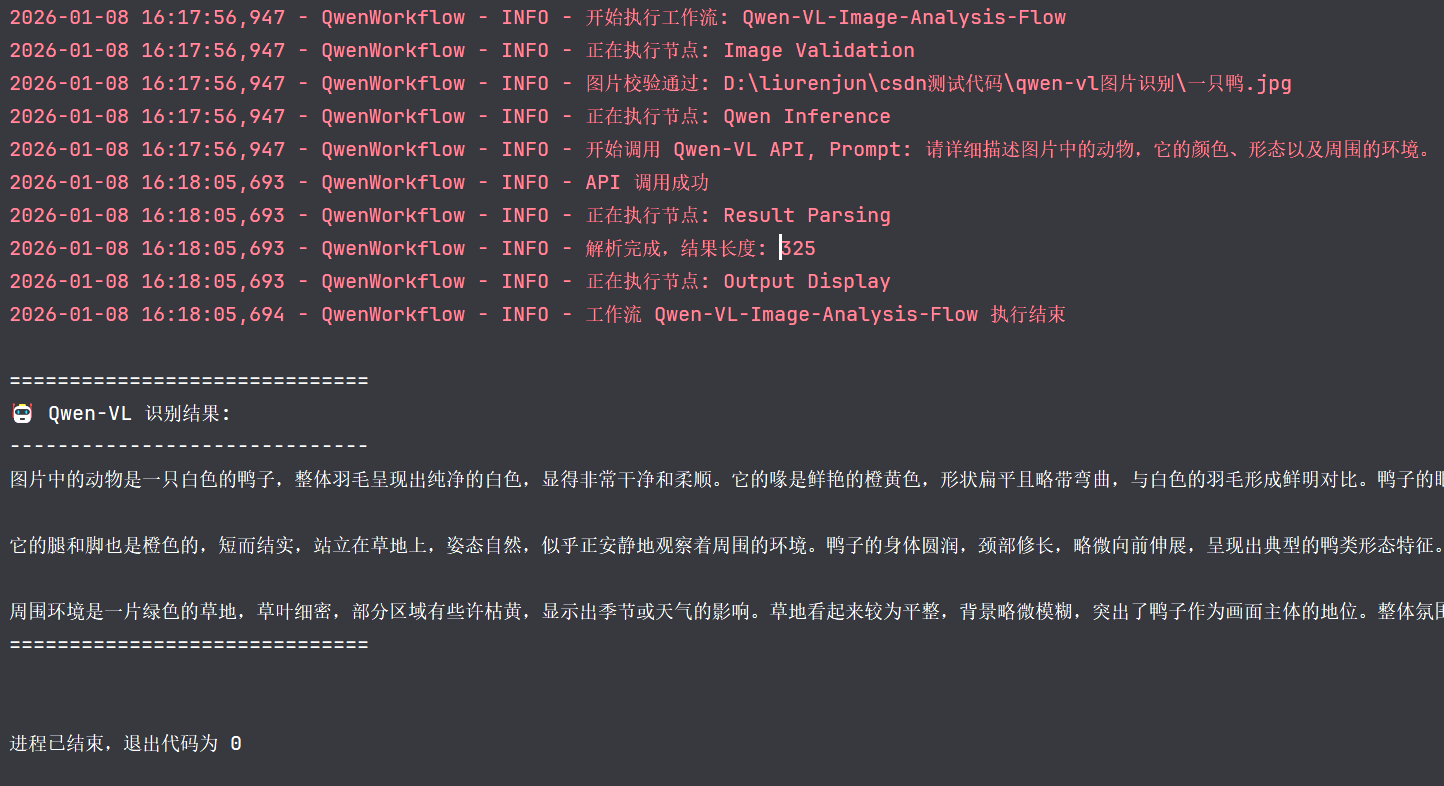
模型分析结果:
六、完整代码
import os
import logging
from abc import ABC, abstractmethod
from typing import Dict, Any, List, Optional
from dotenv import load_dotenv
import dashscope
from dashscope import MultiModalConversation

# 配置日志
logging.basicConfig(level=logging.INFO, format='%(asctime)s - %(name)s - %(levelname)s - %(message)s')
logger = logging.getLogger("QwenWorkflow")

# 加载环境变量
load_dotenv()
dashscope.api_key = os.getenv("Aliyun_API_KEY")

# --- 核心工作流引擎 ---

class WorkflowContext:
    """工作流上下文,用于在节点间传递数据"""
    def __init__(self):
        self._data: Dict[str, Any] = {}

    def set(self, key: str, value: Any):
        self._data[key] = value

    def get(self, key: str) -> Any:
        return self._data.get(key)

    def __repr__(self):
        return f"WorkflowContext(keys={list(self._data.keys())})"

class BaseNode(ABC):
    """节点基类"""
    def __init__(self, name: str):
        self.name = name
        self.next_nodes: List['BaseNode'] = []

    def add_next(self, node: 'BaseNode'):
        self.next_nodes.append(node)
        return node  # 返回节点以支持链式调用

    @abstractmethod
    def execute(self, context: WorkflowContext) -> bool:
        """执行节点逻辑,返回 True 表示继续,False 表示终止"""
        pass

class WorkflowGraph:
    """图工作流管理器"""
    def __init__(self, name: str):
        self.name = name
        self.start_node: Optional[BaseNode] = None

    def set_start_node(self, node: BaseNode):
        self.start_node = node

    def run(self, context: WorkflowContext):
        logger.info(f"开始执行工作流: {self.name}")
        if not self.start_node:
            logger.error("未设置起始节点")
            return

        current_node = self.start_node
        # 这里是一个简单的线性执行或基于条件的选择,
        # 对于更复杂的图(如有分支),execute 可以返回下一个要执行的节点

        queue = [current_node]
        visited = set()

        while queue:
            node = queue.pop(0)
            if node in visited:
                continue

            logger.info(f"正在执行节点: {node.name}")
            try:
                success = node.execute(context)
                visited.add(node)

                if success:
                    # 将后续节点加入队列
                    # 在简单线性流中,通常只有一个 next
                    for next_node in node.next_nodes:
                        queue.append(next_node)
                else:
                    logger.warning(f"节点 {node.name} 执行返回 False,工作流终止或跳过后续分支")
            except Exception as e:
                logger.error(f"节点 {node.name} 执行出错: {str(e)}")
                break

        logger.info(f"工作流 {self.name} 执行结束")

# --- 具体业务节点实现 ---

class ImageValidationNode(BaseNode):
    """校验图片是否存在"""
    def execute(self, context: WorkflowContext) -> bool:
        image_path = context.get("image_path")
        if not image_path:
            logger.error("上下文中未找到 image_path")
            return False

        if not os.path.exists(image_path):
            logger.error(f"图片文件不存在: {image_path}")
            return False

        abs_path = os.path.abspath(image_path)
        context.set("abs_image_path", abs_path)
        context.set("image_url", f"file://{abs_path}")
        logger.info(f"图片校验通过: {abs_path}")
        return True

class QwenVLInferenceNode(BaseNode):
    """调用 Qwen-VL 模型进行推理"""
    def execute(self, context: WorkflowContext) -> bool:
        image_url = context.get("image_url")
        prompt = context.get("prompt") or "请描述这张图片"

        logger.info(f"开始调用 Qwen-VL API, Prompt: {prompt}")

        messages = [
            {
                "role": "user",
                "content": [
                    {"image": image_url},
                    {"text": prompt}
                ]
            }
        ]

        try:
            response = MultiModalConversation.call(
                model='qwen-vl-max',
                messages=messages
            )

            if response.status_code == 200:
                context.set("raw_response", response)
                logger.info("API 调用成功")
                return True
            else:
                logger.error(f"API 调用失败: {response.code} - {response.message}")
                return False

        except Exception as e:
            logger.error(f"API 调用异常: {str(e)}")
            return False

class ResultParsingNode(BaseNode):
    """解析并格式化输出结果"""
    def execute(self, context: WorkflowContext) -> bool:
        response = context.get("raw_response")
        if not response:
            return False

        result_text = ""
        if 'choices' in response.output and len(response.output.choices) > 0:
            content = response.output.choices[0].message.content
            if isinstance(content, list):
                for item in content:
                    if 'text' in item:
                        result_text += item['text']
            else:
                result_text = str(content)

        context.set("final_result", result_text)
        logger.info(f"解析完成,结果长度: {len(result_text)}")
        return True

class OutputDisplayNode(BaseNode):
    """展示最终结果"""
    def execute(self, context: WorkflowContext) -> bool:
        result = context.get("final_result")
        print("\n" + "="*30)
        print("🤖 Qwen-VL 识别结果:")
        print("-" * 30)
        print(result)
        print("="*30 + "\n")
        return True

# --- 构建并运行工作流 ---

def build_and_run_workflow(image_path: str, prompt: str):
    # 1. 创建图
    graph = WorkflowGraph("Qwen-VL-Image-Analysis-Flow")

    # 2. 创建节点
    node_validate = ImageValidationNode("Image Validation")
    node_inference = QwenVLInferenceNode("Qwen Inference")
    node_parser = ResultParsingNode("Result Parsing")
    node_output = OutputDisplayNode("Output Display")

    # 3. 构建连接关系 (线性流: Validate -> Inference -> Parser -> Output)
    node_validate.add_next(node_inference)
    node_inference.add_next(node_parser)
    node_parser.add_next(node_output)

    # 4. 设置起始节点
    graph.set_start_node(node_validate)

    # 5. 初始化上下文
    ctx = WorkflowContext()
    ctx.set("image_path", image_path)
    ctx.set("prompt", prompt)

    # 6. 运行
    graph.run(ctx)

if __name__ == "__main__":
    # 测试用例
    test_image = "一只鸭.jpg"
    test_prompt = "请详细描述图片中的动物,它的颜色、形态以及周围的环境。"

    build_and_run_workflow(test_image, test_prompt)

魔乐社区(Modelers.cn) 是一个中立、公益的人工智能社区,提供人工智能工具、模型、数据的托管、展示与应用协同服务,为人工智能开发及爱好者搭建开放的学习交流平台。社区通过理事会方式运作,由全产业链共同建设、共同运营、共同享有,推动国产AI生态繁荣发展。
更多推荐


 5
5 0
0- 0


 已为社区贡献1条内容

所有评论(0)