opencv 安装_树莓派编译安装OpenCV
本文将介绍如何在树莓派上编译安装OpenCV,当前使用的是OpenCV4.1.2,同时支持Python3和C++,编译完成后,将通过一个C++和Python的Demo打开CSI摄像头来测试开发环境是否搭建完成。一、系统配置1、系统版本信息查看pi@raspberrypi:~ $ lsb_release -aNo LSB modules are available.Distributor ...
本文将介绍如何在树莓派上编译安装OpenCV,当前使用的是OpenCV4.1.2,同时支持Python3和C++,编译完成后,将通过一个C++和Python的Demo打开CSI摄像头来测试开发环境是否搭建完成。
一、系统配置
1、系统版本信息查看
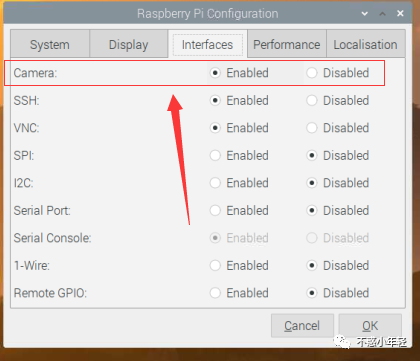
pi@raspberrypi:~ $ lsb_release -aNo LSB modules are available.Distributor ID: RaspbianDescription: Raspbian GNU/Linux 10 (buster)Release: 10Codename: busterpi@raspberrypi:~ $ uname -aLinux raspberrypi 5.4.51-v7l+ #1333 SMP Mon Aug 10 16:51:40 BST 2020 armv7l GNU/Linuxpi@raspberrypi:~ $ cat /etc/debdebconf.conf debian_version pi@raspberrypi:~ $ cat /etc/debian_version 10.42、开启摄像头
sudo modprobe bcm2835-v4l2 # to load it and create /dev/video0
使用以下命令检测摄像头是否配置成功:
raspivid -t 0 -cs 0
3、准备视频流设备
在OpenCV中,若要读取摄像头数据,需要开启v4l2(video for linux 2),开启后,摄像头设备文件为/dev/video0,OpenCV将从该文件中读取视频流文件。
开启方法如下:
sudo vim /etc/modules
在末尾添加一行:
bcm2835-v4l2
4、更换系统软件源
强烈推介使用清华大学的源
帮助文档[1]
pi@raspberrypi:~ $ cat /etc/apt/sources.list.d/raspi.list | grep -v ^#deb https://mirrors.bfsu.edu.cn/raspberrypi/ buster main uipi@raspberrypi:~ $ cat /etc/apt/sources.list | grep -v ^#deb http://mirrors.tuna.tsinghua.edu.cn/raspbian/raspbian/ buster main contrib non-free rpideb-src http://mirrors.tuna.tsinghua.edu.cn/raspbian/raspbian/ buster main contrib non-free rpi二、安装OpenCV依赖包
1、 安装numpy
NumPy(Numerical Python) 是 Python 语言的一个扩展程序库,支持大量的维度数组与矩阵运算,此外也针对数组运算提供大量的数学函数库。
sudo pip3 install numpy -i https://pypi.douban.com/simple/
2、系统C/C++编译环境
sudo apt-get install build-essential cmake
3、图像工具包
sudo apt-get install libjpeg8-dev sudo apt-get install libtiff5-dev sudo apt-get install libjasper-dev sudo apt-get install libpng12-dev4、视频I/O包
sudo apt-get install libavcodec-dev libavformat-dev libswscale-dev libv4l-dev5、gtk2.0和优化函数包
sudo apt-get install libatlas-base-dev gfortran -ysudo apt-get install libgtk2.0-dev -y三、编译安装OpenCV
1、下载opencv-4.1.2
下载地址[2]
git clone -b 4.1.2 --recursive https://github.com/opencv/opencv.git
2、下载opencv_contrib-4.1.2
下载地址[3]
git clone -b 4.1.0 --recursive https://github.com/opencv/opencv_contrib.git
3、配置Cmake
Cmake是一款跨平台的编译工具,经过配置,可输出适配于树莓派平台的Makefile
cd /home/pi/openvcsrc/opencv-4.1.2mkdir buildcd buildcmake -D CMAKE_BUILD_TYPE=RELEASE \-D CMAKE_INSTALL_PREFIX=/usr/local \-D INSTALL_C_EXAMPLES=ON \-D INSTALL_PYTHON_EXAMPLES=ON \-D OPENCV_EXTRA_MODULES_PATH=/home/pi/openvcsrc/opencv_contrib-4.1.2/modules \-D BUILD_EXAMPLES=ON \-D WITH_LIBV4L=ON \-D PYTHON3_EXECUTABLE=/usr/bin/python3.7 \-D PYTHON_INCLUDE_DIR=/usr/include/python3.7 \-D PYTHON_LIBRARY=/usr/lib/arm-linux-gnueabihf/libpython3.7m.so \-D PYTHON3_NUMPY_INCLUDE_DIRS=/usr/lib/python3/dist-packages/numpy/core/include \..注意,以上命令需要根据您具体的软件环境进行修改,否则很可能报错
•CMAKE_BUILD_TYPE=RELEASE \ 代表编译类型为发行版本•CMAKE_INSTALL_PREFIX=/usr/local \ 安装路径•INSTALL_C_EXAMPLES=ON \ C demo•INSTALL_PYTHON_EXAMPLES=ON \ Python demo•OPENCV_EXTRA_MODULES_PATH=/home/pi/openvcsrc/opencv_contrib-4.1.2/modules \ OpenCV Contrib路径•BUILD_EXAMPLES=ON \ 编译demo•WITH_LIBV4L=ON \ 开启Video for Linux•PYTHON3_EXECUTABLE=/usr/bin/python3.7 \ Python3路径•PYTHON_INCLUDE_DIR=/usr/include/python3.7 \ Python3 include文件夹•PYTHON_LIBRARY=/usr/lib/arm-linux-gnueabihf/libpython3.7m.so \ Python3库•PYTHON3_NUMPY_INCLUDE_DIRS=/usr/lib/python3/dist-packages/numpy/core/include \ Python3 Numpy安装路径
4、编译
在Cmake生成Makefile之后,便可进行编译
make
注意:make编译时间比较长,一般编译时间在5小时左右。
5、安装
sudo make install
6、刷新系统动态链接库
sudo ldconfig
7、测试是否安装成功
pi@raspberrypi:~ $ python3Python 3.7.3 (default, Jul 25 2020, 13:03:44) [GCC 8.3.0] on linuxType "help", "copyright", "credits" or "license" for more information.>>> import cv2>>> cv2.__version__'4.1.2'四、OpenCV使用事例
1、Python使用事例
#!/usr/bin/env python'''A demo to show whether The OpenCV and CSI camera is well installed'''import numpy as npimport cv2def main(): print("OpenCV Version:{}".format(cv2.__version__)) # 0: use CSI camera,1:use USB camera cap = cv2.VideoCapture(0) if(not cap.isOpened()): print("can't open this camera") while(True): ret, FrameImage = cap.read() if ret == True: # change to gray image GrayImage = cv2.cvtColor(FrameImage, cv2.COLOR_BGR2GRAY) # blur the image BlurImage = cv2.blur(GrayImage,(7,7)) # use canny to detect contour CannyImage = cv2.Canny(BlurImage,3,9) # show the image cv2.imshow('Camera Capture',CannyImage) #Press Q to quit if (cv2.waitKey(1)) == ord('q'): cap.release() break else: breakif __name__ == '__main__': print(__doc__) main() # Release resource cv2.destroyAllWindows()2、C++使用事例
#include #include using namespace std;using namespace cv;int main(){ cout << "OpenCV Version:" << CV_VERSION << endl; // 0: use CSI camera,1:use USB camera VideoCapture cap(0); if(!cap.isOpened()) { cout< return -1; } Mat FrameImage,GrayImage,BlurImage,CannyImage; while(1) { cap>>FrameImage; //Change to gray image cvtColor(FrameImage,GrayImage,COLOR_BGR2GRAY); //blur the image blur(GrayImage,BlurImage,Size(7,7)); //use canny to detect contour Canny(BlurImage,CannyImage,3,9); //show the image imshow("Camera Capture",CannyImage); //Press Q to quit if(char(waitKey(1)) == 'q') { break; } } return 0;}CMakeLists.txt
cmake_minimum_required(VERSION 3.0)project(00_Test_OpenCV)find_package(OpenCV REQUIRED)add_executable(00_Test_OpenCV 00_Test_OpenCV.cpp)target_link_libraries(00_Test_OpenCV ${OpenCV_LIBS})运行
cmakemake./00_Test_OpenCVReferences
[1] 帮助文档: https://mirrors.tuna.tsinghua.edu.cn/help/raspbian/[2] 下载地址: https://github.com/opencv/opencv[3] 下载地址: https://github.com/opencv/opencv_contrib

魔乐社区(Modelers.cn) 是一个中立、公益的人工智能社区,提供人工智能工具、模型、数据的托管、展示与应用协同服务,为人工智能开发及爱好者搭建开放的学习交流平台。社区通过理事会方式运作,由全产业链共同建设、共同运营、共同享有,推动国产AI生态繁荣发展。
更多推荐


 0
0 0
0- 0


 已为社区贡献7条内容

所有评论(0)