将图像分割数据集转为目标检测数据集(外接矩形坐标保存到XML文件中)
·
一、前言
通过借助cv2.findContours()函数来获取轮廓的坐标,再对坐标进行排序从而画出外接矩形,再将坐标转存到XML文件中,实现目标检测数据集构建(VOC格式),并根据xml文件在原图画出矩形框验证转换结果。
二、代码
原图
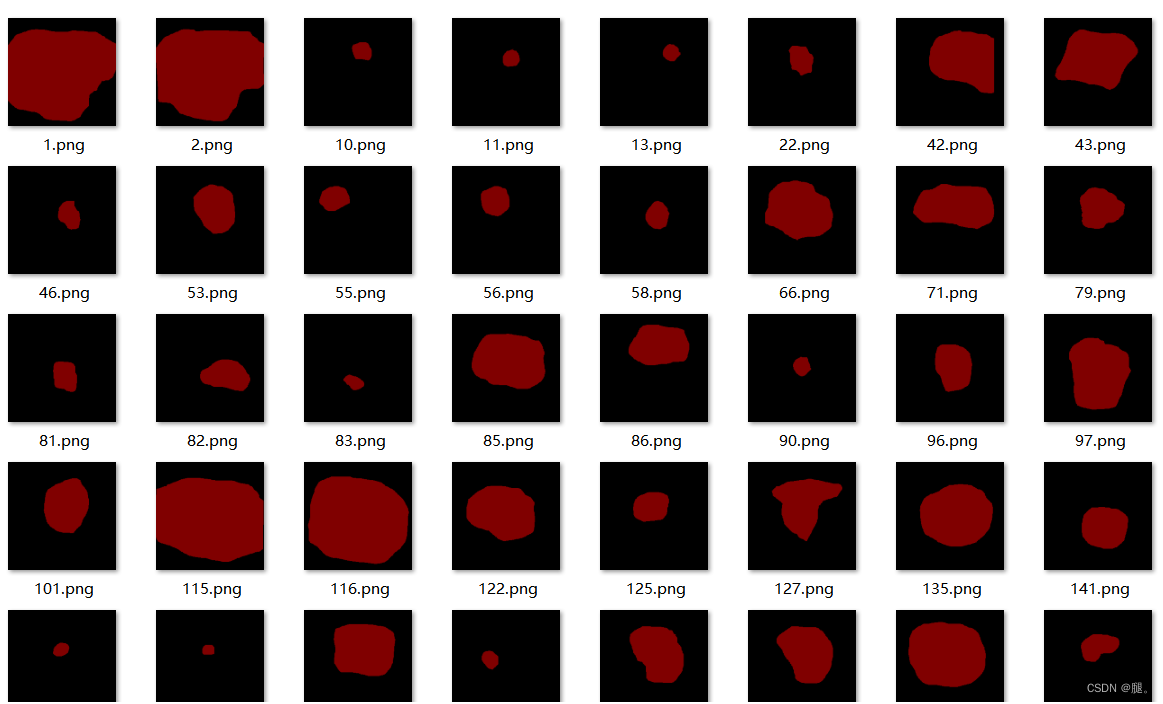
1、将外接矩形坐标保存到xml文件中(注意修改相应的地址以及图片名的后缀)
import cv2
import numpy as np
import pandas as pd
import os


def get_coor(img):
    gray = cv2.cvtColor(img, cv2.COLOR_BGR2GRAY)  # 变为灰度图
    ret, binary = cv2.threshold(gray, 0, 255, cv2.THRESH_BINARY | cv2.THRESH_OTSU)  ## 阈值分割得到二值化图片
    contours, heriachy = cv2.findContours(binary, cv2.RETR_EXTERNAL, cv2.CHAIN_APPROX_SIMPLE)
    print(len(contours))
    for i, contour in enumerate(contours):
        if i == len(contours)-1:
            print('i:', i)
            a = sorted(contour[:, 0], key=lambda x: x[0])  # 所有坐标按x轴从小到大排序
            x_min = a[0][0]
            x_max = a[-1][0]
            b = sorted(contour[:, 0], key=lambda x: x[1])  # 所有坐标按y轴从小到大排序
            y_min = b[0][1]
            y_max = b[-1][1]
            rec = img
                # cv2.drawContours(img, contours, i, (0, 0, 255), 5)
                # 第一个参数指在哪幅图上绘制轮廓信息,第二个参数是轮廓本身,第三个参数是指定绘制哪条轮廓
                # 第四个参数是绘图的颜色,第五个参数是绘制的线宽 输入-1则表示填充
            cv2.rectangle(rec, (x_min, y_min), (x_max, y_max), (0, 255, 0), 3)
            # cv2.imshow('rectangle', rec)
            # cv2.waitKey()
            return x_min, y_min, x_max, y_max

def save_xml(src_xml_dir, img_name, h, w, x1, y1, x2, y2):

    xml_file = open((src_xml_dir + '/' + img_name + '.xml'), 'w')
    xml_file.write('<annotation>\n')
    xml_file.write('    <folder>VOC2007</folder>\n')


    xml_file.write('    <filename>' + str(img_name) + '.jpg' + '</filename>\n')


    xml_file.write('    <size>\n')
    xml_file.write('        <width>' + str(w) + '</width>\n')
    xml_file.write('        <height>' + str(h) + '</height>\n')
    xml_file.write('        <depth>3</depth>\n')
    xml_file.write('    </size>\n')

    # write the region of image on xml file
    xml_file.write('    <object>\n')
    xml_file.write('        <name>' + 'nodule' + '</name>\n')
    xml_file.write('        <pose>Unspecified</pose>\n')
    xml_file.write('        <truncated>0</truncated>\n')
    xml_file.write('        <difficult>0</difficult>\n')
    xml_file.write('        <bndbox>\n')
    xml_file.write('            <xmin>' + str(x1) + '</xmin>\n')
    xml_file.write('            <ymin>' + str(y1) + '</ymin>\n')
    xml_file.write('            <xmax>' + str(x2) + '</xmax>\n')
    xml_file.write('            <ymax>' + str(y2) + '</ymax>\n')
    xml_file.write('        </bndbox>\n')
    xml_file.write('    </object>\n')
    xml_file.write('</annotation>')


file_dir = r'D:\YQ\General_code\Json2mask\2_preprocessed_data_stage2_1\datasets\SegmentationClass'
save_xml_dir = r'D:\YQ\General_code\Json2mask\2_preprocessed_data_stage2_1\datasets\rectangle_xml'
for name in os.listdir(file_dir):
    print(name)
    img_path = os.path.join(file_dir, name)
    img = cv2.imread(img_path)
    # img = cv2.imdecode(np.fromfile(img_path), dtype=np.uint8), -1)
    h, w = img.shape[:-1]
    x1, y1, x2, y2 = get_coor(img)
    img_name = name.split('.')[0]
    save_xml(save_xml_dir,img_name, h, w, x1, y1, x2, y2)
生成的XML文件
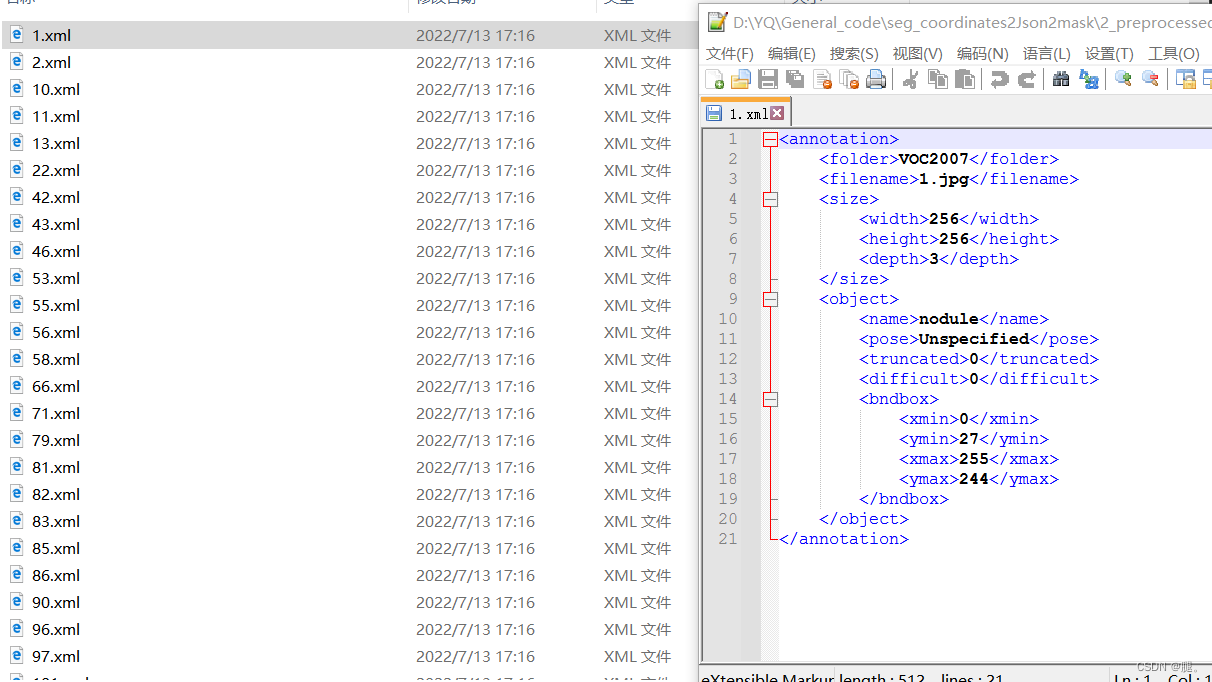
2、读取xml文件,将矩形画在原图上(注意修改路径)
import os
import xml.etree.ElementTree  as ET
import cv2
img_root = ""  # 图片地址
xml_root = ""  # xml文件地址
dstRoot = ""  # 保存画完矩形框后得到的图片的地址

for img in os.listdir(img_root):
    iname = img[:-4]
    for xml in os.listdir(xml_root):
        xname = xml[:-4]
        if iname == xname:
            xmlpath = os.path.join(xml_root, xml)
            xmlfile = open(xmlpath, encoding='utf-8')
            tree = ET.parse(xmlfile)
            root = tree.getroot()
            imgpath = os.path.join(img_root, img)
            mat = cv2.imread(imgpath)
            darwpath = os.path.join(dstRoot, img)
            size = root.find('size')
            w = int(size.find('width').text)
            h = int(size.find('height').text)
            for obj in root.iter('object'):
                # difficult = obj.find('difficult').text
                cls = obj.find('name').text
                xmlbox = obj.find('bndbox')
                b = (float(xmlbox.find('xmin').text), float(xmlbox.find('xmax').text),
                     float(xmlbox.find('ymin').text), float(xmlbox.find('ymax').text))
                x1, x2, y1, y2 = b
                # 标注越界修正
                if x2 > w:
                    x2 = w
                if y2 > h:
                    y2 = h
                b = (x1, x2, y1, y2)
                # print('%d, %d, %d, %d' % (x1, x2, y1, y2))
                pt1 = (int(x1), int(y1))
                pt2 = (int(x2), int(y2))
                color = (255, 0, 255)
                cv2.rectangle(mat, pt1, pt2, color, 4, 4)
            # cv2.imshow('show', mat)
            # cv2.waitKey(33)
            cv2.imwrite(darwpath, mat)
结果 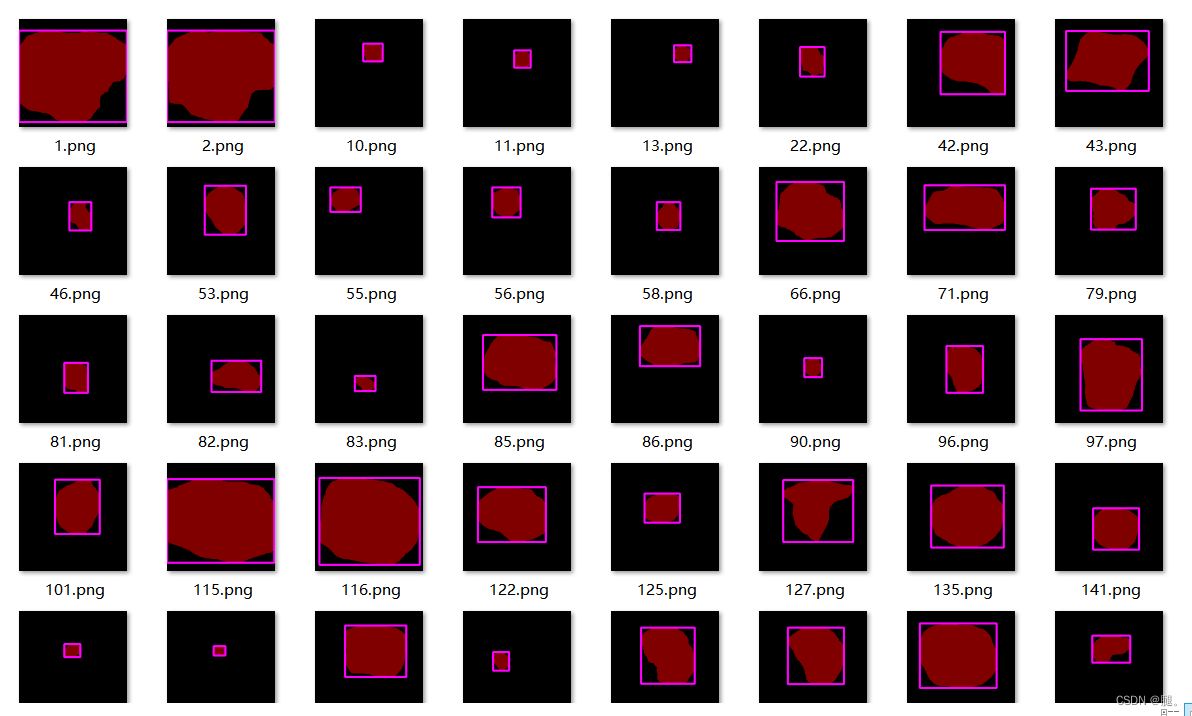

魔乐社区(Modelers.cn) 是一个中立、公益的人工智能社区,提供人工智能工具、模型、数据的托管、展示与应用协同服务,为人工智能开发及爱好者搭建开放的学习交流平台。社区通过理事会方式运作,由全产业链共同建设、共同运营、共同享有,推动国产AI生态繁荣发展。
更多推荐


 6
6 0
0- 0


 已为社区贡献1条内容

所有评论(0)