springboot_vue3 项目搭建springboot3 mybatis
·
1. 创建项目
- 直接new-project --》 选择界面的配置 --> 创建
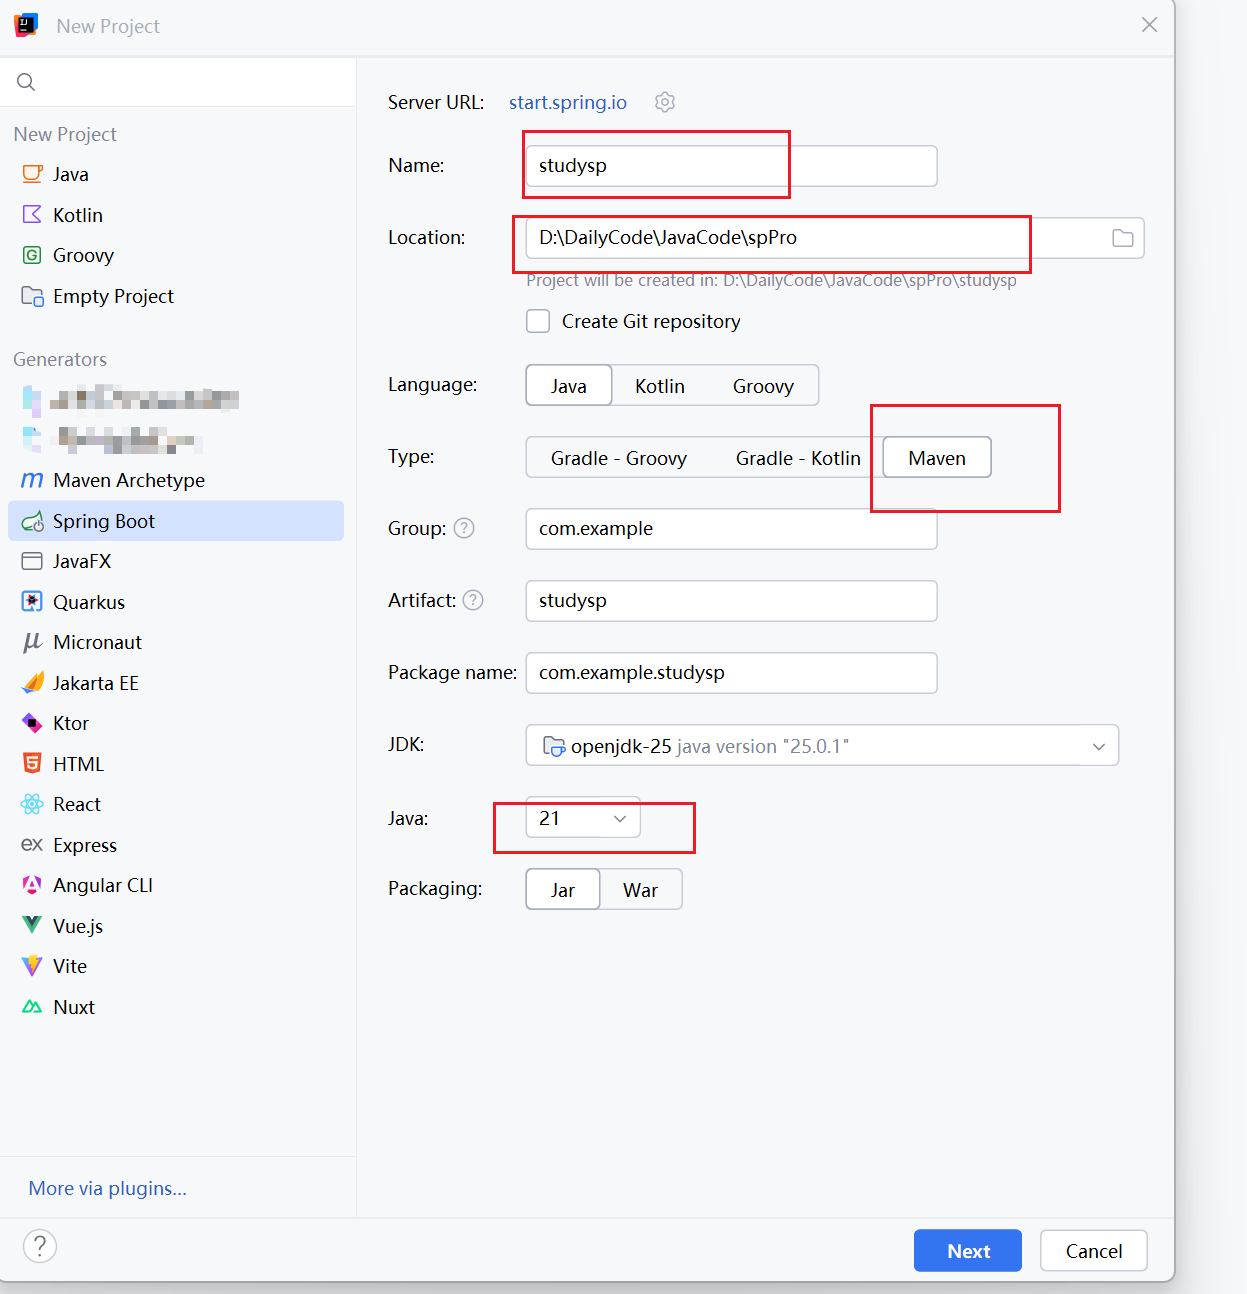

- 修改项目里面的文件:
修改rescource中的 application.properties --》 application.yml
spring:
  application:
    name: demo
  datasource:
    driver-class-name: com.mysql.cj.jdbc.Driver
    url: jdbc:mysql://localhost:3306/demo?serverTimezone=Asia/Shanghai&useUnicode=true&characterEncoding=utf-8&allowMultiQueries=true&useSSL=false&allowPublicKeyRetrieval=true
    username: root
    password: 123456
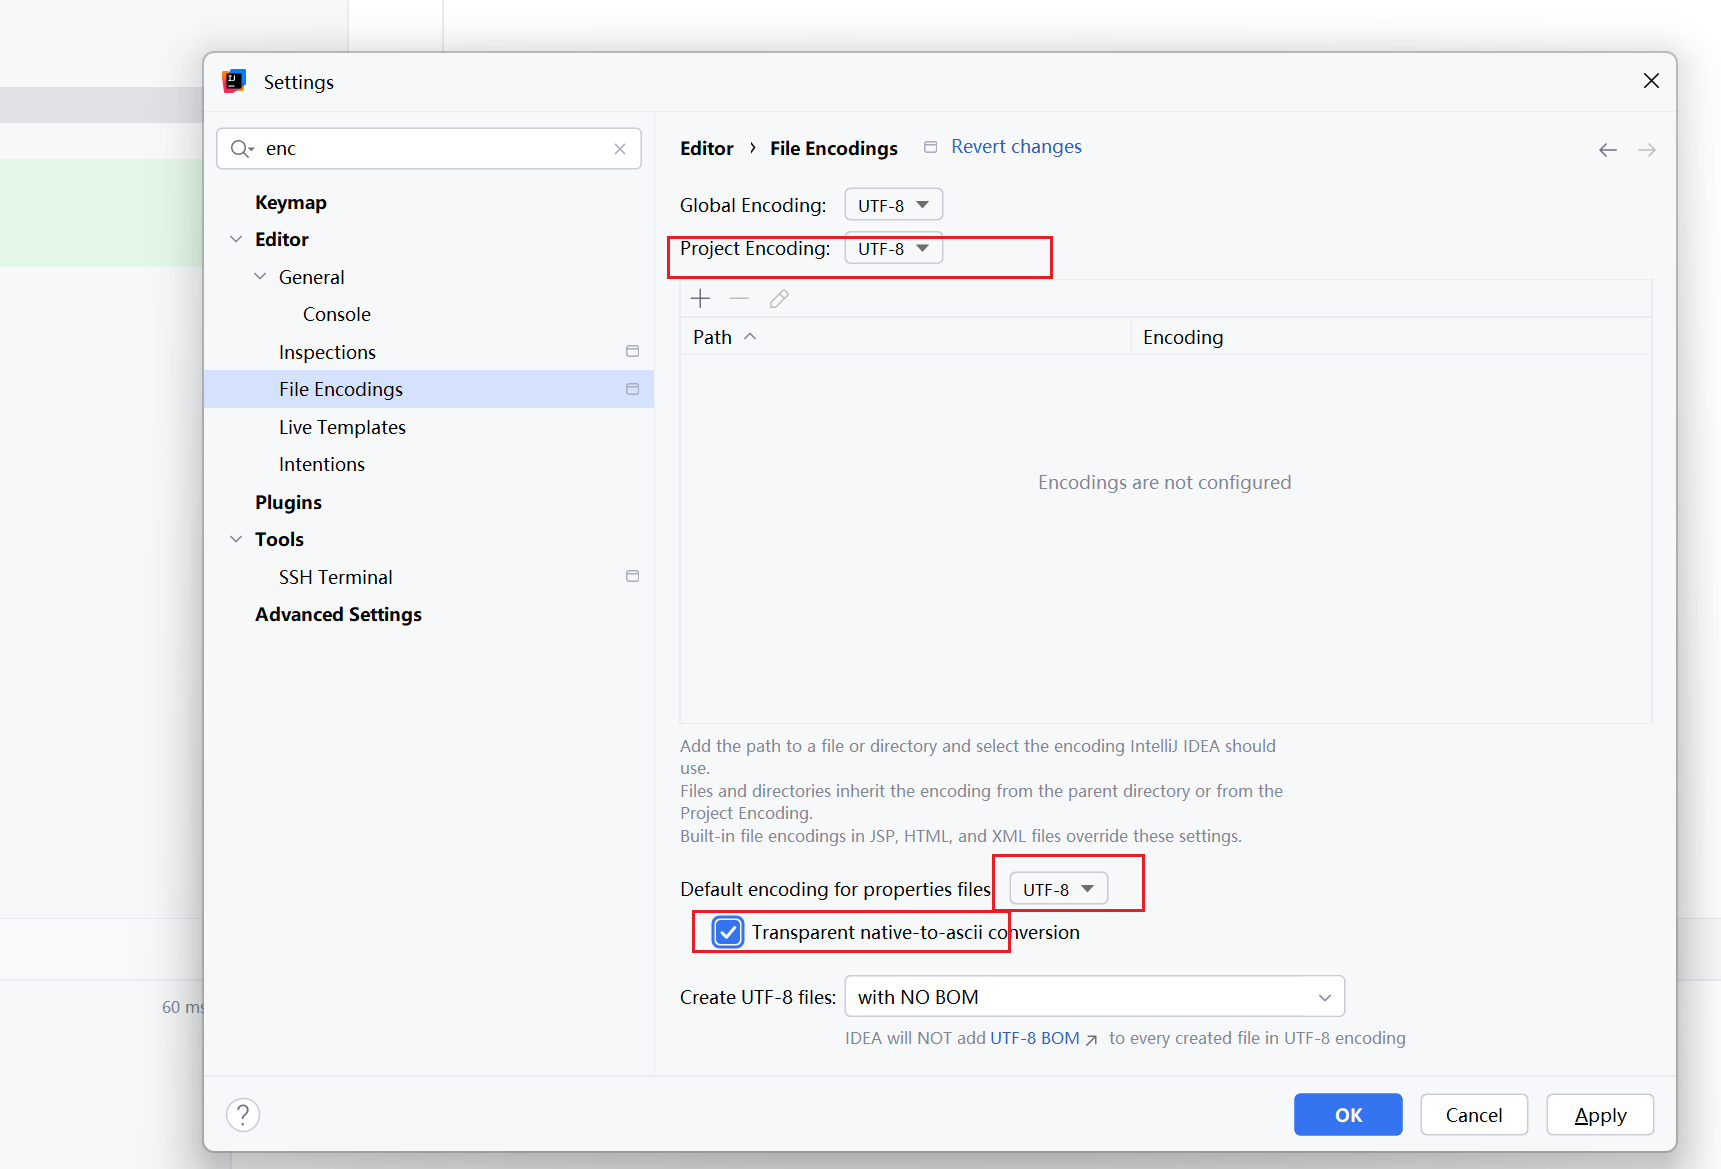
1. 配置编码
file–settings–encoding–file Encoding
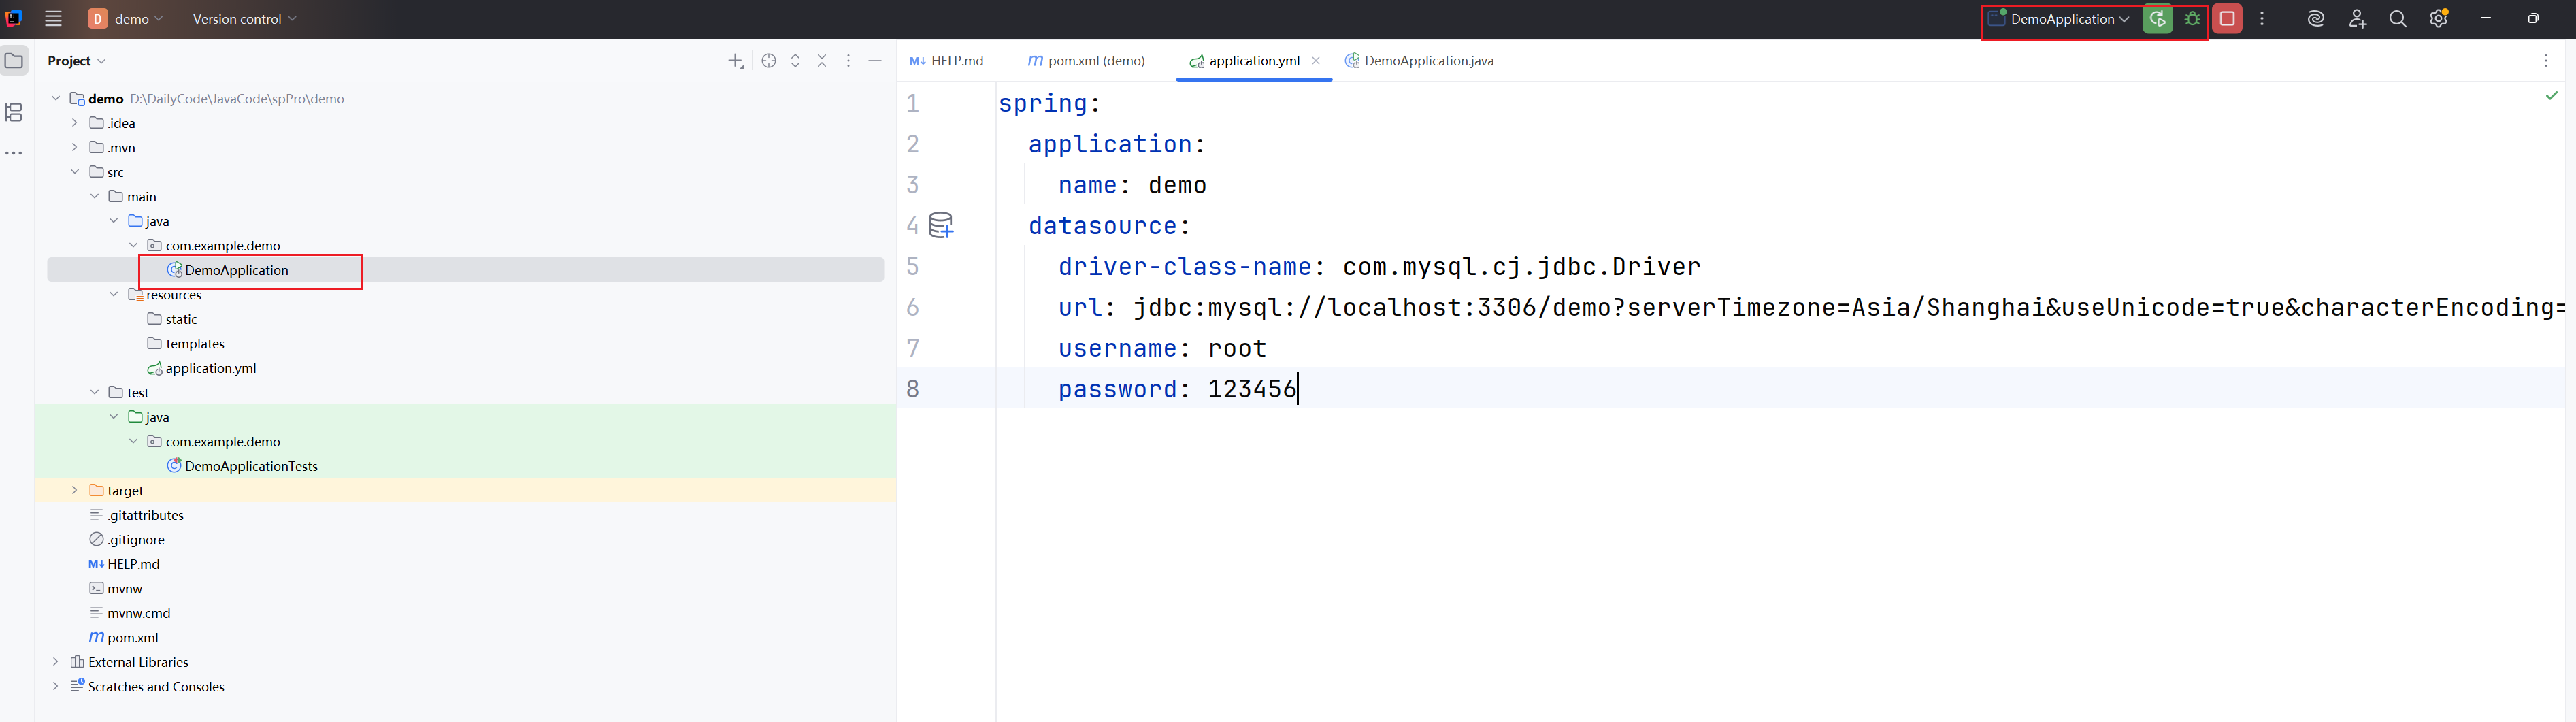
启动
按照下面方式启动
重要:springboot的三层架构
只要熟悉,熟练使用这三层架构,基本可以快速搭建一个后端框架。
版本1
contoller
package com.example.demo.controller;

import org.springframework.web.bind.annotation.GetMapping;
import org.springframework.web.bind.annotation.RestController;

@RestController
public class TestController {
    @GetMapping("/hello")
    public String test() {
        return "hello world";
    }
}
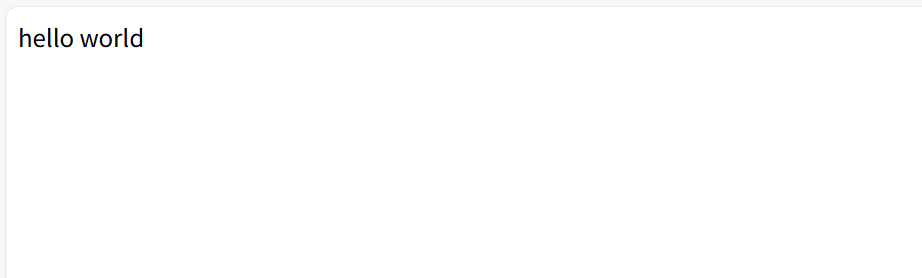
最简单的controller,返回hello world,在浏览器中输入 localhost:8080/hello,可以看到如下
package com.example.demo.controller;

import com.example.demo.commen.Result;
import com.example.demo.entity.Employee;
import com.example.demo.service.EmployeeService;
import jakarta.annotation.Resource;
import lombok.Data;
import org.springframework.web.bind.annotation.GetMapping;
import org.springframework.web.bind.annotation.PostMapping;
import org.springframework.web.bind.annotation.RequestMapping;
import org.springframework.web.bind.annotation.RestController;

import java.util.List;

@RestController
@RequestMapping("/employee")
public class EmployeeController {
    @Resource
    private EmployeeService employeeService;

    @GetMapping("/getEmps")
    public Result get() {
        List<Employee> employees = employeeService.getEmps();
        return Result.success(employees);
    }
// 传递多个参数
    @PostMapping("/getEmpByIdAndName")
    public Result getEmpByIdAndName(@RequestParam Integer id, @RequestParam String name) {
        Employee employee = employeeService.getEmpByIdAndName(id, name);
        return Result.success(employee);
    }

		@GetMapping("/getEmpByObj")
    public Result getEmpByObhj(Employee emp) {
        Employee employee = employeeService.getEmp(emp);
        return Result.success(employee);
    }

}
当我们使用对象查询的时候,查询参数可以如下图所示I:但是要保证传入的名称和 employee中的属性名保持一致。

service
package com.example.demo.service;

import com.example.demo.entity.Employee;
import com.example.demo.mapper.EmployeeMapper;
import jakarta.annotation.Resource;
import org.springframework.stereotype.Service;

import java.util.List;

@Service
public class EmployeeService {
    @Resource
    private EmployeeMapper employeeMapper;

    public List<Employee> getEmps() {
        return employeeMapper.getAll();
    }
}
mapper
package com.example.demo.mapper;


import com.example.demo.entity.Employee;
import org.apache.ibatis.annotations.Mapper;
import org.apache.ibatis.annotations.Select;

import java.util.List;

@Mapper
public interface EmployeeMapper {
    List<Employee> getAll();

    @Select("select * from employee where id = #{id}")
    Employee getEmpById(Integer id);
}
新定义的内容
entity
package com.example.demo.entity;

import lombok.Data;

@Data
public class Employee {
    private Integer id;
    private String name;
    private Integer age;
    private String email;
}
mybatis实现
<?xml version="1.0" encoding="UTF-8" ?>
<!DOCTYPE mapper
        PUBLIC "-//mybatis.org//DTD Mapper 3.0//EN"
        "http://mybatis.org/dtd/mybatis-3-mapper.dtd">
<mapper namespace="com.example.demo.mapper.EmployeeMapper">
    <select id="getAll" resultType="com.example.demo.entity.Employee">
        select * from employee
    </select>
</mapper>
配置文件
spring:
  application:
    name: demo
  datasource:
    driver-class-name: com.mysql.cj.jdbc.Driver
    url: jdbc:mysql://localhost:3306/study?serverTimezone=Asia/Shanghai&useUnicode=true&characterEncoding=utf-8&allowMultiQueries=true&useSSL=false&allowPublicKeyRetrieval=true
    username: root
    password: 123456

#mybatis配置
mybatis:
    mapper-locations: classpath*:mapper/*.xml
    configuration:
      map-underscore-to-camel-case: true
      # 开启下划线转驼峰,通常我们数据库的字段都是下划线命名,开启后,mybatis会自动将下划线转为驼峰命名
      log-impl: org.apache.ibatis.logging.stdout.StdOutImpl
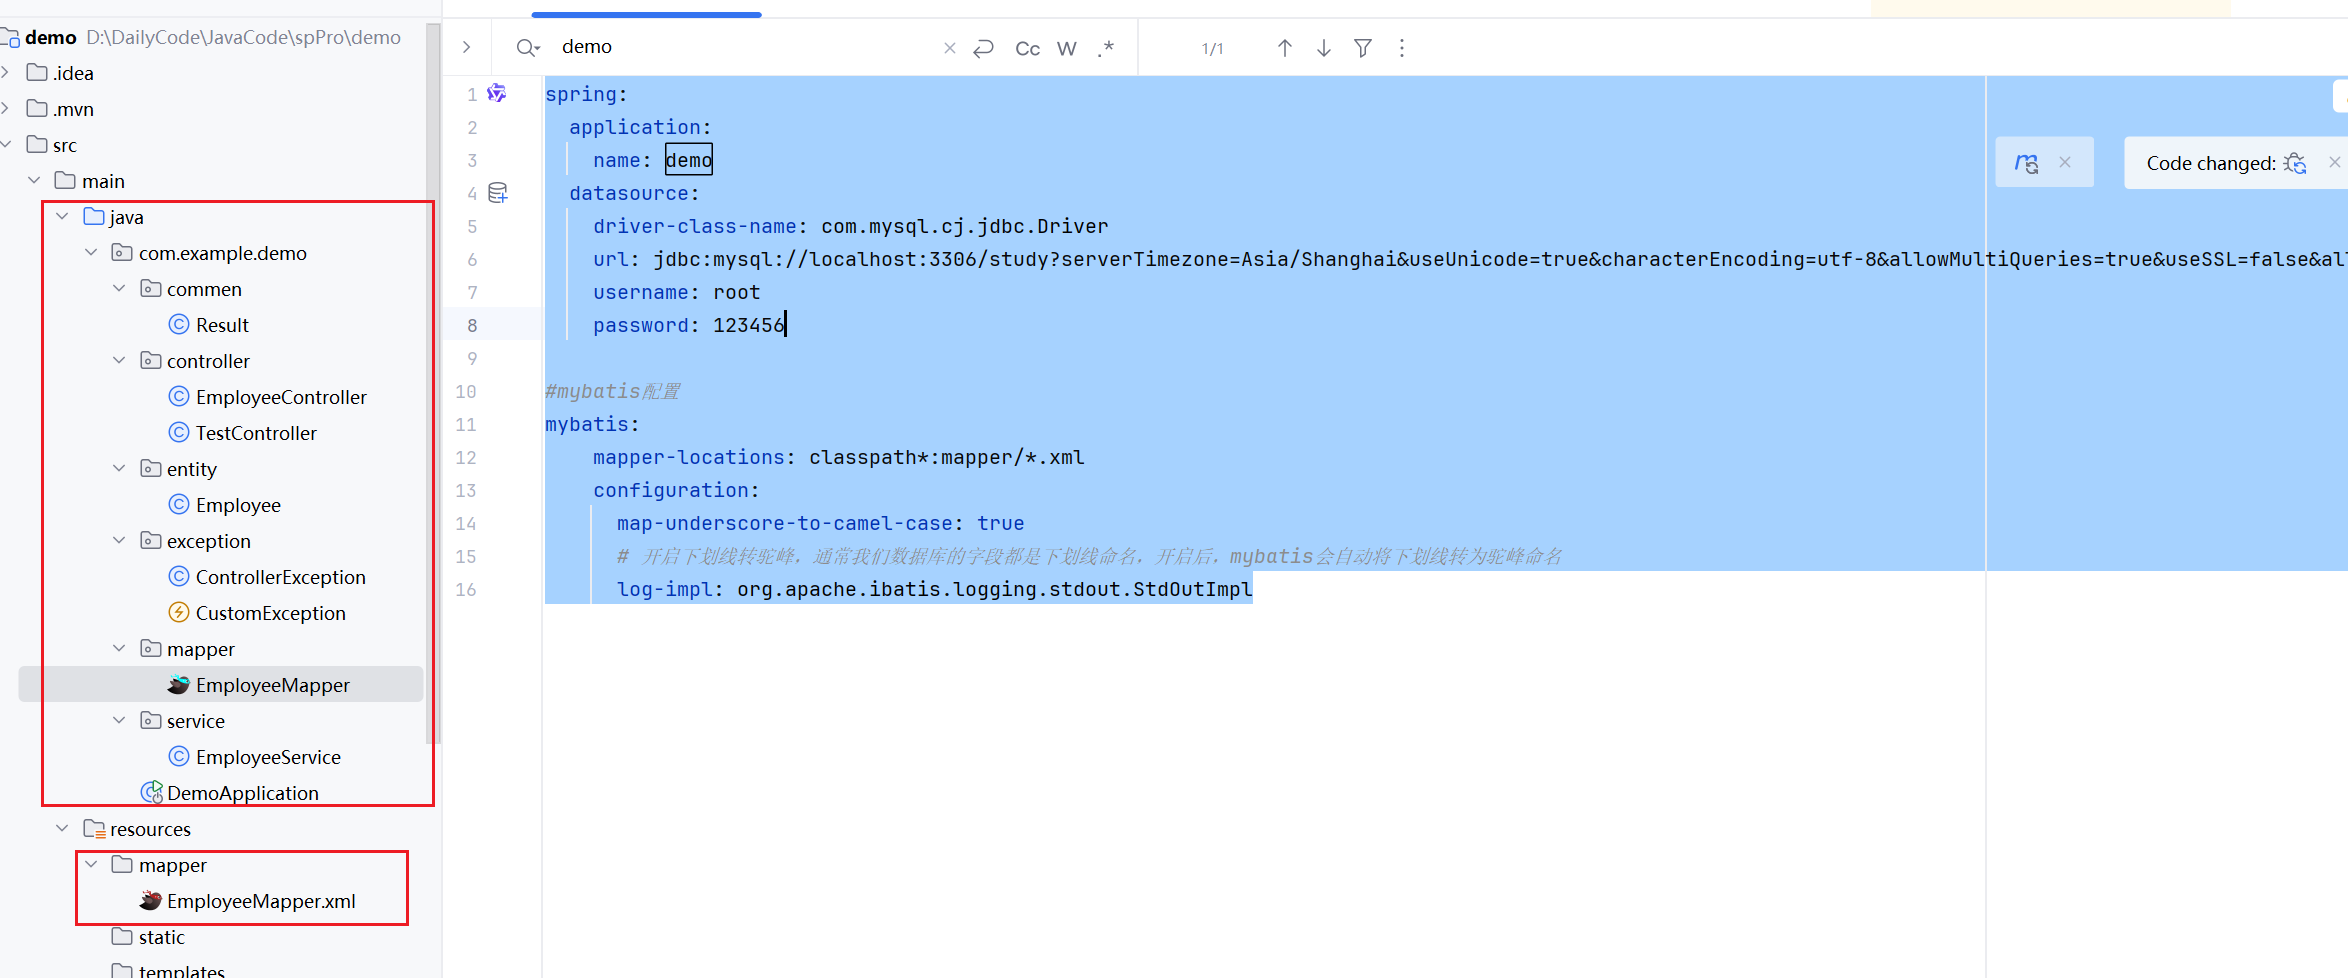
整体路径如下;
补充:
1. 定义Result
通常,我们都希望返回一个固定格式的结果,那么定义一个result来封装我们的结果。
package com.example.demo.commen;

import lombok.Data;

@Data
public class Result {
    private Integer code;
    private String msg;
    private Object data;
    public Result(Integer code, String msg, Object data) {
        this.code = code;
        this.msg = msg;
        this.data = data;
    }

    public Result(Integer code, String msg) {
        this.code = code;
        this.msg = msg;
    }

    public Result() {
    }

    public static Result success(Object data) {
        return new Result(200, "success", data);
    }

    public static Result success() {
        return new Result(200, "success", null);
    }

    public static Result error(Integer code, String msg) {
        return new Result(code, msg, null);
    }

    public static Result error(String msg) {
        return new Result(500, msg, null);
    }

    public static Result error() {
        return new Result(500, "error", null);
    }

}
全局捕获异常
package com.example.demo.exception;

import com.example.demo.commen.Result;
import org.springframework.web.bind.annotation.ControllerAdvice;
import org.springframework.web.bind.annotation.ExceptionHandler;
import org.springframework.web.bind.annotation.ResponseBody;

@ControllerAdvice(basePackages = "com.example.demo.controller")  // 捕获对应的包的异常
public class ControllerException {
    @ExceptionHandler(Exception.class)
    @ResponseBody
    public Result error(Exception e) {
        e.printStackTrace();
        return Result.error();
    }

}
自定义异常
有时候我们想要捕获我们自己定义的异常,我们自己可以写一个异常,然后进行捕获。
package com.example.demo.controller;

import com.example.demo.commen.Result;
import com.example.demo.exception.CustomException;
import org.springframework.web.bind.annotation.GetMapping;
import org.springframework.web.bind.annotation.RestController;

@RestController
public class TestController {
    @GetMapping("/hello")
    public Result test() {
        throw new CustomException(100, "自定义异常");
//        return Result.success("成功") ;
    }
}
然后在 对应的Exception中
package com.example.demo.exception;

import com.example.demo.commen.Result;
import org.springframework.web.bind.annotation.ControllerAdvice;
import org.springframework.web.bind.annotation.ExceptionHandler;
import org.springframework.web.bind.annotation.ResponseBody;

@ControllerAdvice(basePackages = "com.example.demo.controller")  // 捕获对应的包的异常
public class ControllerException {
    @ExceptionHandler(Exception.class)
    @ResponseBody
    public Result error(Exception e) {
        e.printStackTrace();
        return Result.error();
    }

    @ExceptionHandler(CustomException.class)
    @ResponseBody
    public Result error(CustomException e) {
        e.printStackTrace();
        return Result.error(e.getCode(), e.getMsg());
    }
}
这样,当我们进行异常处理的时候:
package com.example.demo.controller;

import com.example.demo.commen.Result;
import com.example.demo.exception.CustomException;
import org.springframework.web.bind.annotation.GetMapping;
import org.springframework.web.bind.annotation.RestController;

@RestController
public class TestController {
    @GetMapping("/hello")
    public Result test() {
        throw new CustomException(100, "自定义异常");          // 就会被我们自定义的异常捕获
//        return Result.success("成功") ;
    }
}
总结:
总体上来讲,只需要最重要的几个
| 类型 | 注解 |
|---|---|
| controller | @RestController |
| Service | @Service |
| Mapper | @Mapper |
其他的内容,我们只需要根据需要不断的进行添加就可以了,都是自然而然的。
mybatis内容:
数据的持久层框架(其实就是操作数据的。与数据库打交道)
配置mybatis
spring:
  application:
    name: demo
  datasource:
    driver-class-name: com.mysql.cj.jdbc.Driver
    url: jdbc:mysql://localhost:3306/demo?serverTimezone=Asia/Shanghai&useUnicode=true&characterEncoding=utf-8&allowMultiQueries=true&useSSL=false&allowPublicKeyRetrieval=true
    username: root
    password: 123456

#mybatis配置
mybatis:
    mapper-locations: classpath:mapper/*.xml  # 映射resources下面,mapper的所有xml文件
    configuration:
      map-underscore-to-camel-case: true
      # 开启下划线转驼峰,通常我们数据库的字段都是下划线命名,开启后,mybatis会自动将下划线转为驼峰命名
      log-impl: org.apache.ibatis.logging.stdout.StdOutImpl

魔乐社区(Modelers.cn) 是一个中立、公益的人工智能社区,提供人工智能工具、模型、数据的托管、展示与应用协同服务,为人工智能开发及爱好者搭建开放的学习交流平台。社区通过理事会方式运作,由全产业链共同建设、共同运营、共同享有,推动国产AI生态繁荣发展。
更多推荐


 4
4 0
0- 0


 已为社区贡献1条内容

所有评论(0)