java内嵌tomcat并启动
java内嵌tomcat并启动
创建工程
创建maven工程ee-tomat-embed
pom.xml添加依赖如下
<properties>
  <project.build.sourceEncoding>UTF-8</project.build.sourceEncoding>
</properties>
<dependencies>
  <!-- tomcat-embed-core -->
  <dependency>
    <groupId>org.apache.tomcat.embed</groupId>
    <artifactId>tomcat-embed-core</artifactId>
    <version>8.5.39</version>
  </dependency>

  <!-- tomcat-embed-el -->
  <dependency>
    <groupId>org.apache.tomcat.embed</groupId>
    <artifactId>tomcat-embed-el</artifactId>
    <version>8.5.39</version>
  </dependency>

  <!-- tomcat-embed-jasper -->
  <dependency>
    <groupId>org.apache.tomcat.embed</groupId>
    <artifactId>tomcat-embed-jasper</artifactId>
    <version>8.5.39</version>
  </dependency>

  <!-- javax.servlet-api -->
  <dependency>
    <groupId>javax.servlet</groupId>
    <artifactId>javax.servlet-api</artifactId>
    <version>3.1.0</version>
  </dependency>
</dependencies>
在工程目录下创建一个webapp目录,在webapp新增一个index.html文件index.html文件中随便写点代码
创建启动类
推荐添加Listen后再添加WebAPP
import java.io.File;

import org.apache.catalina.Context;
import org.apache.catalina.LifecycleException;
import org.apache.catalina.core.AprLifecycleListener;
import org.apache.catalina.core.StandardServer;
import org.apache.catalina.startup.Tomcat;

import com.billrobot.tomcat.servlet.HelloServlet;

public class TomcatConfig {
  public static void main(String[] args) throws LifecycleException {
    long start = System.currentTimeMillis();
    // 设置端口
    int port = 8888;
    Tomcat tomcat = new Tomcat();
    tomcat.setPort(port);

    // 添加listener
    StandardServer server = (StandardServer) tomcat.getServer();
    AprLifecycleListener listener = new AprLifecycleListener();
    server.addLifecycleListener(listener);

    // 设置contextPath和路径
    String contextPath = "/ee-tomat-embed";
    String docBase = new File("webapp").getAbsolutePath();
    Context context = tomcat.addWebapp(contextPath, docBase);
    System.out.println("添加contextPath和docBase是:" + contextPath + "==>" + docBase);

    // add servlet
    // Context context = tomcat.addContext(contextPath, baseDir);
    String servletName = "hello";
    String servletMapping = "/hello";
    tomcat.addServlet(contextPath, servletName, new HelloServlet());
    context.addServletMappingDecoded(servletMapping, servletName);
    // 启动tomcat
    tomcat.start();
    long end = System.currentTimeMillis();
    System.out.println("启动完成,共使用了:" + (end - start) + "ms");
    // 进入监听状态,如果不进入监听状态,启动tomat后就会关闭tomcat
    tomcat.getServer().await();
  }
}
启动完成后访问静态文件
访问静态文件

访问servlet

打包部署
在pom.xml中添加
<!-- 分环境打包配置文件 -->
<profiles>
  <!-- 本地环境 -->
  <profile>
    <id>local</id>
    <build>
      <resources>
        <resource>
          <directory>src/main/resources/local</directory>
        </resource>
      </resources>
    </build>

    <activation>
      <activeByDefault>true</activeByDefault>
    </activation>
    <properties>
      <env.profile>local</env.profile>
    </properties>
  </profile>

  <!-- 开发环境 -->
  <profile>
    <id>dev</id>
    <build>
      <resources>
        <resource>
          <directory>src/main/resources/dev</directory>
        </resource>
      </resources>
    </build>

    <properties>
      <env.profile>dev</env.profile>
    </properties>
  </profile>

  <!--测试环境 -->
  <profile>
    <id>tests</id>
    <build>
      <resources>
        <resource>
          <directory>src/main/resources/tests</directory>
        </resource>
      </resources>
    </build>
    <properties>
      <env.profile>tests</env.profile>
    </properties>
  </profile>

  <!--线上环境 -->
  <profile>
    <id>prod</id>
    <build>
      <resources>
        <resource>
          <directory>src/main/resources/prod</directory>
        </resource>
      </resources>
    </build>

    <properties>
      <env.profile>prod</env.profile>
    </properties>
  </profile>

</profiles>

<build>
  <!-- -->
  <resources>
    <resource>
      <directory>src/main/resources</directory>
      <excludes>
        <exclude>local/**</exclude>
        <exclude>dev/**</exclude>
        <exclude>tests/**</exclude>
        <exclude>prod/**</exclude>
      </excludes>
      <filtering>true</filtering>
    </resource>

  </resources>

  <plugins>

    <!-- jar 包中的配置文件优先级高于 config 目录下的 "同名文件" 因此,打包时需要排除掉 jar 包中来自 src/main/resources 目录的 配置文件, -->
    <!-- 否则部署时 config 目录中的同名配置文件不会生效 -->
    <plugin>
      <groupId>org.apache.maven.plugins</groupId>
      <artifactId>maven-jar-plugin</artifactId>
      <version>2.6</version>
      <configuration>
        <excludes>
          <exclude>/*.*</exclude>
        </excludes>
      </configuration>
    </plugin>

    <!-- 使用 mvn clean package 打包 更多配置可参考官司方文档:http://maven.apache.org/plugins/maven-assembly-plugin/single-mojo.html -->
    <plugin>
      <groupId>org.apache.maven.plugins</groupId>
      <artifactId>maven-assembly-plugin</artifactId>
      <version>3.1.0</version>
      <executions>
        <execution>
          <id>make-assembly</id>
          <phase>package</phase>
          <goals>
            <goal>single</goal>
          </goals>

          <configuration>
            <!-- 打包生成的文件名 -->
            <finalName>${project.build.finalName}</finalName>
            <!-- jar 等压缩文件在被打包进入 zip、tar.gz 时是否压缩,设置为 false 可加快打包速度 -->
            <recompressZippedFiles>true</recompressZippedFiles>
            <!-- 打包生成的文件是否要追加 release.xml 中定义的 id 值 -->
            <appendAssemblyId>true</appendAssemblyId>
            <!-- 指向打包描述文件 package.xml -->
            <descriptors>
              <descriptor>src/main/assembly/package.xml</descriptor>
            </descriptors>
            <!-- 打包结果输出的基础目录 -->
            <outputDirectory>${project.build.directory}/</outputDirectory>
          </configuration>
        </execution>
      </executions>
    </plugin>
  </plugins>
</build>
执行下面的命令打包
mvn clean install -Dmaven.test.skip=true -Pdev完成的包ee-tomat-embed-1.0-release-dev.tar.gz,仅仅5.93 MB,依赖的jar包
ecj-3.12.3.jar
ee-tomat-embed-1.0.jar
javax.servlet-api-3.1.0.jar
tomcat-annotations-api-8.5.39.jar
tomcat-embed-core-8.5.39.jar
tomcat-embed-el-8.5.39.jar
tomcat-embed-jasper-8.5.39.jar
前台启动
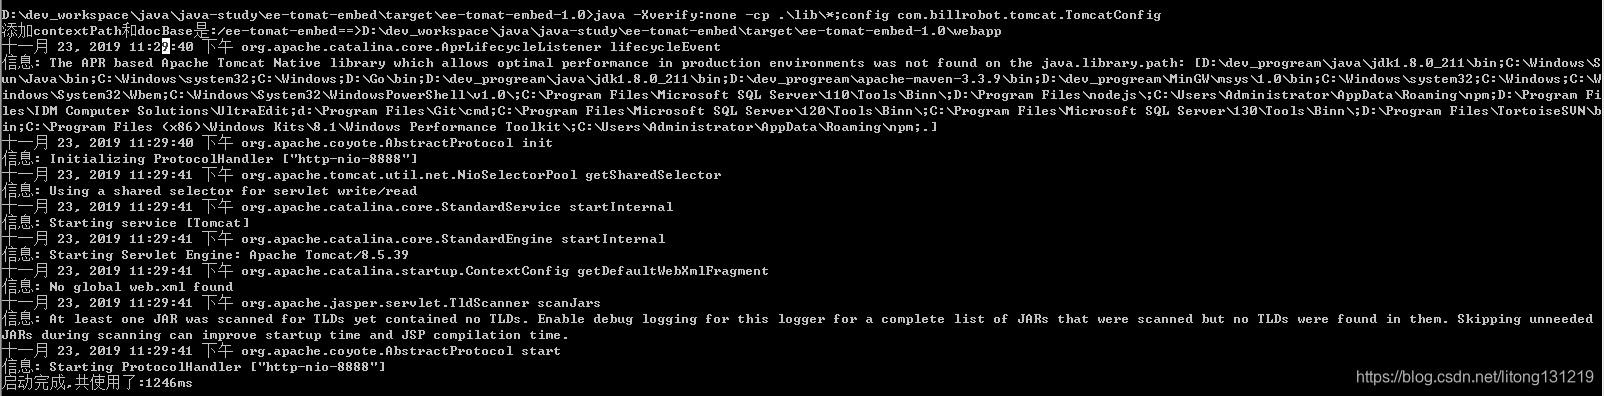
在Windwos前台启动使用下面的命令,向classpath中添加config
java -Xverify:none -cp .\lib\*;config com.billrobot.tomcat.TomcatConfig启动成功
参考链接
Java org.apache.catalina.startup.Tomcat 代码实例
https://www.helplib.com/Java_API_Classes/article_67063
jfinal 内嵌tomcat,打包可运行jar
https://www.jianshu.com/p/6f16c593a4ac
项目地址
https://gitee.com/eblly/jfinalCase
官网API
http://tomcat.apache.org/tomcat-8.5-doc/api/org/apache/catalina/startup/package-summary.html
Java org.apache.catalina.startup.Tomcat 代码实例
https://www.helplib.com/Java_API_Classes/article_67063
jfinal 内嵌tomcat,打包可运行jar
https://www.jianshu.com/p/6f16c593a4ac
项目地址
https://gitee.com/eblly/jfinalCase
官网API
http://tomcat.apache.org/tomcat-8.5-doc/api/org/apache/catalina/startup/package-summary.html

魔乐社区(Modelers.cn) 是一个中立、公益的人工智能社区,提供人工智能工具、模型、数据的托管、展示与应用协同服务,为人工智能开发及爱好者搭建开放的学习交流平台。社区通过理事会方式运作,由全产业链共同建设、共同运营、共同享有,推动国产AI生态繁荣发展。
更多推荐


 0
0 0
0- 0


 已为社区贡献4条内容

所有评论(0)