MMDetection 训练自定义数据集balloon
MMDetection 训练自定义数据集balloon
·
本文所有过程的参考来自:妙啊!MMDetection 训练自定义数据集(本文只是记录操作过程,具体原理请查看该链接)
1、准备自定义数据集
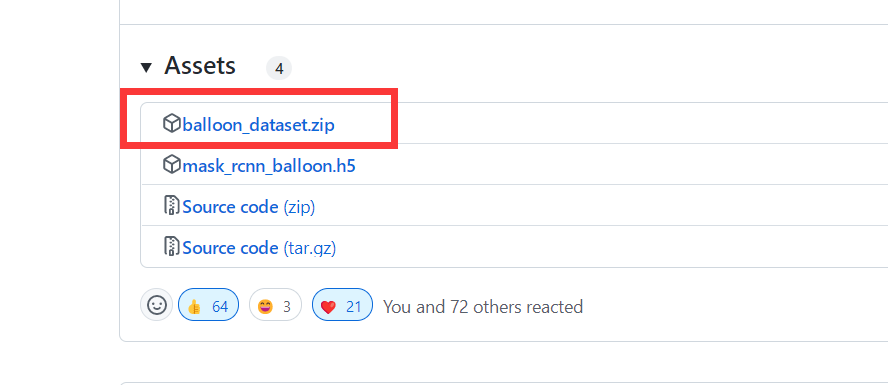
下载链接 :Mask R-CNN 2.1 ,下载之后不用做任何事情,直接拿来可以用。
2、将数据集重新组织为COCO格式。
新建一个.py,内容如下,
import os.path as osp
import mmcv


def convert_balloon_to_coco(ann_file, out_file, image_prefix):
    data_infos = mmcv.load(ann_file)


    annotations = []
    images = []
    obj_count = 0


    for idx, v in enumerate(mmcv.track_iter_progress(data_infos.values())):
        filename = v['filename']
        img_path = osp.join(image_prefix, filename)
        height, width = mmcv.imread(img_path).shape[:2]


        images.append(dict(
            id = idx,
            file_name = filename,
            height=height,
            width = width))


        bboxes = []
        labels = []
        masks = []
        for _, obj in v['regions'].items():
            assert not obj['region_attributes']
            obj = obj['shape_attributes']
            px = obj['all_points_x']
            py = obj['all_points_y']
            poly = [(x+0.5, y+0.5) for x,y in zip(px,py)]
            poly = [p for  x in poly for p in x]


            x_min, y_min, x_max, y_max = (
                min(px), min(py), max(px),max(py))

            data_anno = dict(
                image_id = idx,
                id = obj_count,
                category_id = 0,
                bbox = [x_min, y_min, x_max-x_min, y_max-y_min],
                area = (x_max - x_min)*(y_max - y_min),
                segmentation = [poly],
                iscrowd =0)


            annotations.append(data_anno)
            obj_count += 1
    coco_format_json = dict(
        images = images,
        annotations = annotations,
        categories=[{'id':0, 'name':'balloon'}]
    )
    mmcv.dump(coco_format_json, out_file)


# 对验证集数据进行处理是,将下面路径中的train 替换成val 即可
# 注意数据集 balloon 的路径自行调整
ann_file = './balloon/train/via_region_data.json'
out_file = './balloon/train/annotation_coco.json'
image_prefix = './balloon/train'
convert_balloon_to_coco(ann_file, out_file, image_prefix)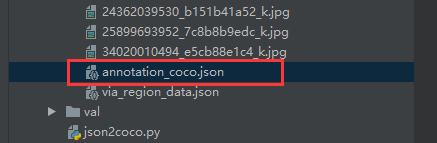
3、在官方下载预训练权重
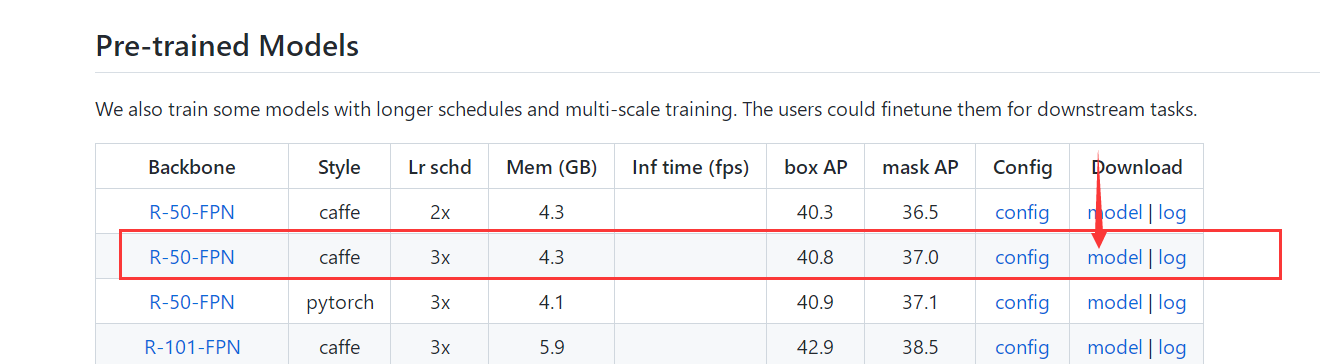
下载好之后放入到checkpoints里,没有checkpoints就新建一个
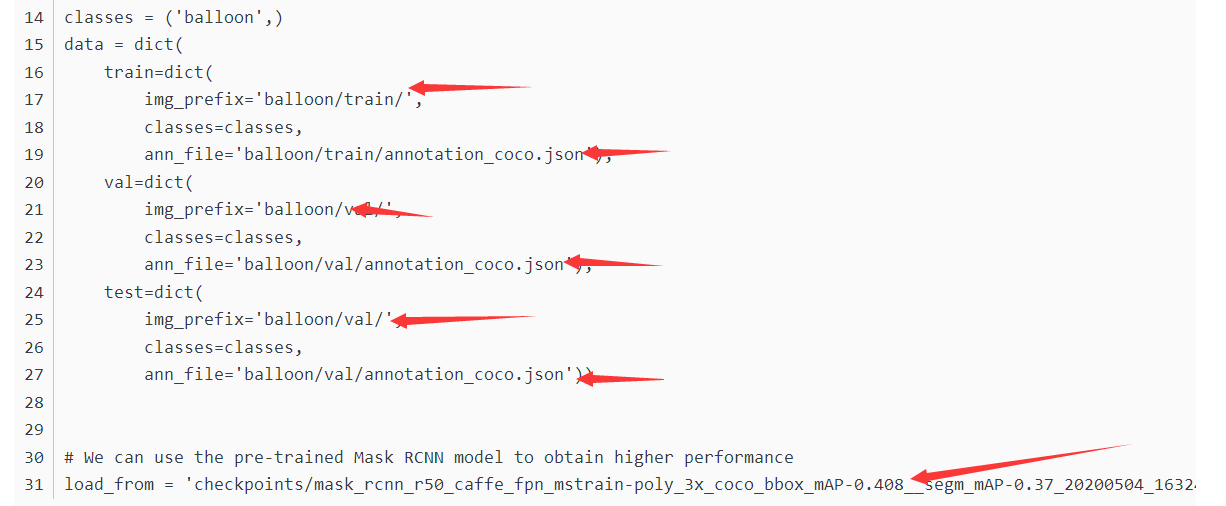
4、在configs/balloon/目录下,新建命名为mask_rcnn_r50_caffe_fpn_mstrain-poly_1x_balloon.py
# The new config inherits a base config to highlight the necessary modification
_base_ = '../mask_rcnn/mask_rcnn_r50_caffe_fpn_mstrain-poly_1x_coco.py'


# We also need to change the num_classes in head to match the dataset's annotation
model = dict(
    roi_head=dict(
        bbox_head=dict(num_classes=1),
        mask_head=dict(num_classes=1)))


# Modify dataset related settings
dataset_type = 'COCODataset'
classes = ('balloon',)
data = dict(
    train=dict(
        img_prefix='balloon/train/',
        classes=classes,
        ann_file='balloon/train/annotation_coco.json'),
    val=dict(
        img_prefix='balloon/val/',
        classes=classes,
        ann_file='balloon/val/annotation_coco.json'),
    test=dict(
        img_prefix='balloon/val/',
        classes=classes,
        ann_file='balloon/val/annotation_coco.json'))


# We can use the pre-trained Mask RCNN model to obtain higher performance
load_from = 'checkpoints/mask_rcnn_r50_caffe_fpn_mstrain-poly_3x_coco_bbox_mAP-0.408__segm_mAP-0.37_20200504_163245-42aa3d00.pth'
记得改里面文件位置!!这几个地方改成自己的文件位置 。
5、使用新的config 训练一个模型
直接运行下面的代码即可:
python tools/train.py configs/balloon/mask_rcnn_r50_caffe_fpn_mstrain-poly_1x_balloon.py6、测试训练好的模型,直接运行:
python tools/test.py configs/balloon/mask_rcnn_r50_caffe_fpn_mstrain-poly_1x_balloon.py work_dirs/mask_rcnn_r50_caffe_fpn_mstrain-poly_1x_balloon.py/latest.pth --eval bbox segm
魔乐社区(Modelers.cn) 是一个中立、公益的人工智能社区,提供人工智能工具、模型、数据的托管、展示与应用协同服务,为人工智能开发及爱好者搭建开放的学习交流平台。社区通过理事会方式运作,由全产业链共同建设、共同运营、共同享有,推动国产AI生态繁荣发展。
更多推荐


 0
0 0
0- 0


 已为社区贡献3条内容

所有评论(0)