Windwos 下使用docker安装OpenClaw
本文详细介绍了在Windows Server 2022系统上通过WSL2和Docker部署OpenClaw的完整流程。首先解决Windows容器无法运行Linux项目的问题,采用WSL2安装Ubuntu子系统。随后在Ubuntu中配置Docker环境,设置国内镜像加速,并完成OpenClaw项目的构建。文章提供了从环境准备、WSL2安装、Docker配置到项目构建的详细命令行操作指南,特别针对Wi
近期,OpenClaw的热度在各方的炒作下持续上升。🧍♂️小伙伴们也尝试了在各个环境中安装OpenClaw。我呢,闲来无事,想着使用docker来安装一下OpenClaw,网上搜索了一下,发现有些博主的帖子虽然也是说怎么在windows环境下使用docker来安装OpenClaw,但是具体操作步骤尚有不明确的地方。因此我写了此篇博客,以供各位参考。本次安装部署将在微软的两类系统中进行,一类是微软的windows server 操作系统,另一类是微软的windows 操作系统。两个操作系统上的安装部署各有不同之处,本章节将讲述如何使用windows server 操作系统 部署。好了,废话不多说了,开始进入主题:
一、环境准备
1.1 服务器信息
- 操作系统:Microsoft Windows Server 2022 Datacenter
- 项目路径:D:\OpenClaw\openclaw (注意,此路径可根据实际情况去新建文件夹,比如D:\OpenClaw 是我自己创建的文件夹,而openclaw 是通过git 从github上拉取的镜像文件夹)
1.2 面临的问题
OpenClaw 是一个基于 Linux 的 Node.js 项目,Dockerfile 基于 node:22-bookworm(Debian),
而 Windows Server 的 Docker Engine 仅支持 Windows 容器(OSType: windows),无法直接运行 Linux 容器。
解决方案:通过 WSL2(Windows Subsystem for Linux)在 Windows Server 上运行 Linux 环境,
在 WSL2 的 Ubuntu 中安装 Docker Engine 来构建和运行 Linux 容器。
1.3 OpenClaw镜像拉取
使用git 工具从github 上拉取
https://github.com/openclaw/openclaw.git
也可以使用 PowerShell工具执行命令拉取,有兴趣的可以自行查阅资料,此处不再过多阐述。
二、安装 WSL2
2.1 安装 WSL2 基础组件
在 PowerShell(管理员)中执行:
wsl --install -d Ubuntu --no-launch
此命令会自动安装以下组件:
- 虚拟机平台(Virtual Machine Platform)
- 适用于 Linux 的 Windows 子系统(Windows Subsystem for Linux)
- Ubuntu 发行版
注意:安装完成后提示需要重启服务器,必须重启才能生效。
2.2 重启服务器
Restart-Computer
2.3 重启后安装 Ubuntu
如果第一次安装时未同时下载 Ubuntu(例如因网络问题),重启后再次执行:
wsl --install -d Ubuntu --no-launch
如果 --web-download 方式因网络问题失败(无法连接 raw.githubusercontent.com),
去掉 --web-download 参数即可从 Microsoft Store 缓存安装。
2.4 验证安装
# 检查 WSL 状态,确认默认版本为 2
wsl --status

# 查看已安装的发行版
wsl --list --verbose
预期输出:
  NAME      STATE     VERSION
* Ubuntu    Stopped   2
2.5 创建用户
wsl -d Ubuntu -u root -- bash -c "useradd -m -s /bin/bash openclaw && echo 'openclaw:openclaw' | chpasswd && usermod -aG sudo openclaw"
三、在 WSL2 Ubuntu 中安装 Docker Engine
3.1 安装前置依赖
wsl -d Ubuntu -u root -- bash -c "apt-get update && apt-get install -y ca-certificates curl gnupg lsb-release"
3.2 添加 Docker 官方 GPG 密钥
wsl -d Ubuntu -u root -- bash -c "install -m 0755 -d /etc/apt/keyrings && curl -fsSL https://download.docker.com/linux/ubuntu/gpg -o /etc/apt/keyrings/docker.asc && chmod a+r /etc/apt/keyrings/docker.asc"
3.3 添加 Docker APT 源
wsl -d Ubuntu -u root -- bash -c "echo 'deb [arch=amd64 signed-by=/etc/apt/keyrings/docker.asc] https://download.docker.com/linux/ubuntu noble stable' > /etc/apt/sources.list.d/docker.list"
3.4 安装 Docker Engine
wsl -d Ubuntu -u root -- bash -c "apt-get update && apt-get install -y docker-ce docker-ce-cli containerd.io docker-buildx-plugin docker-compose-plugin"
安装完成后版本信息:
- Docker Engine: 29.2.1
- Docker Compose: v5.0.2
3.5 启动 Docker 服务
wsl -d Ubuntu -u root -- bash -c "service docker start"
3.6 验证 Docker
wsl -d Ubuntu -u root -- bash -c "docker --version && docker compose version"
3.7 将用户添加到 docker 组
wsl -d Ubuntu -u root -- bash -c "usermod -aG docker openclaw"
四、配置 Docker 镜像加速
由于服务器在国内,需要配置镜像加速地址。
4.1 创建配置脚本
在服务器 D: 盘创建 setup_wsl_docker.sh:
#!/bin/bash
set -e

mkdir -p /etc/docker
cat > /etc/docker/daemon.json << 'EOF'
{
  "registry-mirrors": [
    "https://docker.1ms.run",
    "https://docker.xuanyuan.me",
    "https://docker.m.daocloud.io",
    "https://hub.rat.dev",
    "https://docker.1panel.live"
  ]
}
EOF

service docker restart
echo "Docker mirrors configured and service restarted"
docker info 2>&1 | grep -A5 "Registry Mirrors"
4.2 执行配置脚本
wsl -d Ubuntu -u root -- bash /mnt/d/setup_wsl_docker.sh
4.3 验证镜像加速
执行后应输出类似:
Docker mirrors configured and service restarted
 Registry Mirrors:
  https://docker.1ms.run/
  https://docker.xuanyuan.me/
  https://docker.m.daocloud.io/
  https://hub.rat.dev/
  https://docker.1panel.live/
五、构建 OpenClaw Docker 镜像
5.1 确认项目可访问
WSL2 中通过 /mnt/d/ 访问 Windows 的 D: 盘:
wsl -d Ubuntu -u root -- bash -c "ls /mnt/d/OpenClaw/openclaw/Dockerfile"
5.2 构建镜像
wsl -d Ubuntu -u root -- bash -c "cd /mnt/d/OpenClaw/openclaw && docker build -t openclaw:local -f Dockerfile ."
构建过程大约需要 5-10 分钟(取决于网络和机器性能),主要步骤包括:
- 拉取
node:22-bookworm基础镜像 - 安装 Bun 构建工具
- 执行
pnpm install安装依赖 - 执行
pnpm build编译项目 - 执行
pnpm ui:build构建前端 UI - 设置文件权限,切换到 node 用户
5.3 验证镜像
wsl -d Ubuntu -u root -- bash -c "docker images openclaw:local"
预期输出:
IMAGE            ID             DISK USAGE   CONTENT SIZE
openclaw:local   9999153e8d00   6.93GB       1.83GB
六、配置并启动 OpenClaw
6.1 修改 docker-compose.yml
在 docker-compose.yml 的 openclaw-gateway 服务的 command 中添加 --allow-unconfigured 参数:
    command:
      [
        "node",
        "dist/index.js",
        "gateway",
        "--bind",
        "${OPENCLAW_GATEWAY_BIND:-lan}",
        "--port",
        "18789",
        "--allow-unconfigured",
      ]
如果不加此参数,容器启动后会报错:
Missing config. Run `openclaw setup` or set gateway.mode=local
6.2 创建 .env 环境变量文件
在项目目录 D:\OpenClaw\openclaw\ 下创建 .env 文件:
OPENCLAW_CONFIG_DIR=/root/.openclaw
OPENCLAW_WORKSPACE_DIR=/root/.openclaw/workspace
OPENCLAW_GATEWAY_PORT=18789
OPENCLAW_BRIDGE_PORT=18790
OPENCLAW_GATEWAY_BIND=lan
OPENCLAW_GATEWAY_TOKEN=<你的随机Token>
OPENCLAW_IMAGE=openclaw:local
生成随机 Token:
wsl -d Ubuntu -u root -- openssl rand -hex 32
6.3 创建配置目录并设置权限
容器内以 node 用户(uid=1000)运行,挂载的配置目录需要对应权限:
wsl -d Ubuntu -u root -- bash -c "mkdir -p /root/.openclaw/workspace && chown -R 1000:1000 /root/.openclaw && chmod -R 755 /root/.openclaw"
6.4 启动 OpenClaw
wsl -d Ubuntu -u root -- bash -c "cd /mnt/d/OpenClaw/openclaw && docker compose up -d openclaw-gateway"
启动后会看到类似输出:
 Network openclaw_default Created
 Container openclaw-openclaw-gateway-1 Created
 Container openclaw-openclaw-gateway-1 Started
6.5 验证启动
查看容器状态:
wsl -d Ubuntu -u root -- docker ps
预期输出:
CONTAINER ID   IMAGE            STATUS       PORTS
addb7615afee   openclaw:local   Up 14 sec    0.0.0.0:18789-18790->18789-18790/tcp
查看日志:
wsl -d Ubuntu -u root -- docker logs openclaw-openclaw-gateway-1 --tail 10
关键日志行:
[gateway] listening on ws://0.0.0.0:18789 (PID 7)
[canvas] host mounted at http://0.0.0.0:18789/__openclaw__/canvas/
[browser/service] Browser control service ready (profiles=2)
HTTP 访问验证:
Invoke-WebRequest -Uri http://127.0.0.1:18789 -UseBasicParsing
返回 HTTP 200 即为成功。
七、访问信息
| 项目 | 值 |
|---|---|
| 访问地址 | http://服务器IP:18789 |
| WebSocket | ws://服务器IP:18789 |
| Bridge 端口 | 18790 |
| 配置目录(WSL 内) | /root/.openclaw |
| 工作目录(WSL 内) | /root/.openclaw/workspace |
| 项目目录(Windows) | D:\OpenClaw\openclaw |
| 项目目录(WSL 内) | /mnt/d/OpenClaw/openclaw |
八、日常管理命令
所有命令在 Windows PowerShell 中执行:
查看日志(实时跟踪)
wsl -d Ubuntu -u root -- docker logs -f openclaw-openclaw-gateway-1
查看容器状态
wsl -d Ubuntu -u root -- docker ps
重启服务
wsl -d Ubuntu -u root -- bash -c "cd /mnt/d/OpenClaw/openclaw && docker compose restart"
停止服务
wsl -d Ubuntu -u root -- bash -c "cd /mnt/d/OpenClaw/openclaw && docker compose down"
启动服务
wsl -d Ubuntu -u root -- bash -c "cd /mnt/d/OpenClaw/openclaw && docker compose up -d openclaw-gateway"
重新构建镜像(代码更新后)
wsl -d Ubuntu -u root -- bash -c "cd /mnt/d/OpenClaw/openclaw && docker build -t openclaw:local -f Dockerfile . && docker compose down && docker compose up -d openclaw-gateway"
确保 WSL Docker 服务启动(服务器重启后)
服务器重启后 WSL 中的 Docker 服务不会自动启动,需要手动执行:
wsl -d Ubuntu -u root -- service docker start
wsl -d Ubuntu -u root -- bash -c "cd /mnt/d/OpenClaw/openclaw && docker compose up -d openclaw-gateway"
如需开机自启,可创建 Windows 计划任务:
schtasks /Create /TN "WSL_Docker_OpenClaw" /TR "wsl -d Ubuntu -u root -- bash -c 'service docker start && cd /mnt/d/OpenClaw/openclaw && docker compose up -d openclaw-gateway'" /SC ONSTART /RU SYSTEM /RL HIGHEST /F
九、Gateway 配置文件(openclaw.json)
OpenClaw Gateway 的核心配置通过 JSON 配置文件管理,路径为 WSL 内的 /root/.openclaw/openclaw.json。
9.1 创建配置文件
以下配置包含:Gateway 认证 Token、受信任代理地址、DeepSeek 模型提供者。
推荐创建 bash 脚本 D:\setup_openclaw_config.sh 来生成配置(避免 PowerShell 转义问题):
#!/bin/bash
set -e

CONFIG_FILE="/root/.openclaw/openclaw.json"

cat > "$CONFIG_FILE" << 'EOF'
{
  "gateway": {
    "mode": "local",
    "auth": {
      "token": "<你在 .env 中设置的 OPENCLAW_GATEWAY_TOKEN>"
    },
    "trustedProxies": ["172.18.0.0/16", "172.30.0.0/16", "127.0.0.1"],
    "bind": "lan",
    "port": 18789
  },
  "agents": {
    "defaults": {
      "model": {
        "primary": "deepseek/deepseek-chat"
      }
    }
  },
  "models": {
    "mode": "merge",
    "providers": {
      "deepseek": {
        "baseUrl": "https://api.deepseek.com/v1",
        "apiKey": "<你的 DeepSeek API Key>",
        "api": "openai-completions",
        "models": [
          {
            "id": "deepseek-chat",
            "name": "DeepSeek V3",
            "reasoning": false,
            "input": ["text"],
            "contextWindow": 64000,
            "maxTokens": 8192
          },
          {
            "id": "deepseek-reasoner",
            "name": "DeepSeek R1",
            "reasoning": true,
            "input": ["text"],
            "contextWindow": 64000,
            "maxTokens": 8192
          }
        ]
      }
    }
  }
}
EOF

chown 1000:1000 "$CONFIG_FILE"
chmod 644 "$CONFIG_FILE"
echo "Config created: $CONFIG_FILE"
执行脚本:
wsl -d Ubuntu -u root -- bash /mnt/d/setup_openclaw_config.sh
9.2 配置项说明
| 配置项 | 说明 |
|---|---|
gateway.mode |
设为 "local" 表示本地模式 |
gateway.auth.token |
Gateway 认证 Token,必须与 .env 中 OPENCLAW_GATEWAY_TOKEN 一致 |
gateway.trustedProxies |
受信任的代理 IP 范围(见 9.3) |
gateway.bind |
监听方式,"lan" 表示监听所有网卡 |
agents.defaults.model.primary |
默认使用的模型,格式为 provider/model |
models.providers |
自定义模型提供者配置(见第十节) |
9.3 关于 trustedProxies
由于外部访问通过 Nginx HTTPS 反向代理转发到 Gateway,代理请求来自 Docker 网桥(172.18.x.x)或 WSL 虚拟网段(172.30.x.x)。如果不配置 trustedProxies,Gateway 日志会出现以下警告:
Proxy headers detected from untrusted address. Connection will not be treated as local.
Configure gateway.trustedProxies to restore local client detection behind your proxy.
9.4 重启 Gateway 加载配置
修改 openclaw.json 后需重启 Gateway 容器:
wsl -d Ubuntu -u root -- docker compose -f /mnt/d/OpenClaw/openclaw/docker-compose.yml restart openclaw-gateway
验证配置是否加载成功:
wsl -d Ubuntu -u root -- docker logs openclaw-openclaw-gateway-1 --tail 5
成功时日志会显示:
[gateway] agent model: deepseek/deepseek-chat
[gateway] listening on ws://0.0.0.0:18789 (PID 7)
如果配置有误,日志会提示:
Config invalid
File: ~/.openclaw/openclaw.json
Problem: ...
Run: openclaw doctor --fix
注意:配置文件中不能包含未知字段,否则 Gateway 会报配置无效错误。
只使用 OpenClaw 认可的顶级字段:gateway、agents、models。
十、模型配置详解
10.1 使用 DeepSeek 模型
OpenClaw 默认使用 Anthropic Claude 模型(anthropic/claude-opus-4-6),但如果没有 Anthropic API Key,
发送消息时会报错:
Agent failed: No API key found for provider "anthropic".
Auth store: /home/node/.openclaw/agents/main/agent/auth-profiles.json
通过在 openclaw.json 的 models.providers 中配置 DeepSeek 作为自定义提供者,
可以使用 DeepSeek 的 API。DeepSeek API 兼容 OpenAI 接口,配置 api: "openai-completions" 即可。
10.2 可用的 DeepSeek 模型
| 模型 ID | 名称 | 说明 |
|---|---|---|
deepseek/deepseek-chat |
DeepSeek V3 | 通用对话模型,速度快 |
deepseek/deepseek-reasoner |
DeepSeek R1 | 推理增强模型,适合复杂问题 |
10.3 在聊天中切换模型
在 OpenClaw 的聊天界面中输入以下命令可切换模型:
/model                              # 打开模型选择器
/model list                         # 列出可用模型
/model deepseek/deepseek-chat       # 切换到 DeepSeek V3
/model deepseek/deepseek-reasoner   # 切换到 DeepSeek R1
10.4 使用其他模型提供者(可选)
如果有其他 API Key,可以在 models.providers 中添加更多提供者,或使用内置提供者。
Anthropic Claude(推荐,效果最好):
- 在
.env中设置ANTHROPIC_API_KEY=sk-ant-... - 配置
"primary": "anthropic/claude-opus-4-6"
OpenAI:
- 在
.env中设置OPENAI_API_KEY=sk-... - 配置
"primary": "openai/gpt-5.1-codex"
Ollama(本地模型,免费):
- 先安装 Ollama 并拉取模型:
ollama pull llama3.3 - 配置
"primary": "ollama/llama3.3"
十一、设备配对(Dashboard 访问认证)
11.1 问题说明
通过 HTTPS 打开 OpenClaw Dashboard 时,可能会看到以下错误:
disconnected (1008): unauthorized: gateway token missing— 浏览器尚未传递 Gateway Tokendisconnected (1008): pairing required— Token 已验证,但浏览器设备尚未被批准
11.2 获取 Dashboard URL(含 Token)
wsl -d Ubuntu -u root -- docker compose -f /mnt/d/OpenClaw/openclaw/docker-compose.yml run --rm openclaw-cli dashboard --no-open
输出示例:
Dashboard URL: http://127.0.0.1:18789/#token=10d451e1...
关键:Token 通过 URL hash fragment(
#token=)传递,不是 query parameter(?token=)。
格式:https://IP地址/#token=<Token值>
11.3 在浏览器中首次访问
由于外部设备通过 HTTPS 访问,将 URL 中的 localhost 替换为 HTTPS 地址:
https://192.168.1.100/#token=<你的OPENCLAW_GATEWAY_TOKEN>
首次访问时浏览器会提示证书不安全(自签名证书),点击 “高级” → “继续前往” 即可。
Token 会被浏览器自动存储在 localStorage 中,后续访问不需要再带 Token。
11.4 批准浏览器设备
首次通过浏览器连接后,Gateway 会将浏览器记录为"待批准设备"(pending)。需要通过 CLI 批准。
由于 CLI 默认从配置文件读取 bind: "lan" 并尝试连接 LAN IP,会触发安全检查错误:
SECURITY ERROR: Gateway URL "ws://172.x.x.x:18789" uses plaintext ws:// to a non-loopback address.
解决方法:临时将配置中的 bind 改为 "loopback",运行 CLI 命令后改回 "lan"。
步骤一:临时修改配置为 loopback
wsl -d Ubuntu -u root -- sed -i 's/"bind": "lan"/"bind": "loopback"/' /root/.openclaw/openclaw.json
注意:不要重启 Gateway。只修改配置文件让 CLI 认为网关在 localhost。
Gateway 仍按之前的 lan 模式运行,不受影响。
步骤二:列出待批准的设备
wsl -d Ubuntu -u root -- docker run --rm --network host -v /root/.openclaw:/home/node/.openclaw -e HOME=/home/node -e OPENCLAW_GATEWAY_TOKEN=<你的Token> openclaw:local node dist/index.js devices list
输出示例:
Pending (2)
┌──────────────────────────────────────┬──────────────┬──────────┬─────────────┬──────────┐
│ Request                              │ Device       │ Role     │ IP          │ Age      │
├──────────────────────────────────────┼──────────────┼──────────┼─────────────┼──────────┤
│ 3aea2d30-60e4-4017-869a-511ad1cd1669 │ d8771c35...  │ operator │             │ just now │
│ 09e9d0f5-5c4f-4da7-8b84-08462e57ac39 │ e34ff187...  │ operator │ 172.30.80.1 │ 2m ago   │
└──────────────────────────────────────┴──────────────┴──────────┴─────────────┴──────────┘
步骤三:批准所有待审设备
# 替换 <requestId> 为 Pending 列表中 Request 列的值
wsl -d Ubuntu -u root -- docker run --rm --network host -v /root/.openclaw:/home/node/.openclaw -e HOME=/home/node -e OPENCLAW_GATEWAY_TOKEN=<你的Token> openclaw:local node dist/index.js devices approve <requestId>
每个设备单独批准,输出:
Approved d8771c35... (3aea2d30-60e4-4017-869a-511ad1cd1669)
步骤四:恢复配置为 lan
wsl -d Ubuntu -u root -- sed -i 's/"bind": "loopback"/"bind": "lan"/' /root/.openclaw/openclaw.json
步骤五:重启 Gateway
wsl -d Ubuntu -u root -- docker compose -f /mnt/d/OpenClaw/openclaw/docker-compose.yml restart openclaw-gateway
11.5 验证连接
重启后查看日志,成功连接时会显示:
[ws] webchat connected conn=e6830245... remote=172.18.0.1 client=openclaw-control-ui webchat vdev
[ws] ⇄ res ✓ config.schema 1540ms ...
[ws] ⇄ res ✓ chat.history 121ms ...
[gateway] agent model: deepseek/deepseek-chat
刷新浏览器页面,Dashboard 应正常显示,可以开始聊天。
十二、配置 HTTPS 访问(必须)
12.1 问题说明
OpenClaw 的控制界面要求 安全上下文(Secure Context) 才能正常工作:
- 通过
http://localhost访问 — 正常 - 通过
http://IP地址访问 — 白屏(WebSocket 连接被拒绝) - 通过
https://IP地址访问 — 正常
日志中会显示如下错误:
[ws] closed before connect ... reason=control ui requires HTTPS or localhost (secure context)
因此,从其他设备访问必须配置 HTTPS。
12.2 生成自签名 SSL 证书
wsl -d Ubuntu -u root -- bash -c "mkdir -p /root/.openclaw/certs && openssl req -x509 -nodes -days 3650 -newkey rsa:2048 -keyout /root/.openclaw/certs/key.pem -out /root/.openclaw/certs/cert.pem -subj '/CN=openclaw.local/O=OpenClaw/C=CN' -addext 'subjectAltName=IP:192.168.1.100,DNS:localhost' && chown -R 1000:1000 /root/.openclaw/certs"
参数说明:
-days 3650:证书有效期 10 年subjectAltName=IP:192.168.1.100:替换为你服务器的实际 IP- 证书存放路径:WSL 内
/root/.openclaw/certs/
12.3 安装 Nginx 反向代理
wsl -d Ubuntu -u root -- bash -c "apt-get update && apt-get install -y nginx"
12.4 配置 Nginx HTTPS 反向代理
创建 Nginx 配置脚本 D:\setup_nginx_ssl.sh:
#!/bin/bash
set -e

cat > /etc/nginx/sites-available/openclaw << 'NGINX'
server {
    listen 443 ssl;
    server_name _;

    ssl_certificate /root/.openclaw/certs/cert.pem;
    ssl_certificate_key /root/.openclaw/certs/key.pem;

    location / {
        proxy_pass http://127.0.0.1:18789;
        proxy_http_version 1.1;
        proxy_set_header Upgrade $http_upgrade;
        proxy_set_header Connection "upgrade";
        proxy_set_header Host $host;
        proxy_set_header X-Real-IP $remote_addr;
        proxy_set_header X-Forwarded-For $proxy_add_x_forwarded_for;
        proxy_set_header X-Forwarded-Proto https;
        proxy_read_timeout 86400s;
        proxy_send_timeout 86400s;
    }
}
NGINX

ln -sf /etc/nginx/sites-available/openclaw /etc/nginx/sites-enabled/openclaw
rm -f /etc/nginx/sites-enabled/default

nginx -t && service nginx restart
echo "Nginx HTTPS proxy configured on port 443"
执行脚本:
wsl -d Ubuntu -u root -- bash /mnt/d/setup_nginx_ssl.sh
关键配置说明:
- 监听 443 端口(HTTPS 标准端口)
proxy_pass http://127.0.0.1:18789:转发到 OpenClaw Gatewayproxy_set_header Upgrade / Connection:支持 WebSocket 升级proxy_read_timeout 86400s:WebSocket 长连接超时设为 24 小时
十三、配置 Windows 端口转发
13.1 问题说明
WSL2 的端口仅自动转发到 Windows 的 localhost,不会监听在外部网卡上。
需要通过 netsh interface portproxy 将外部请求转发到 WSL2 内部 IP。
13.2 手动配置端口转发
获取 WSL2 内部 IP:
wsl -d Ubuntu -u root -- hostname -I
输出示例:172.30.92.44(每次 WSL 重启可能会变)
配置端口转发(替换 172.30.92.44 为实际 WSL IP):
# HTTPS 端口(Nginx)
netsh interface portproxy add v4tov4 listenport=443 listenaddress=0.0.0.0 connectport=443 connectaddress=172.30.92.44

# OpenClaw 直连端口(可选,仅 localhost 可用)
netsh interface portproxy add v4tov4 listenport=18789 listenaddress=0.0.0.0 connectport=18789 connectaddress=172.30.92.44
netsh interface portproxy add v4tov4 listenport=18790 listenaddress=0.0.0.0 connectport=18790 connectaddress=172.30.92.44
13.3 添加防火墙规则
netsh advfirewall firewall add rule name="OpenClaw HTTPS 443" dir=in action=allow protocol=tcp localport=443
netsh advfirewall firewall add rule name="OpenClaw Gateway 18789" dir=in action=allow protocol=tcp localport=18789
netsh advfirewall firewall add rule name="OpenClaw Bridge 18790" dir=in action=allow protocol=tcp localport=18790
13.4 查看已配置的端口转发
netsh interface portproxy show v4tov4
预期输出:
侦听 ipv4:                 连接到 ipv4:
地址            端口        地址            端口
--------------- ----------  --------------- ----------
0.0.0.0         443         172.30.92.44    443
0.0.0.0         18789       172.30.92.44    18789
0.0.0.0         18790       172.30.92.44    18790
13.5 自动更新端口转发脚本
WSL2 每次重启后内部 IP 可能变化,需要重新配置端口转发。
创建 D:\OpenClaw\openclaw\wsl_port_forward.ps1:
# WSL2 端口转发脚本 - 每次 WSL 重启后运行
$ports = @(443, 18789, 18790)

$wslIp = (wsl -d Ubuntu -u root -- hostname -I).Trim().Split(' ')[0]

if (-not $wslIp) {
    Write-Host "[ERROR] Failed to get WSL2 IP" -ForegroundColor Red
    exit 1
}

Write-Host "WSL2 IP: $wslIp" -ForegroundColor Cyan

foreach ($port in $ports) {
    netsh interface portproxy delete v4tov4 listenport=$port listenaddress=0.0.0.0 2>$null
    netsh interface portproxy add v4tov4 listenport=$port listenaddress=0.0.0.0 connectport=$port connectaddress=$wslIp
    Write-Host "Forwarded 0.0.0.0:$port -> ${wslIp}:$port" -ForegroundColor Green
}

Write-Host "`nPort forwarding configured." -ForegroundColor Green
netsh interface portproxy show v4tov4
13.6 注册开机自启计划任务
schtasks /Create /TN "WSL_OpenClaw_Startup" /TR "powershell -ExecutionPolicy Bypass -File D:\OpenClaw\openclaw\wsl_port_forward.ps1" /SC ONSTART /DELAY 0001:00 /RU SYSTEM /RL HIGHEST /F
延迟 1 分钟启动,等待 WSL2 完全初始化后再配置端口转发。
十四、最终访问方式
14.1 首次访问(需带 Token)
首次在新浏览器访问时,需要在 URL 中携带 Gateway Token:
https://192.168.1.100/#token=<你的OPENCLAW_GATEWAY_TOKEN>
注意:Token 使用
#token=(URL hash fragment),不是?token=(query parameter)。
Token 会被浏览器存储在 localStorage 中,后续访问不需要再带 Token。
14.2 常规访问
| 访问方式 | 地址 | 说明 |
|---|---|---|
| 外部设备(推荐) | https://192.168.1.100 |
通过 Nginx HTTPS 代理,浏览器首次访问需信任证书 |
| 首次外部访问 | https://192.168.1.100/#token=<Token> |
首次需携带 Token,设备配对后即可免 Token 访问 |
| 服务器本机 | http://localhost:18789 |
直连,无需 HTTPS |
浏览器安全提示:由于使用自签名证书,浏览器会显示安全警告。
点击 “高级” → “继续前往 192.168.1.100(不安全)” 即可正常访问。
14.3 获取 Dashboard URL
如果忘记了 Token,可以随时通过 CLI 获取:
wsl -d Ubuntu -u root -- docker compose -f /mnt/d/OpenClaw/openclaw/docker-compose.yml run --rm openclaw-cli dashboard --no-open
十五、完整的服务器重启后恢复流程
服务器重启后需要执行以下步骤(或由计划任务自动完成):
自动恢复(已注册计划任务)
- PMP 刷题系统:计划任务
PMP_TiKu_Service开机自动启动 - 端口转发:计划任务
WSL_OpenClaw_Startup开机后 1 分钟自动配置
手动恢复(如果自动恢复失败)
# 1. 启动 WSL Docker 服务
wsl -d Ubuntu -u root -- service docker start

# 2. 启动 Nginx
wsl -d Ubuntu -u root -- service nginx start

# 3. 启动 OpenClaw 容器
wsl -d Ubuntu -u root -- bash -c "cd /mnt/d/OpenClaw/openclaw && docker compose up -d openclaw-gateway"

# 4. 更新端口转发
powershell -ExecutionPolicy Bypass -File D:\OpenClaw\openclaw\wsl_port_forward.ps1
一键恢复脚本
可创建 D:\OpenClaw\openclaw\start_all.bat:
@echo off
chcp 65001 >nul 2>nul
echo Starting WSL Docker and OpenClaw...

wsl -d Ubuntu -u root -- bash -c "service docker start && service nginx start && cd /mnt/d/OpenClaw/openclaw && docker compose up -d openclaw-gateway"

timeout /t 5 /nobreak >nul

powershell -ExecutionPolicy Bypass -File D:\OpenClaw\openclaw\wsl_port_forward.ps1

echo.
echo OpenClaw started. Access: https://192.168.1.100
pause
十六、架构说明(完整)
Windows Server 2022
├── WSL2 (Virtual Machine Platform)
│   └── Ubuntu (Linux 发行版, IP: 172.30.x.x)
│       ├── Nginx (HTTPS 反向代理, 端口 443)
│       │   └── 自签名 SSL 证书 (/root/.openclaw/certs/)
│       └── Docker Engine (Linux 容器运行时)
│           └── openclaw-openclaw-gateway-1 (容器)
│               ├── Node.js 22 运行时
│               ├── OpenClaw Gateway (端口 18789)
│               ├── OpenClaw Bridge (端口 18790)
│               └── 配置文件 (/home/node/.openclaw/openclaw.json)
│                   ├── Gateway 认证 (token + trustedProxies)
│                   ├── 模型配置 (DeepSeek V3/R1)
│                   └── 设备配对状态 (nodes/paired.json)
├── D:\OpenClaw\openclaw (项目源码,通过 /mnt/d/ 挂载到 WSL)
├── netsh portproxy (端口转发)
│   ├── 0.0.0.0:443  → WSL:443  (HTTPS)
│   ├── 0.0.0.0:18789 → WSL:18789 (Gateway)
│   └── 0.0.0.0:18790 → WSL:18790 (Bridge)
└── Windows 防火墙规则:放行 443, 18789, 18790
外部设备访问路径:
客户端浏览器
  → https://192.168.1.100:443 (携带 #token=xxx)
  → Windows netsh portproxy
  → WSL2 Nginx (SSL 终止 + 反向代理)
  → Docker 容器 OpenClaw Gateway (HTTP 18789)
  → Gateway 验证 Token → 设备配对检查 → 建立 WebSocket 连接
  → 用户消息 → DeepSeek API (deepseek-chat / deepseek-reasoner)
最终效果图:
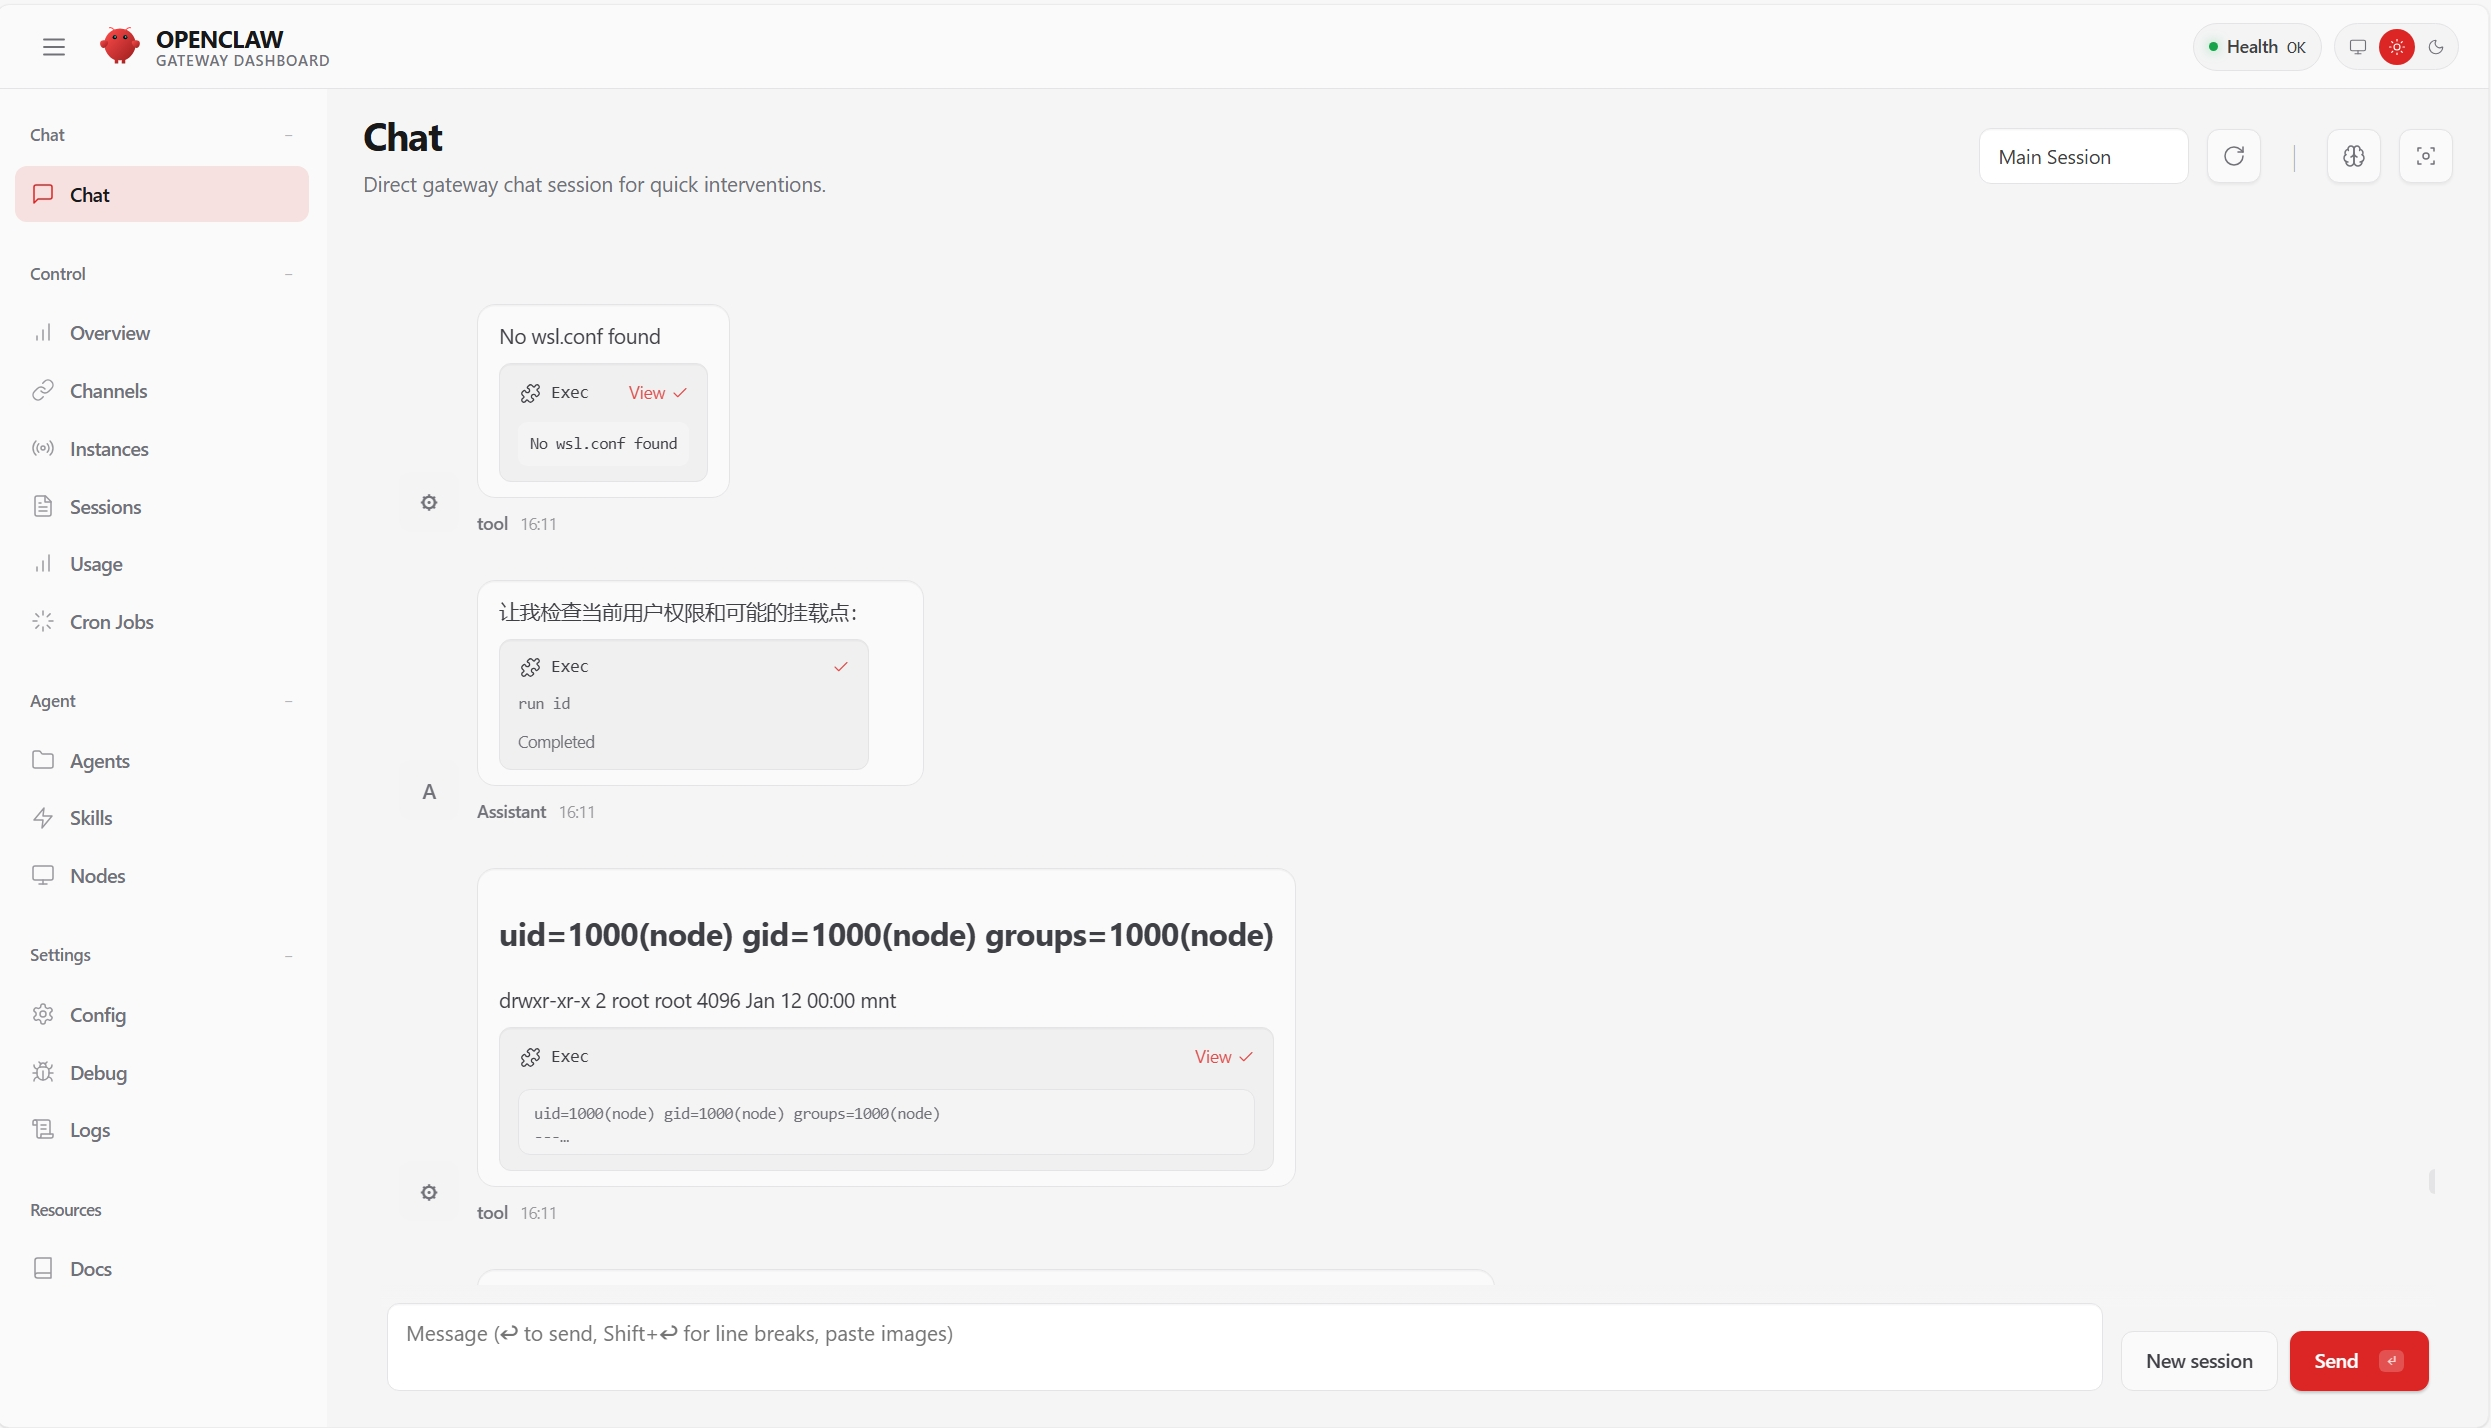
需要注意的是此OpenClaw被限制在了它的部署环境中,无法操作PC端的任意文件,要想操作的话,你可以部署完成后再想其他办法。

魔乐社区(Modelers.cn) 是一个中立、公益的人工智能社区,提供人工智能工具、模型、数据的托管、展示与应用协同服务,为人工智能开发及爱好者搭建开放的学习交流平台。社区通过理事会方式运作,由全产业链共同建设、共同运营、共同享有,推动国产AI生态繁荣发展。
更多推荐


 18
18 0
0- 0


 已为社区贡献2条内容

所有评论(0)