

react 录制音频
In this tutorial, we are going to learn how to record and play audio to React Native apps. We are going to build a simple screen that supports features such as recording audio, playing audio files, pausing and resuming, as well as resetting audio streams. The final app will look like the image below.
在本教程中,我们将学习如何录制和播放音频到React Native应用程序。 我们将构建一个简单的屏幕,该屏幕支持录制音频,播放音频文件,暂停和恢复以及重置音频流等功能。 最终的应用程序将如下图所示。
Originally published at https://www.instamobile.io on August 20, 2020.
最初于 2020年8月20日 在 https://www.instamobile.io 上 发布 。
Recording and playing audio in mobile applications is a very popular feature. Fortunately, to record and play audio in React Native apps can be done easily. This is thanks to the Expo ecosystem that easily supports sound recording in React Native. However, if we need to add any feature that requires us to migrate off the Expo system to React Native CLI, we may need to put much more effort into its configuration.
在移动应用程序中录制和播放音频是非常受欢迎的功能。 幸运的是,在React Native应用程序中录制和播放音频可以轻松完成。 这要归功于Expo生态系统,该生态系统轻松支持React Native中的录音。 但是,如果我们需要添加任何需要从Expo系统迁移到React Native CLI的功能,则可能需要在其配置上付出更多的努力。
As a result, we may need to use a third-party package. After much research, I have come up with a package that meets our requirements for recording and playing audio in React Native. The package name is react-native-audio-recorder-player. The package is easy to configure and provides us with robust modules and components to implement an audio recorder and player in React Native applications.
因此,我们可能需要使用第三方程序包。 经过大量研究,我提出了一个满足我们在React Native中录制和播放音频的要求的软件包。 软件包名称是react-native-audio-recorder-player 。 该软件包易于配置,并为我们提供了强大的模块和组件,以在React Native应用程序中实现音频记录器和播放器。
Without further ado, let’s get started!
事不宜迟,让我们开始吧!
先决条件 (Prerequisites)
In order to go through this tutorial, we need to first prepare our React Native development environment. For this, we can easily follow other tutorials on Instamobile such as the one describing how to set up your React Native development environment.
为了完成本教程,我们需要首先准备我们的React Native开发环境。 为此,我们可以轻松地遵循有关Instamobile的其他教程,例如描述如何设置React Native开发环境的教程。
安装和设置软件包 (Installing and Setting Up the Package)
First, we need to install the react-native-audio-recorder-player package using yarn or npm. I prefer using yarn so I am going to use yarn and run the following command in the project Terminal:
首先,我们需要使用yarn或npm安装react-native-audio-recorder-player软件包。 我更喜欢使用yarn,所以我将使用yarn并在项目Terminal中运行以下命令:
yarn add react-native-audio-recorder-playerThen, we need to run the following command in order to run the app in the iOS device or simulator (simply replace ios with android if you are running on Android)
然后,我们需要运行以下命令,以便在iOS设备或模拟器中运行该应用程序(如果您在Android上运行,只需将ios替换为android )
react-native run-ios准备记录器组件 (Preparing the Recorder Component)
Here, we start by importing the necessary methods from the react-native-audio-recorder-player package as shown in the code snippet below:
在这里,我们首先从react-native-audio-recorder-player包中导入必要的方法,如下面的代码片段所示:
import AudioRecorderPlayer, {
 AVEncoderAudioQualityIOSType,
 AVEncodingOption,
 AudioEncoderAndroidType,
 AudioSet,
 AudioSourceAndroidType,
} from 'react-native-audio-recorder-player';
Then, we need to create a few new states and also initialize a new recorder instance as depicted in the code snippet below:
然后,我们需要创建一些新状态,并初始化一个新的记录器实例,如下面的代码片段所示:
class App extends Component {
  constructor(props) {
    super(props);
    this.state = {
      isLoggingIn: false,
      recordSecs: 0,
      recordTime: '00:00:00',
      currentPositionSec: 0,
      currentDurationSec: 0,
      playTime: '00:00:00',
      duration: '00:00:00',
    };
    this.audioRecorderPlayer = new AudioRecorderPlayer();
    this.audioRecorderPlayer.setSubscriptionDuration(0.09); // optional. Default is 0.1
  }
准备UI (Preparing the UI)
For the UI implementation, we are going to use components of the react-native-paper package. We already have an idea of how an audio player and recorder should look like. Hence, we can easily implement it on our screen. For a simple UI layout for the app, we can use the code from the following code snippet:
对于UI实现,我们将使用react-native-paper包的组件。 我们已经对音频播放器和录音机的外观有所了解。 因此,我们可以轻松地在屏幕上实现它。 对于应用程序的简单UI布局,我们可以使用以下代码段中的代码:
return (
      <Card style={{ flex: 1, flexDirection: 'row', alignItems: 'center', alignContent: 'center', alignSelf: 'center' }}>
        <Background>
          <Logo />
          <Header>InstaPlayer</Header>
          <Title>{this.state.recordTime}</Title>
          <Button mode="contained" icon="record" onPress={() => this.onStartRecord()}>
            RECORD
        </Button>
          <Button
            icon="stop"
            mode="outlined"
            onPress={() => this.onStopRecord()}
          >
            STOP
    </Button>
          <Divider />
          <Title>{this.state.playTime} / {this.state.duration}</Title>
          <Button mode="contained" icon="play" onPress={() => this.onStartPlay()}>
            PLAY
        </Button>
          <Button
            icon="pause"
            mode="contained"
            onPress={() => this.onPausePlay()}
          >
            PAUSE
    </Button>
          <Button
            icon="stop"
            mode="outlined"
            onPress={() => this.onStopPlay()}
          >
            STOP
    </Button>
        </Background>
      </Card>
    )
Hence, we will get an audio recorder and an audio player on the same screen as displayed in the simulator screenshot below:
因此,我们将在与下面的模拟器屏幕快照相同的屏幕上获得一个录音机和一个音频播放器:

Now, it is time to implement the functions for each button on the screen.
现在,是时候实现屏幕上每个按钮的功能了。
在React Native中录制音频 (Record Audio in React Native)
The first thing we need to do in any recording app is to implement the recording feature. The actual implementation is fairly simple for this. We need to follow these simple steps:
在任何录制应用中,我们要做的第一件事就是实现录制功能。 实际的实现对此非常简单。 我们需要遵循以下简单步骤:
- Firstly, we start by defining an audio file name and extension. 首先,我们从定义音频文件名和扩展名开始。
- Secondly, we define the audio format preference. 其次,我们定义音频格式首选项。
- Lastly, we start to record audio and add a record time to the state. 最后,我们开始记录音频并为该状态添加记录时间。
The implementation for this is provided in the code snippet below:
下面的代码段提供了此实现:
onStartRecord = async () => {

    const path = 'hello.m4a';
    const audioSet = {
      AudioEncoderAndroid: AudioEncoderAndroidType.AAC,
      AudioSourceAndroid: AudioSourceAndroidType.MIC,
      AVEncoderAudioQualityKeyIOS: AVEncoderAudioQualityIOSType.high,
      AVNumberOfChannelsKeyIOS: 2,
      AVFormatIDKeyIOS: AVEncodingOption.aac,
    };
    console.log('audioSet', audioSet);
    const uri = await this.audioRecorderPlayer.startRecorder(path, audioSet);
    this.audioRecorderPlayer.addRecordBackListener((e) => {
      this.setState({
        recordSecs: e.current_position,
        recordTime: this.audioRecorderPlayer.mmssss(
          Math.floor(e.current_position),
        ),
      });
    });
    console.log(`uri: ${uri}`);
  };
Hence, we will get the result as shown in the demo screenshot of the emulator below (simply press the Record button):
因此,我们将获得下面的仿真器的演示屏幕截图中所示的结果(只需按“ 记录”按钮):
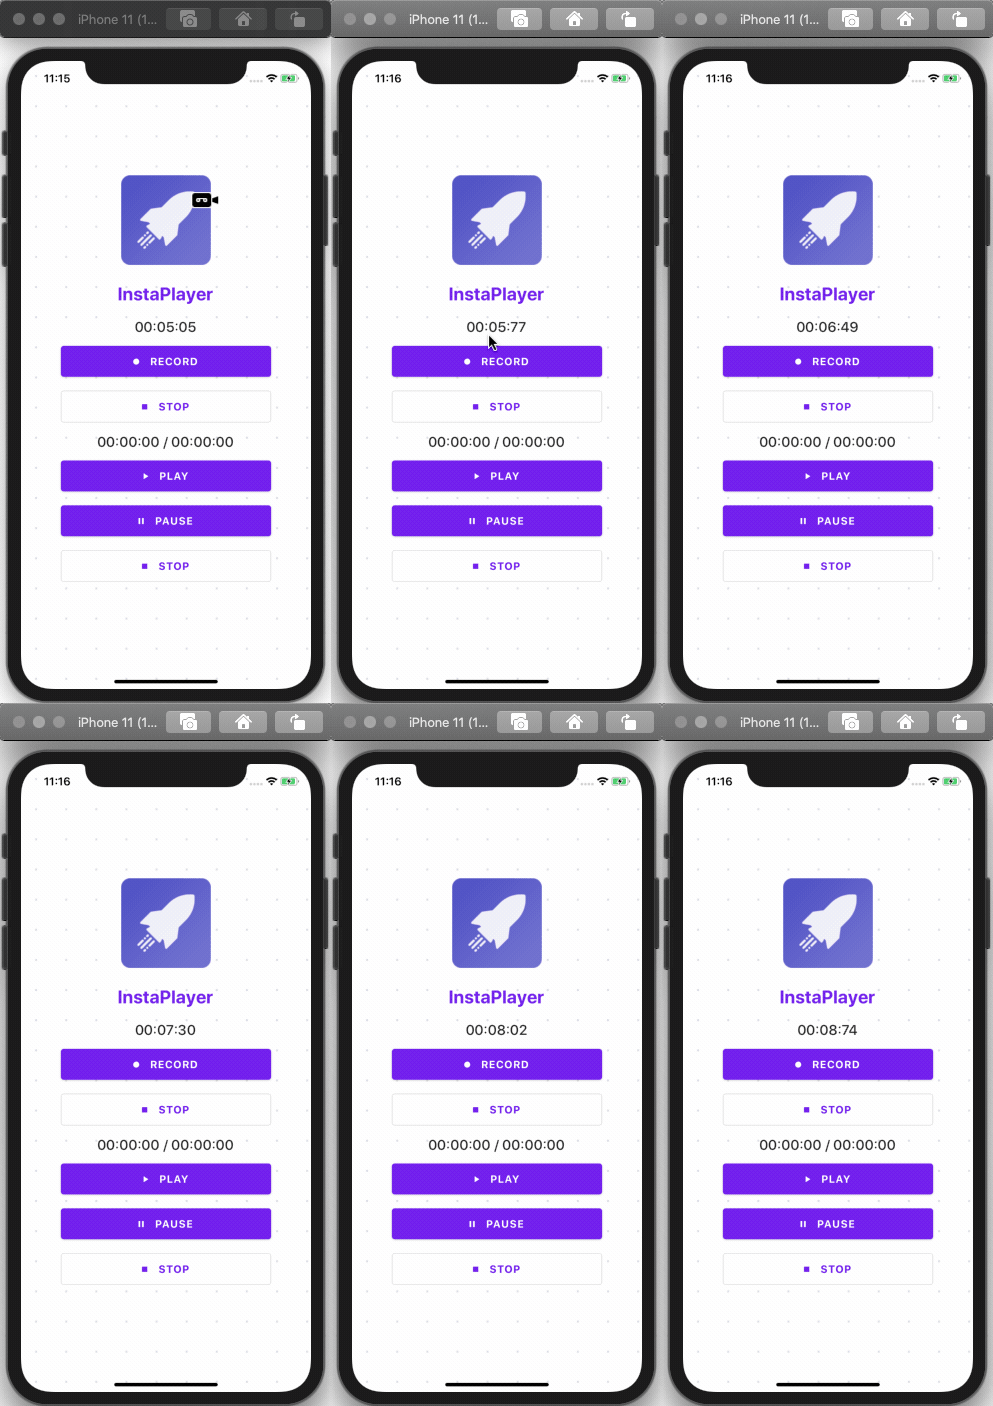
Here, we can see that the timer starts as we tap on the RECORD button.
在这里,我们可以看到定时器在点击“ 记录”按钮时启动。
停止录音 (Stopping Audio Recording)
The stop recording feature is easy to implement as well. We just need to call the stopRecorder method and reset the time counter back to zero using the code from the following code snippet:
停止记录功能也易于实现。 我们只需要调用stopRecorder方法,并使用以下代码片段中的代码将时间计数器重置为零即可:
onStopRecord = async () => {
    const result = await this.audioRecorderPlayer.stopRecorder();
    this.audioRecorderPlayer.removeRecordBackListener();
    this.setState({
      recordSecs: 0,
    });
    console.log(result);
  };
As you can notice we get the result as shown in the demo screenshot below:
如您所见,我们得到的结果如下面的演示屏幕截图所示:
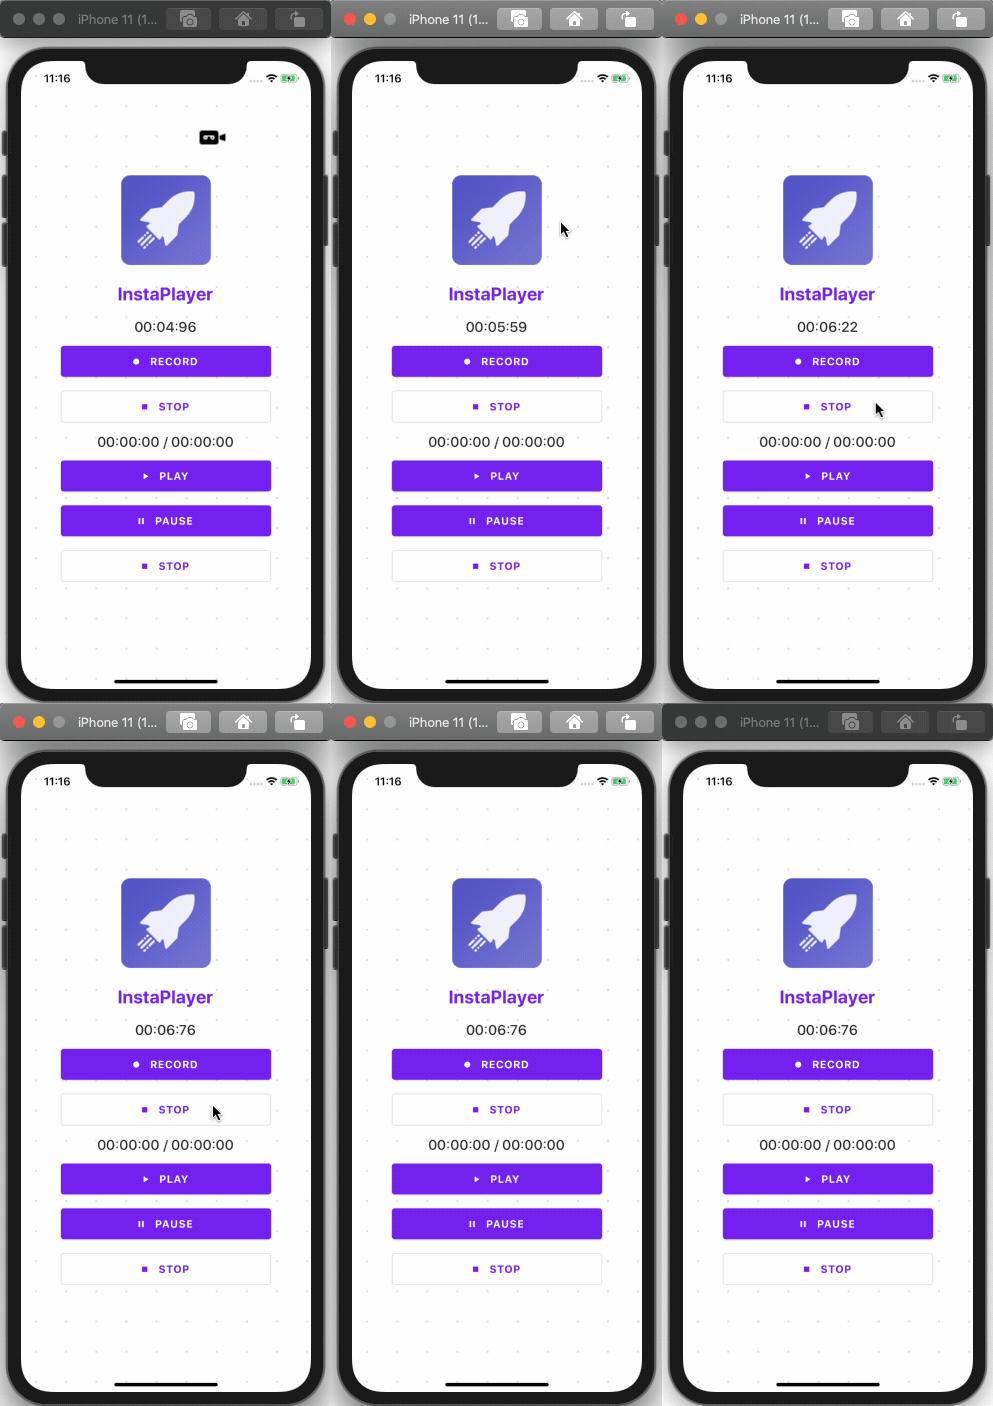
Hence, the timer stops as we tap on the STOP button.
因此,当我们点击“停止”按钮时,计时器停止。
音频播放器以在React Native中播放音频 (Audio Player to Play Audio in React Native)
Since we are done with the recording and stop recording features, we now have an audio file to play. In order to implement the play feature, we need to call the startPlayer method and pass the path to the file that we've just recorded. Then, we need to set the volume. Once the audio plays, we need to set a callback function to stop playing when the play counter indicator reaches the completion point. We also need to add current playtime to the state to display the counter properly in the UI. The implementation for this is provided in the code snippet below:
由于我们已经完成了录制和停止录制功能,因此现在可以播放音频文件。 为了实现播放功能,我们需要调用startPlayer方法并将路径传递到我们刚刚记录的文件。 然后,我们需要设置音量。 音频播放后,我们需要设置一个回调函数,以在播放计数器指示器达到完成点时停止播放。 我们还需要将当前播放时间添加到状态中,以在UI中正确显示计数器。 下面的代码段提供了此实现:
onStartPlay = async (e) => {
    console.log('onStartPlay');
    const path = 'hello.m4a'
    const msg = await this.audioRecorderPlayer.startPlayer(path);
    this.audioRecorderPlayer.setVolume(1.0);
    console.log(msg);
    this.audioRecorderPlayer.addPlayBackListener((e) => {
      if (e.current_position === e.duration) {
        console.log('finished');
        this.audioRecorderPlayer.stopPlayer();
      }
      this.setState({
        currentPositionSec: e.current_position,
        currentDurationSec: e.duration,
        playTime: this.audioRecorderPlayer.mmssss(
          Math.floor(e.current_position),
        ),
        duration: this.audioRecorderPlayer.mmssss(Math.floor(e.duration)),
      });
    });
  };
Hence, we will get the result as shown in the demo screenshot below:
因此,我们将获得如下演示屏幕快照中所示的结果:

As you can see, when we tap the PLAY button, the audio starts playing.
如您所见,当我们点击“播放”按钮时,音频开始播放。
暂停音频播放器 (Pausing The Audio Player)
Implementing a pause feature is simple. We just need to call the pausePlayer method, when PAUSE button is pressed. We can do this by using the following piece of code:
实现暂停功能很简单。 当按下PAUSE按钮时,我们只需要调用pausePlayer方法。 我们可以使用下面的代码来做到这一点:
onPausePlay = async (e) => {
   await this.audioRecorderPlayer.pausePlayer();
};
Hence, we will get the result as shown in the demo screenshot below:
因此,我们将获得如下演示屏幕快照中所示的结果:
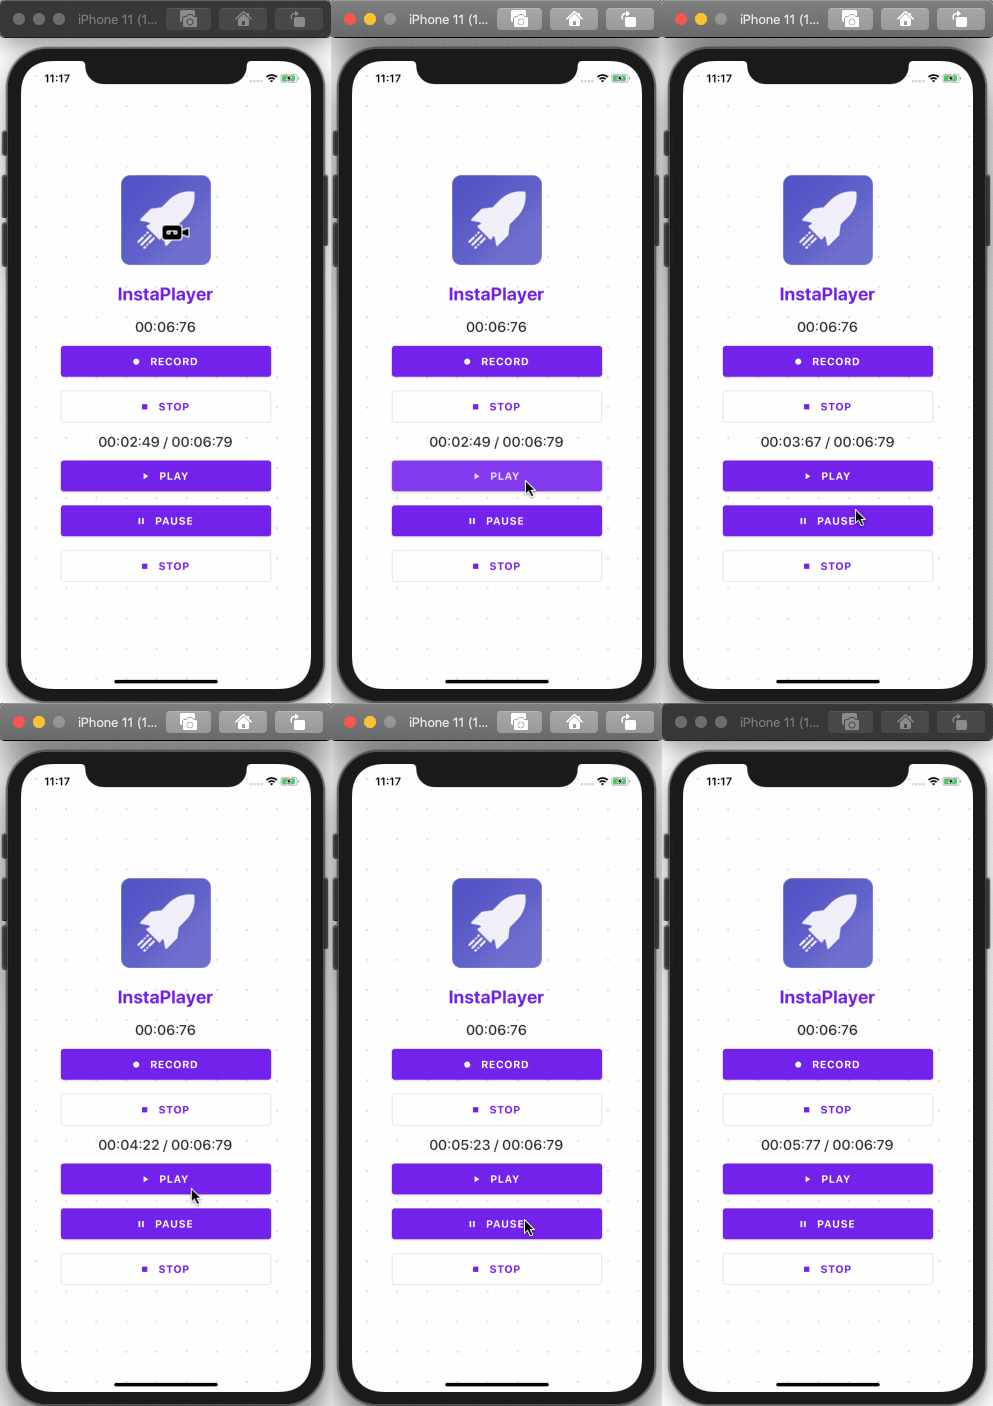
Here, we can see that when we hit the PAUSE button the player pauses, and when we hit the Play button again it starts to play from the same point where we stopped it.
在这里,我们可以看到,当我们按下“暂停”按钮时,播放器会暂停,而当我们再次按下“播放”按钮时,它将从停止它的同一点开始播放。
在React Native中停止音频播放器 (Stopping the Audio Player in React Native)
In order to stop the player, we need to call the stopPlayer method. Then, we need to remove the playback data by calling removePlayBackListener method and reset the counter to zero again. The feature to trigger the stop action is provided as a function in the code snippet below:
为了停止播放器,我们需要调用stopPlayer方法。 然后,我们需要通过调用removePlayBackListener方法删除播放数据,并将计数器再次重置为零。 下面的代码段中提供了触发停止操作的功能:
onStopPlay = async (e) => {
   console.log('onStopPlay');
   this.audioRecorderPlayer.stopPlayer();
   this.audioRecorderPlayer.removePlayBackListener();
 };
Hence, we will get the result as shown in the screenshot below:
因此,我们将得到如下屏幕截图所示的结果:
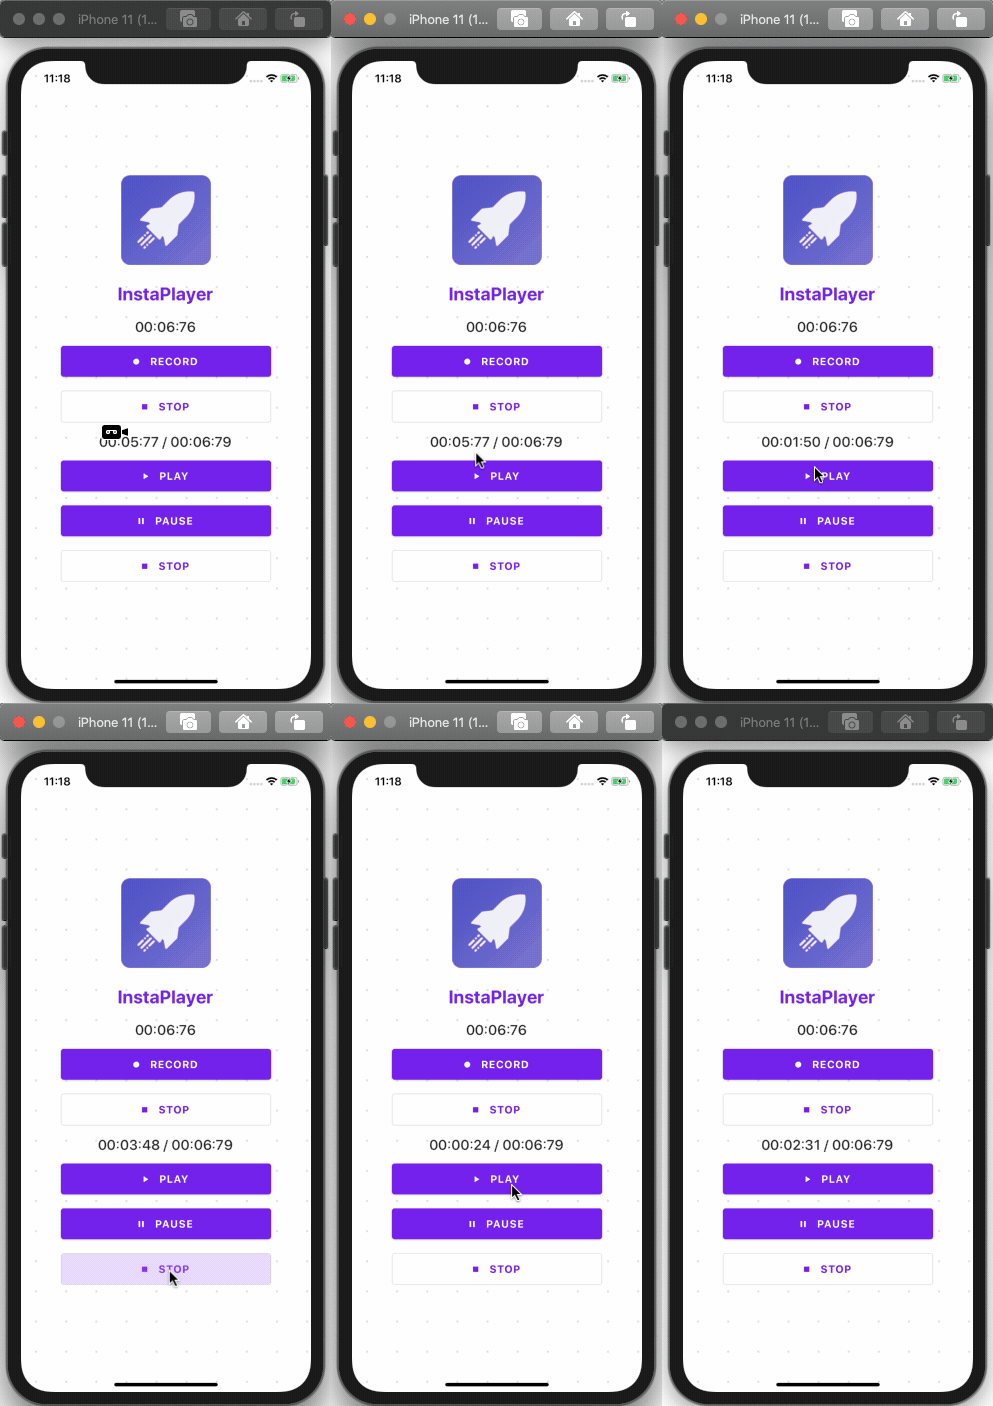
Here, we can see that when we hit the STOP button the player stops and after hitting the PLAY button, the counter starts from this beginning.
在这里,我们可以看到,当我们按下STOP按钮时,播放器停止了,并且在按下PLAY按钮后,计数器从此开始。
Finally, we have successfully implemented the audio recorder and player in the React Native application along with an intuitive UI layout. Hopefully now you know how to record audio in React Native and how to play the recorded audio files into a React Native audio player.
最后,我们已经在React Native应用程序中成功实现了录音机和播放器以及直观的UI布局。 希望现在您知道如何在React Native中录制音频,以及如何将录制的音频文件播放到React Native音频播放器中。
结论 (Conclusion)
It has been an interesting feature to get our hands-on. Implementing an audio recorder and player in a React Native may sound difficult but in fact, it’s fairly simple thanks to a powerful library. This tutorial provides detailed guidance on each step so that it becomes even simpler. The package that we used for recording and playing audio is pretty robust and easy to implement as well. Make sure to get your hands dirty with it.
动手操作是一个有趣的功能。 在React Native中实现录音机和播放器听起来很困难,但实际上,由于功能强大的库,这相当简单。 本教程为每个步骤提供了详细的指导,使其变得更加简单。 我们用于录制和播放音频的程序包非常健壮,并且易于实现。 确保将其弄脏。
We can do tons of things in React Native utilizing this feature (think Spotify clone or Podcasts clone app). At Instamobile, we are using audio recording and playing in all of the apps that have a chat feature, such as our chat app template.
我们可以利用此功能在React Native中做很多事情(想想Spotify克隆或Podcasts克隆应用程序)。 在Instamobile,我们正在所有具有聊天功能的应用程序(例如我们的聊天应用程序模板)中使用音频记录和播放。
普通英语JavaScript (JavaScript In Plain English)
Did you know that we have three publications and a YouTube channel? Find links to everything at plainenglish.io!
您知道我们有三个出版物和一个YouTube频道吗? 在plainenglish.io上找到所有内容的链接!
翻译自: https://medium.com/javascript-in-plain-english/how-to-record-audio-in-react-native-2d728bc6cc29
react 录制音频




 已为社区贡献1条内容

所有评论(0)