前端vue页面实时播放海康威视监控视频 3种方法
ffmpeg-N-103197-gbff7d662d7-win64-gpl官网:https://www.ffmpeg.org/download.html#build-windows。其中我们测试的rtsp是 rtsp://stream.strba.sk:1935/strba/VYHLAD_JAZERO.stream。// .outputFormat('flv').videoCodec('copy'
用于web播放海康威视rtsp://admin:ca123456@192.168.64.82:554//Streaming/Channels/1 格式的视频。
注意:前2个目前都在windows上使用,服务器安装部署多多少少有些问题,如果急需解决则直接看第3个方法。
1、WebRtcStreamer
github:https://github.com/mpromonet/webrtc-streamer/releases
里面有windows版也有linux版的

在本地使用,进入exe目录
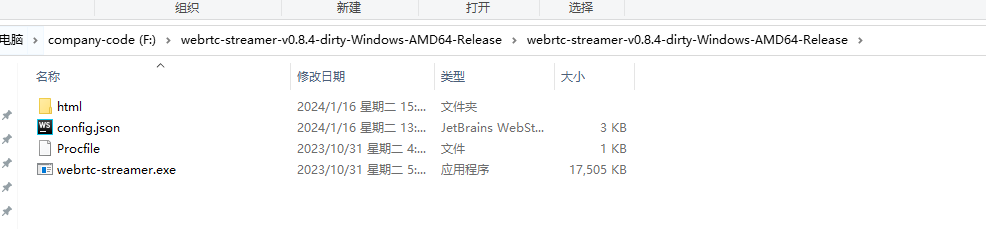
启动,默认是8000

打开测试
默认是index.html,我们可以再html里面新建一个test.html修改一下
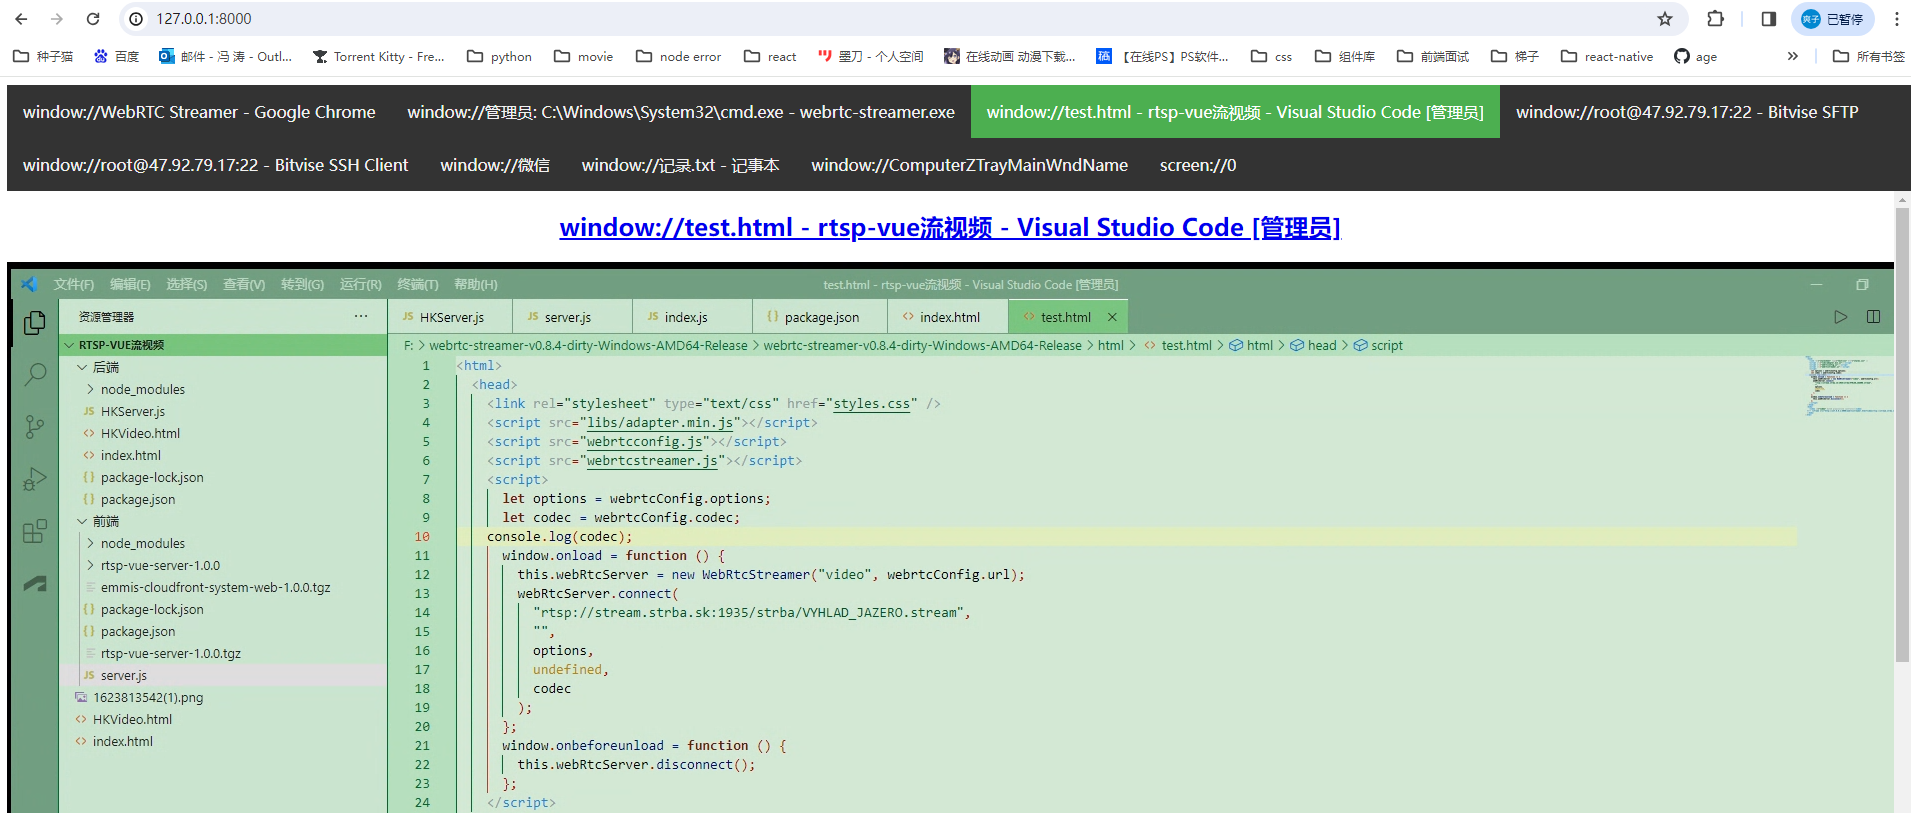
test.html
<html>
  <head>
    <link rel="stylesheet" type="text/css" href="styles.css" />
    <script src="libs/adapter.min.js"></script>
    <script src="webrtcconfig.js"></script>
    <script src="webrtcstreamer.js"></script>
    <script>
      let options = webrtcConfig.options;
      let codec = webrtcConfig.codec;
      console.log(codec);
      window.onload = function () {
        this.webRtcServer = new WebRtcStreamer("video", webrtcConfig.url);
        webRtcServer.connect(
          "rtsp://stream.strba.sk:1935/strba/VYHLAD_JAZERO.stream",
          "",
          options,
          undefined,
          codec
        );
      };
      window.onbeforeunload = function () {
        this.webRtcServer.disconnect();
      };
    </script>
  </head>
  <body>
    <video id="video" muted playsinline controls></video>
    <!-- <iframe src="http://127.0.0.1:8000/webrtcstreamer.html?video=rtsp://stream.strba.sk:1935/strba/VYHLAD_JAZERO.stream"></iframe> -->
  </body>
</html>
其中我们测试的rtsp是 rtsp://stream.strba.sk:1935/strba/VYHLAD_JAZERO.stream
如果不知道网页上的rtsp是否可用,可以下载vlc-3.0.20-win64 播放器打开网络串流测试
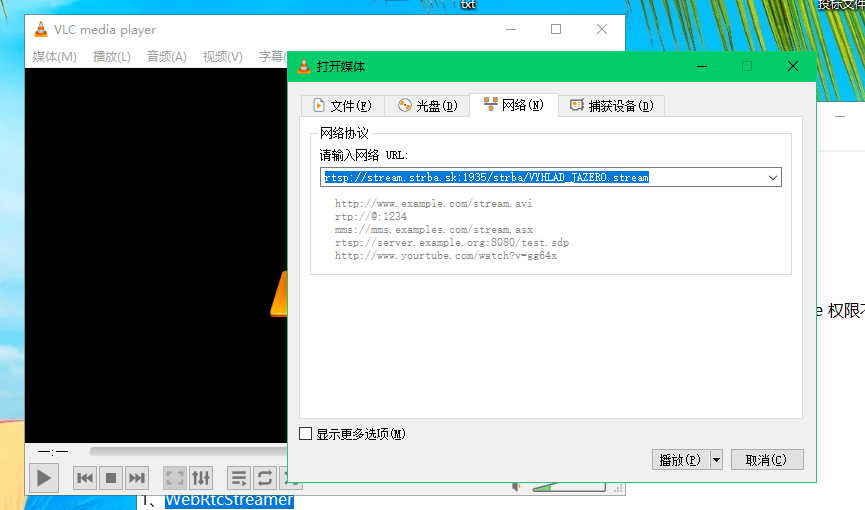
可以播放即能使用。
打开test页面, 播放成功。
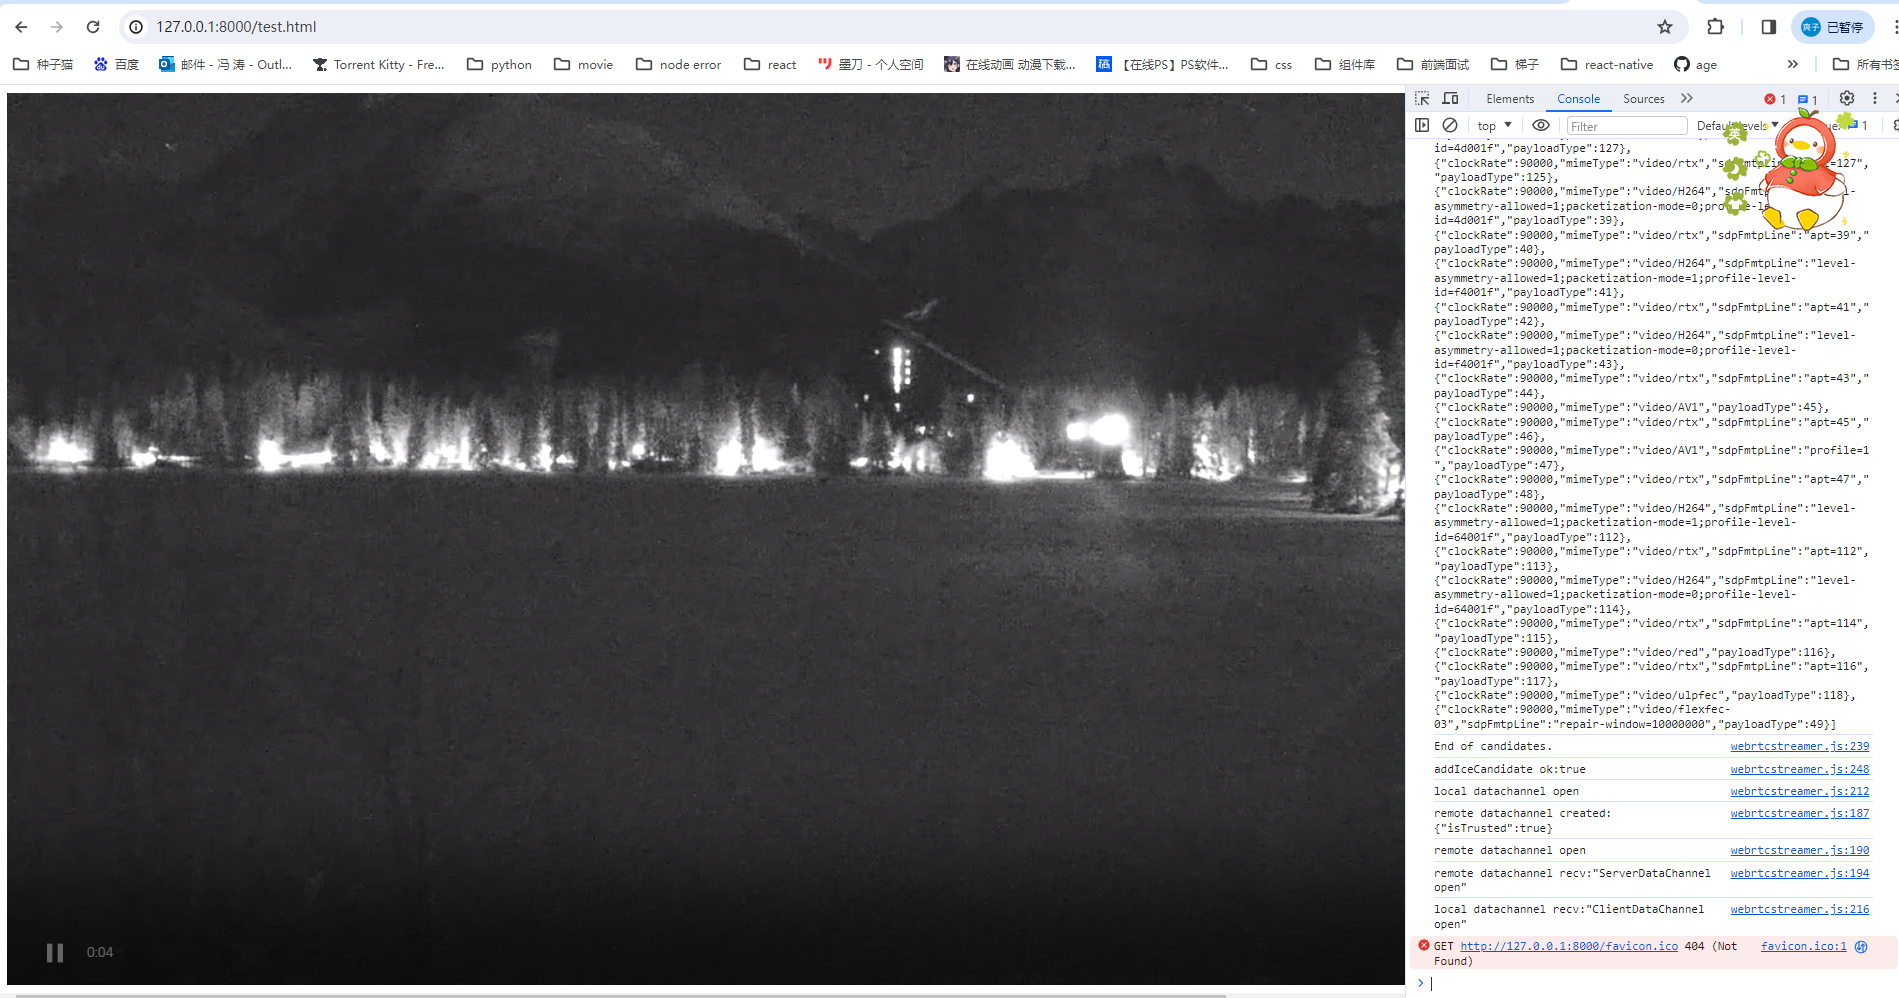
这个使用起来还是比较简单,但是linux服务器安装比较麻烦,目前还在实践中。
2、node websockt+ffmpeg转码成flv
node服务端调用ffmpeg转码然后前端使用
服务端
serve.js
const WebSocket = require('ws')
const webSocketStream = require('websocket-stream/stream')
// const ffmpeg = require('fluent-ffmpeg')
const ffmpegInstaller = require('@ffmpeg-installer/ffmpeg');
const ffmpeg = require('fluent-ffmpeg');
ffmpeg.setFfmpegPath(ffmpegInstaller.path);
// 建立WebSocket服务
const wss = new WebSocket.Server({ port: 8888, perMessageDeflate: false })

// 监听连接
wss.on('connection', handleConnection)

// 连接时触发事件
function handleConnection (ws, req) {
  // 获取前端请求的流地址(前端websocket连接时后面带上流地址)
  const url = req.url.slice(1)
  // 传入连接的ws客户端 实例化一个流
  const stream = webSocketStream(ws, { binary: true })
  // 通过ffmpeg命令 对实时流进行格式转换 输出flv格式
  const ffmpegCommand = ffmpeg(url)
    .addInputOption('-analyzeduration', '100000', '-max_delay', '1000000')
    .on('start', function () { console.log('Stream started.') })
    .on('codecData', function () { console.log('Stream codecData.') })
    .on('error', function (err) {
      console.log('An error occured: ', err.message)
      stream.end()
    })
    .on('end', function () {
      console.log('Stream end!')
      stream.end()
    })
    .outputFormat('flv').videoCodec('copy')
    // .outputFormat('flv').videoCodec('copy').noAudio() // 取消音频输出

  stream.on('close', function () {
    ffmpegCommand.kill('SIGKILL')
  })

  try {
    // 执行命令 传输到实例流中返回给客户端
    ffmpegCommand.pipe(stream)
  } catch (error) {
    console.log(error)
  }
}
创建一个package.json
{
  "name": "rtsp-vue-server",
  "version": "1.0.0",
  "scripts": {
    "start": "node server.js"
  },
  "dependencies": {
    "@ffmpeg-installer/ffmpeg": "^1.1.0",
    "express-ws": "^5.0.2",
    "fluent-ffmpeg": "^2.1.2",
    "node-media-server": "^2.6.2",
    "node-rtsp-stream": "^0.0.9",
    "websocket-stream": "^5.5.2"
  }
}
安装完必须的包后可以通过npm start启动。
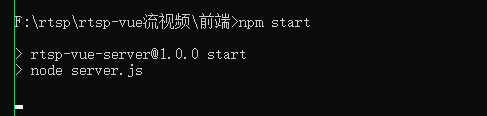
启动完成。
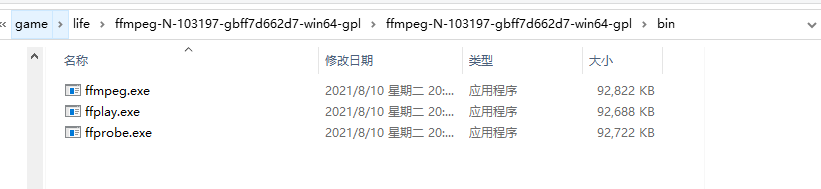
然后下载一个windows版本ffmpeg进行转码
ffmpeg-N-103197-gbff7d662d7-win64-gpl 官网:https://www.ffmpeg.org/download.html#build-windows
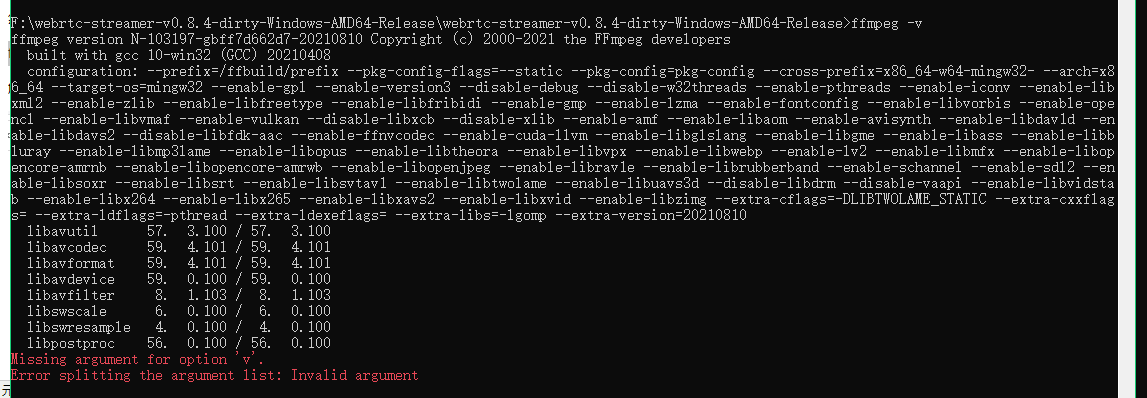
解压完成后通过环境变量加入path,否则会找不到
测试 ffmpeg -v
然后前端使用
npm install flv.js --save
需要安装flv
import flvjs from
'flv.js';
<video
          muted="muted"
          controls
          width="600"
          height="600"
          style="width:100%; height:100%"
          ref="video"></video>

url: 'rtsp://stream.strba.sk:1935/strba/VYHLAD_JAZERO.stream',

createVideo() {
      if (flvjs.isSupported()) {
        const videoElement = this.$refs.video;
        this.flvPlayer = flvjs.createPlayer(
          {
            type: "flv",
            // isLive: false,
            // hasAudio: false,
            url: "ws://localhost:8888/" + this.url,
          },
          {
            cors: true, // 是否跨域
            // enableWorker: true, // 是否多线程工作
            enableStashBuffer: false, // 是否启用缓存
            // stashInitialSize: 128, // 缓存大小(kb)  默认384kb
            autoCleanupSourceBuffer: true, // 是否自动清理缓存
            fixAudioTimestampGap: false, //false才会音视频同步
          }
        );
        this.flvPlayer.attachMediaElement(videoElement);
        this.flvPlayer.load();
        this.flvPlayer.play();
        // 报错重连
        this.flvPlayer.on(flvjs.Events.ERROR, (errType, errDetail) => {
          console.log("errorType:", errType);
          console.log("errorDetail:", errDetail);
          this.play();
        });
      }
    },
    // 销毁video
    destoryVideo() {
      if (this.flvPlayer) {
        this.flvPlayer.pause();
        this.flvPlayer.unload();
        this.flvPlayer.detachMediaElement();
        this.flvPlayer.destroy();
        this.flvPlayer = null;
      }
    },
    // 重播/播放
    play() {
      this.destoryVideo();
      this.createVideo();
    },
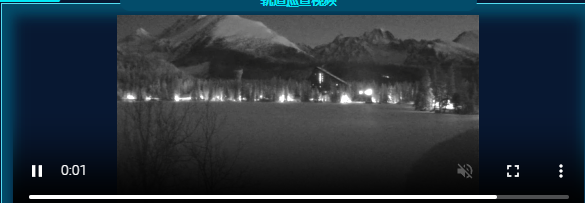
加载片刻后即可播放
目前也还在实践linux部署。
3.海康威视无插件开发包
前提需要确保摄像头可以支持websocket,可以登录 海康威视的平台查看网络配置。
需要注意的是,海康威视会有一个大的ip以及子ip摄像头,需要登录包含所有的摄像头ip去查看。
ex:
ip1: 192.168.64.214 登录之后可以查看所有通道下的摄像头视频
ip2: 192.168.64.xx 登录之后只能查看一个摄像头的视频 与之对应的视频地址:rtsp://admin:ca123456@192.168.64.xx:554//Streaming/Channels/1
这是需要注意的,我当时就是使用了ip2测试,但是一直播放不了,但使用ip1即可。
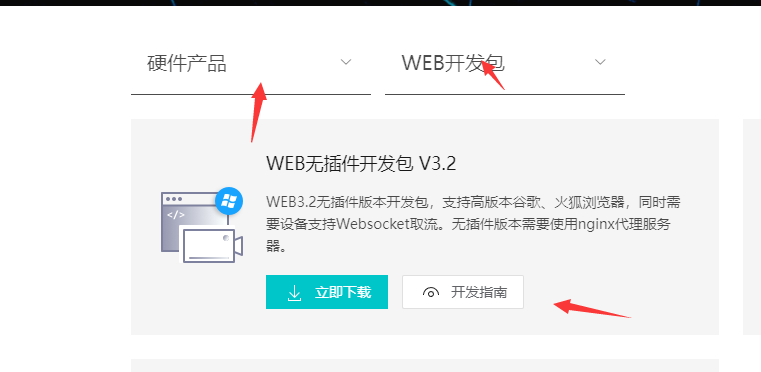
首先下载开发包
https://open.hikvision.com/download/5cda567cf47ae80dd41a54b3?type=20&id=4c945d18fa5f49638ce517ec32e24e24
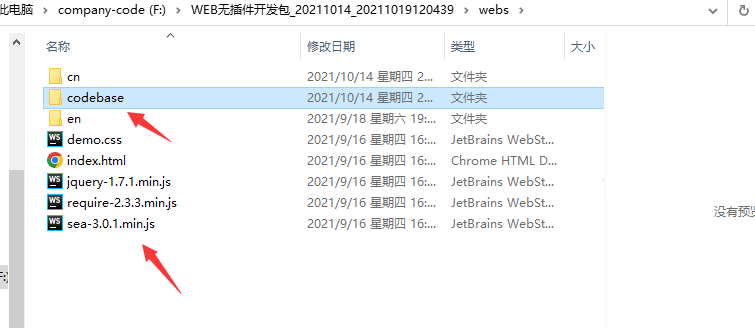
下载完成解压如下:
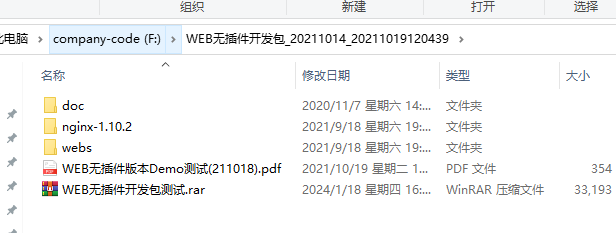
其中webs里面会有测试demo nginx是用于起服务的以及连接websocket ,其中nginx的配置需要拷贝到服务器上的nginx里面。
doc里面还会有一些问题。如下:
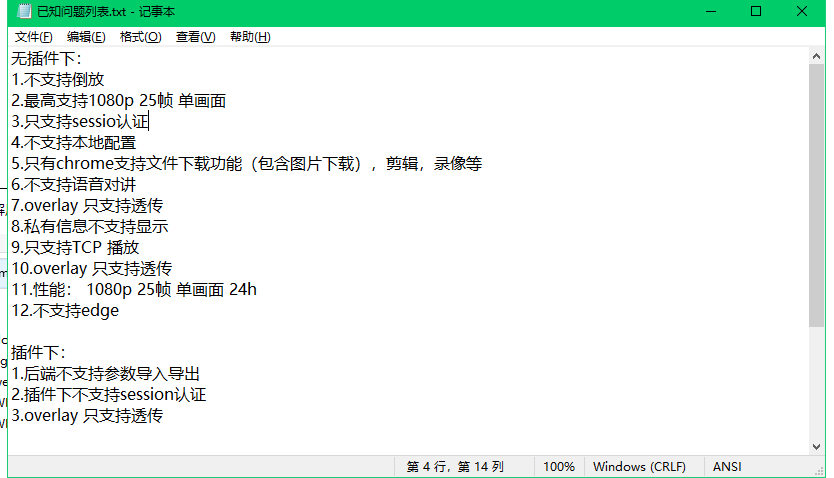
因为看到了不支持本地配置 所以我并没有在本地测试,可以直接在服务器上测试demo,首先确保服务器可以连到摄像头对应的ip。
服务器测试:
配置nginx 只需要配置指向web以及sdk和websocket的配置
location / {
root "usr/wen/webs";
index index.html index.htm;
}
 location ~ /ISAPI|SDK/ {
        if ($http_cookie ~ "webVideoCtrlProxy=(.+)") {
        proxy_pass http://$cookie_webVideoCtrlProxy;
        break;
        }
    }
    location ^~ /webSocketVideoCtrlProxy {
        #web socket
        proxy_http_version 1.1;
        proxy_set_header Upgrade $http_upgrade;
        proxy_set_header Connection "upgrade";
        proxy_set_header Host $host;

        if ($http_cookie ~ "webVideoCtrlProxyWs=(.+)") {
        proxy_pass http://$cookie_webVideoCtrlProxyWs/$cookie_webVideoCtrlProxyWsChannel?$args;
        break;
        }
        if ($http_cookie ~ "webVideoCtrlProxyWss=(.+)") {
        proxy_pass http://$cookie_webVideoCtrlProxyWss/$cookie_webVideoCtrlProxyWsChannel?$args;
        break;
        }
    }
然后再服务器上打开对应的ip进行测试。
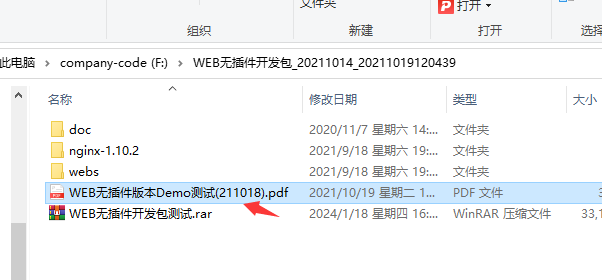
测试的流程可以根据开发包里面的pdf来操作
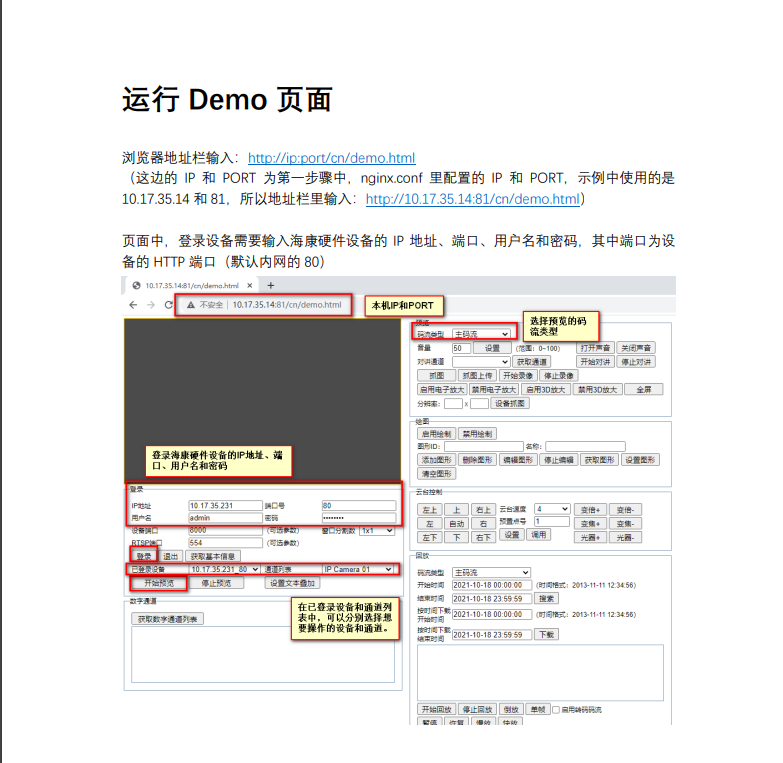
如果没有什么问题的话,就可以打开,其中也可以根据里面的操作信息提示判断一些问题。
点击登录,如果可以登录成功表明以及连上了。
然后点开始预览就会去获取通道的一些信息,有零通道 模拟通道 数字通道等,就可以看到摄像头到底使用的哪一个通道,倒是后集成到前端时我们就可以去掉一些通道。
如果获取通道都失败可能表明 nginx没配置好 或者 摄像头是否开启了或者是否支持websocket等原因。
测试结果因为当时在内网没有截图,所以无法展现。
如果测试通过了,即可集成到vue项目中了。
按照demo的引入方式,我们需要引入这些内容
<script type="text/javascript" src="/jquery-1.7.1.min.js"></script>
<script  type="text/javascript"  src="/codebase/encryption/AES.js"></script>
<script type="text/javascript"  src="/codebase/encryption/cryptico.min.js"></script>
<script type="text/javascript"  src="/codebase/encryption/crypto-3.1.2.min.js"></script>
<script type="text/javascript"   id="videonode" src="/codebase/webVideoCtrl.js"></script>
在video页面使用
新建一个webVideo.js 配置初始化连接海康的文件 // 初始化插件
export function WebVideo() {
  this.g_iWndIndex = 0;
  this.szDeviceIdentify = "";
  this.deviceport = "8000";
  this.rtspPort = "554";
  this.channels = [];
  this.ip = "192.168.64.214";
  this.port = "80";
  this.username = "admin";
  this.password = "ca123456";
  this.idchannel = 1; //默认的通道id
  this.init = function (ip, username, password, idchannel) {
    this.ip = ip;
    this.username = username;
    this.password = password;
    this.idchannel = idchannel; //传进来的通道
    // var self = this
    // 检查插件是否已经安装过
    // var iRet = WebVideoCtrl.I_CheckPluginInstall();
    // if (-1 == iRet) {
    //     alert("您还未安装过插件,双击开发包目录里的WebComponentsKit.exe安装!");
    //     return;
    // }
    // 初始化插件参数及插入插件
    WebVideoCtrl.I_InitPlugin(454, 315, {
      szColorProperty:
        "plugin-background:#102749; sub-background:#102749; sub-border:#18293c; sub-border-select:red",
      bWndFull: true, // 全屏
      // iPackageType: 2,
      iWndowType: 1, //分屏
      bNoPlugin: true, // 支持无插件
      cbInitPluginComplete: function () {
        WebVideoCtrl.I_InsertOBJECTPlugin("divPlugin");
      },
    });
  };
  // 登录
  this.clickLogin = function () {
    var self = this;
    if ("" == self.ip || "" == self.port) {
      return;
    }
    self.szDeviceIdentify = self.ip + "_" + self.port;
    console.log(self.idchannel);
    WebVideoCtrl.I_Login(self.ip, 1, self.port, self.username, self.password, {
      success: function (xmlDoc) {
        setTimeout(function () {
          console.log("登录成功");
      //登录完成之后需要获取该ip下所有通道,可以通过demo测试查看使用的哪一个通道  我这里用的是数字通道  有的可能是模拟通道
      // 由于我已经知晓了所有通道信息  我就没有去吊数字通道
          // self.getChannelInfoData();
          // self.getDevicePort();
        }, 10);
        setTimeout(function () {
          self.clickStartRealPlay();
        }, 5000);
      },
      error: function (status, xmlDoc) {
        console.log("登录失败");
      },
    });
  };
  // 退出
  this.clickLogout = function () {
    var self = this;
    self.channels = [];
    var szDeviceIdentify = $("#ip").val(),
      szInfo = "";

    if (null == szDeviceIdentify) {
      return;
    }

    // if (null == self.szDeviceIdentify) {
    //     return;
    // }
    // var iRet = WebVideoCtrl.I_Logout(self.szDeviceIdentify);
    var iRet = WebVideoCtrl.I_Logout(szDeviceIdentify);
    if (0 == iRet) {
      console.log("退出成功");
      // self.getChannelInfoData();
      // self.getDevicePort();
    }
  };
  // 获取通道
  this.getChannelInfo = function () {
    var self = this;
    self.channels = [];
    if (null == self.szDeviceIdentify) {
      return;
    }
    // 模拟通道
    WebVideoCtrl.I_GetAnalogChannelInfo(self.szDeviceIdentify, {
      async: false,
      success: function (xmlDoc) {
        var oChannels = $(xmlDoc).find("VideoInputChannel");
        console.log(oChannels);
        $.each(oChannels, function (i) {
          var id = $(this).find("id").eq(0).text(),
            name = $(this).find("name").eq(0).text();
          if ("" == name) {
            name = "Camera " + (i < 9 ? "0" + (i + 1) : i + 1);
          }
          self.channels.push({
            id: id,
            name: name,
          });
        });
        console.log("获取模拟通道号成功");
      },
      error: function (status, xmlDoc) {
        console.log("获取模拟通道号失败");
      },
    });
  };
  //数字通道
  this.getChannelInfoData = function () {
    var self = this;
    self.channels = [];
    if (null == self.szDeviceIdentify) {
      return;
    }

    WebVideoCtrl.I_GetDigitalChannelInfo(self.szDeviceIdentify, {
      async: false,
      success: function (xmlDoc) {
        var oChannels = $(xmlDoc).find("InputProxyChannelStatus");
        console.log(oChannels);
        $.each(oChannels, function (i) {
          var id = $(this).find("id").eq(0).text(),
            name = $(this).find("name").eq(0).text();
          if ("" == name) {
            name = "Camera " + (i < 9 ? "0" + (i + 1) : i + 1);
          }
          self.channels.push({
            id: id,
            name: name,
          });
        });
        console.log("获取模拟通道号成功");
      },
      error: function (status, xmlDoc) {
        console.log("获取模拟通道号失败");
      },
    });
  };

  // 显示回调信息
  this.showCBInfo = (szInfo) => {
    szInfo =
      "<div>" + szInfo +"</div>";
    $("#title-video").html(szInfo);
  };

  // 获取端口
  this.getDevicePort = function () {
    var self = this;
    if (null == self.szDeviceIdentify) {
      return;
    }
    var oPort = WebVideoCtrl.I_GetDevicePort(self.szDeviceIdentify);
    if (oPort != null) {
      self.deviceport = oPort.iDevicePort;
      self.rtspPort = oPort.iRtspPort;
    }
    console.log("获取端口号成功");
  };

  // 开始预览
  this.clickStartRealPlay = function () {
    var self = this;
    var oWndInfo = WebVideoCtrl.I_GetWindowStatus(self.g_iWndIndex),
      // iChannelID = self.channels[0].id
      iChannelID = self.idchannel;
    console.log(self.channels);
    if (null == self.szDeviceIdentify) {
      return;
    }
    var startRealPlay = function () {
      WebVideoCtrl.I_StartRealPlay(self.szDeviceIdentify, {
        iChannelID: iChannelID,
        bZeroChannel: false,
        iStreamType: 2,
        success: function () {
          console.log("预览成功");
          self.showCBInfo("")
        },
        error: function (status, xmlDoc) {
          if (403 === status) {
            console.log("设备不支持Websocket取流");
          } else {
            console.log("预览失败");
          }
        },
      });
    };

    if (oWndInfo != null) {
      // 已经在播放了,先停止
      WebVideoCtrl.I_Stop({
        success: function () {
          startRealPlay();
        },
      });
    } else {
      startRealPlay();
    }
  };
  // 停止预览
  this.clickStopRealPlay = function (id = 0) {
    var self = this;
    var oWndInfo = WebVideoCtrl.I_GetWindowStatus(self.g_iWndIndex);
    if (oWndInfo != null) {
      WebVideoCtrl.I_Stop({
        success: function () {
        //   console.log("停止预览成功");
        //   alert("停止预览成功");
        //   console.log("开始登出");
            self.showCBInfo("停止预览中,请稍后...")
          // self.clickLogout();
          if (id > 0) {
            self.idchannel = id;
            self.clickStartRealPlay();
          }
        },
        error: function () {
          console.log("停止预览失败");
        },
      });
    }
  };
}
在页面中使用:
正常播放视频的逻辑是,先初始化->登录->获取通道->选择通道播放
其中通道我们可以在demo测试那里知道到底用的哪一个通道,甚至我们可以直接把通道复制下来写死,正如下方所示:
通道格式是xml,如下:
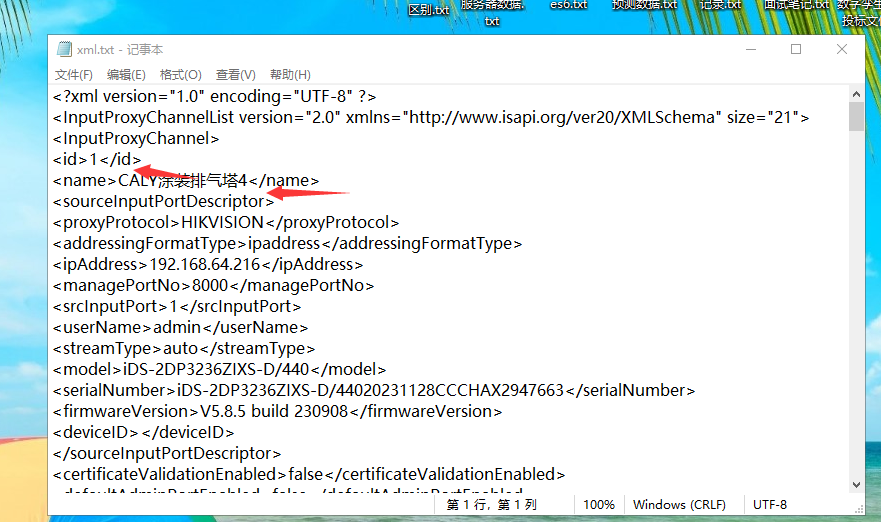
我们配置数据如下:
 { id: 1, name: "CALY涂装排气塔4" },
        { id: 2, name: "CALY储运车场H库" },
        { id: 3, name: "CALY涂装RTO4" },
        { id: 4, name: "CALY涂装VOC内4" },
        { id: 5, name: "CALY涂装VOC外4" },
        { id: 6, name: "CALY废水站槽体A4" },
        { id: 7, name: "CALY涂装危废间4" },
        { id: 8, name: "CALY废水站槽体B4" },
        { id: 9, name: "CALY排气塔东侧3" },
        { id: 10, name: "CALY一厂污水处理站排水槽" },
        { id: 11, name: "CALY一厂污水处理过滤池" },
这就是该ip下所有的通道,我们只需要通道id用于播放。
如果你知晓了通道,就可以不用再获取通道信息。正如我上面的js一样,我注释调了获取通道的内容,我直接将通道传入。
this.idchannel = 1;
this.init = function (ip, username, password, idchannel) {
this.ip = ip;
this.username = username;
this.password = password;
this.idchannel = idchannel;
我默认就播放第一个通道,如果你需要真实的不写死的话就可以直接去获取通道,然后选择其中的来播放。
<template>
  <Backdrop :title="'轨道巡查视频'">
    <template #Assembly>
      <div class="on-line-monitoring-video">
        <div class="title" id="title-video"></div>
        <el-icon
          class="iconswitch"
          @click="showChannelList = !showChannelList"
          title="切换视频"
          ><Switch
        /></el-icon>
        <div class="srollList" ref="srollListRef" v-show="showChannelList">
          <div
            v-for="(item, key) in channelList"
            :ref="'srollDiv' + key + 'ref'"
            :title="item.name"
            :key="key"
            @click="selectVideo(item.id)"
          >
            <span :class="activeIndex == item.id ? 'active' : ''">{{
              item.name
            }}</span>
          </div>
        </div>
        <div
          id="divPlugin"
          class="divPlugin"
          style="width: 100%; height: 100%; overflow-y: auto"
        />
      </div>
    </template>
  </Backdrop>
</template>

<script>
import { ref } from "vue";
import { WebVideo } from "@/utils/webVideo.js";
export default {
  name: "OnLineMonitoringVideo",
  data() {
    return {
      activeIndex: 1,
      webVideoPlayer: null,
      hkvInfo: {
        ip: "192.168.64.214", //ip
        username: "admin", //用户名
        password: "ca123456", //密码
      },
      showChannelList: false,
    //所有的通道list
      channelList: [
        { id: 1, name: "CALY涂装排气塔4" },
        { id: 2, name: "CALY储运车场H库" },
        { id: 3, name: "CALY涂装RTO4" },
        { id: 4, name: "CALY涂装VOC内4" },
        { id: 5, name: "CALY涂装VOC外4" },
        { id: 6, name: "CALY废水站槽体A4" },
        { id: 7, name: "CALY涂装危废间4" },
        { id: 8, name: "CALY废水站槽体B4" },
        { id: 9, name: "CALY排气塔东侧3" },
        { id: 10, name: "CALY一厂污水处理站排水槽" },
        { id: 11, name: "CALY一厂污水处理过滤池" },
      ],
    };
  },
  mounted() {
    this.initVideoPlay();
  },
  beforeDestroy() {
    // this.stopVideoPlay();
    this.webVideoPlayer.clickStopRealPlay();
  },
  methods: {
    selectVideo(key) {
    //切换视频 先停止再播放下一个
      this.activeIndex = key;
      this.stopVideoPlay(key);
      // this.initVideoPlay();
    },
    initVideoPlay() {
      if (this.webVideoPlayer == null) this.webVideoPlayer = new WebVideo();
      this.$nextTick(() => {
        this.webVideoPlayer.init(
          this.hkvInfo.ip,
          this.hkvInfo.username,
          this.hkvInfo.password,
          this.activeIndex
        );
        this.webVideoPlayer.clickLogin();
      });
    },
    stopVideoPlay(key) {
      this.webVideoPlayer.clickStopRealPlay(key);
    },
  },
};
</script>

<style lang="less" scoped>
.iconswitch {
  position: absolute;
  left: 0px;
  top: 50%;
  font-weight: bold;
  cursor: pointer;
}
#title-video {
  color: red;
  height: 20px;
  position: absolute;
  top: 0px;
  text-align: center;
  width: 100%;
  padding: 10px;
}
</style>
然后部署到服务器上就可以正常播放第一个视频了,但是目前切换视频很慢还没有解决。
其中关闭上一个视频的操作很慢,主要是WebVideoCtrl.I_Stop 这个方法特别慢,内置的无法知晓。

魔乐社区(Modelers.cn) 是一个中立、公益的人工智能社区,提供人工智能工具、模型、数据的托管、展示与应用协同服务,为人工智能开发及爱好者搭建开放的学习交流平台。社区通过理事会方式运作,由全产业链共同建设、共同运营、共同享有,推动国产AI生态繁荣发展。
更多推荐


 2
2 0
0- 0


 已为社区贡献2条内容

所有评论(0)