Geoserver配置以及发布geojson服务教程
第一步:下载文件
先下载geoserver-2.17.0-bin压缩包,解压后再将geoserver-2.17-SNAPSHOT-vectortiles-plugin.zip解压,解压后获得的四个jar包复制到geoserver-2.17.0-bin\webapps\geoserver\WEB-INF\lib目录

配置环境变量:
第二步:运行
直接双击geoserver-2.17.0-bin\bin目录下的startup.bat文件,刚开始可能会出现端口冲突的问题,因为他的默认端口是8080
解决端口冲突问题:
打开geoserver-2.17.0-bin\start.ini:
# HTTP port to listen on
jetty.port=8082
将8080改为不冲突端口,我在这里改成了8082
再次运行,运行成功为下面这样:
你可以在浏览器打开该链接:http://localhost:8082/geoserver/web,如果是下面这样就说明你运行成功了,初始账号为admin,密码为geoserver
第三步:发布服务
举个例子:发布 Shapefile - ESRI™ Shapefiles (*.shp)(即shp)服务
1、创建工作区
点击左侧工作区按钮,然后点击添加新的工作区,name和命名空间URL你自己想填什么都行,然后点提交就行了
2、新建数据存储
点击左侧数据存储按钮,然后点击新增新的数据存储,然后点击 Shapefile,随便起个数据源名称,然后点击浏览按钮,将你的shp文件选上

选中后其他不用填,点击保存就行了,保存后点击发布按钮
点击发布按钮后需要再填几个参数,我这里选择的坐标系是3857
ok,这时候你就可以点击Layer Preview按钮,找到你发布的那个图层
点击openlayers按钮就可以查看了
第四步:使用openlayer加载你的服务
1、普通加载
上面你点击openlayers按钮跳转到预览页面,将你的浏览器里的地址copy下来,等会使用openlayers.js加载会用到
代码:
<!doctype html>
<html lang="en">

<head>
    <meta http-equiv="Content-Type" content="text/html; charset=utf-8">
    <meta name="viewport" content="width=device-width, initial-scale=1.0, maximum-scale=1.0, user-scalable=0">
    <meta name="apple-mobile-web-app-capable" content="yes">
    <!-- <link rel="stylesheet" href="https://openlayers.org/en/v3.20.1/css/ol.css" type="text/css"> -->
    <link rel="stylesheet" href="https://cdnjs.cloudflare.com/ajax/libs/openlayers/4.6.5/ol.css"
          integrity="sha256-rQq4Fxpq3LlPQ8yP11i6Z2lAo82b6ACDgd35CKyNEBw=" crossorigin="anonymous"/>
    <script src="jquery-3.4.1/jquery-3.4.1.min.js"></script>

    <script src="https://cdnjs.cloudflare.com/ajax/libs/openlayers/4.6.5/ol.js"
            integrity="sha256-77IKwU93jwIX7zmgEBfYGHcmeO0Fx2MoWB/ooh9QkBA="
            crossorigin="anonymous"></script>
    <!-- <script src="https://openlayers.org/en/v3.20.1/build/ol.js" type="text/javascript"></script> -->

    <title></title>
</head>

<body onload="init()">
    <h2>WMS</h2>
    <div id="map" style="height: 900px; width: 100%;"></div>
    <script type="text/javascript">
        //基于openlayers3
        function init() {
            //WMS的边界范围,在发布后设置的边框参数里面有
            var extent = [719.732854878202, -29203.49459640363, 66300.68943086099, 42326.37664149498];

            var AllFeatures = null
            var tiled = [
                new ol.layer.Tile({
                    source: new ol.source.TileWMS({
                        url: 'http://localhost:8082/geoserver/workhome/wms',
                        params: {
                            'LAYERS': 'workhome:ployline',
                            'TILED': false
                        },
                        serverType: 'geoserver'
                    })
                })
            ];
            //这里的url和参数就是你从浏览器里面复制的地址,对应好就好了
            //我的:http://localhost:8082/geoserver/workhome/wms?service=WMS&version=1.1.0&request=GetMap&layers=workhome%3Aployline&bbox=719.732854878202%2C-29203.49459640363%2C66300.68943086099%2C42326.37664149498&width=704&height=768&srs=EPSG%3A3857&format=application/openlayers
            var vectorsource = new ol.source.Vector({
                url: 'http://localhost:8082/geoserver/workhome/ows?service=WFS&version=1.0.0&request=GetFeature&typeName=workhome%3Aployline&outputFormat=application%2Fjson',
                format: new ol.format.GeoJSON(),
                features:ol.Feature,
            })

            var styles = [
                new ol.style.Style({
                    stroke: new ol.style.Stroke({
                        color: 'blue',
                        width: 3
                    }),
                    fill: new ol.style.Fill({
                        color: 'rgba(0, 0, 255, 0.1)'
                    })
                }),
                new ol.style.Style({
                    image: new ol.style.Circle({
                        radius: 5,
                        fill: new ol.style.Fill({
                            color: 'orange'
                        })
                    }),
                })
            ];
            //定义地图对象
            var map = new ol.Map({
                layers: tiled,
                target: 'map',
                view: new ol.View({
                    projection: 'EPSG:3857',
                    zoom: 20
                }),
                controls: ol.control.defaults({
                    attributionOptions: {
                        collapsible: false
                    }
                })
            });

            map.getView().fit(extent, map.getSize());
    </script>
</body>

</html>
效果图: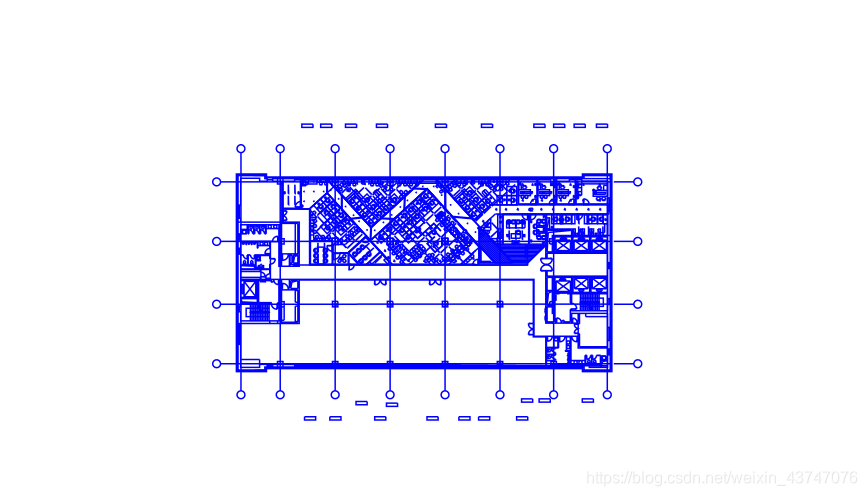
2、通过geojson方式发布
点击左侧Layer Preview按钮,找到你发布的那个图层,找到SELECT ONE按钮,找到GeoJson并点击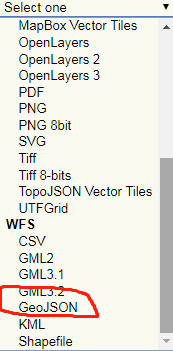
点击后的页面应该是你请求的geojson数据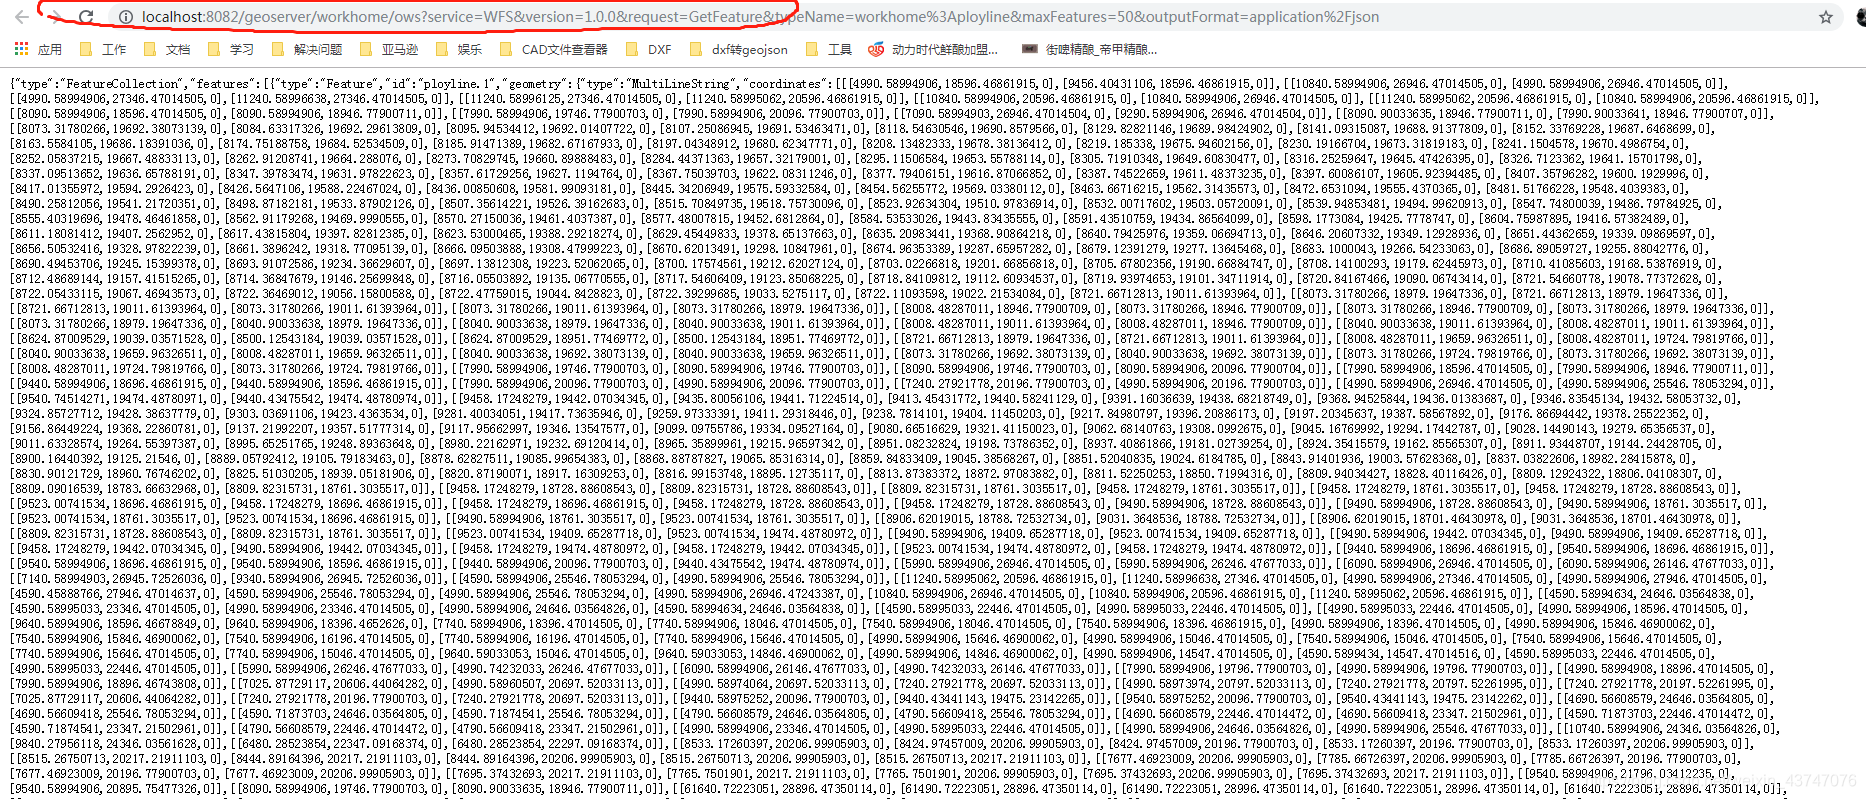
复制你浏览器栏里的地址,等会会用得上
代码:
<!doctype html>
<html lang="en">

<head>
    <meta http-equiv="Content-Type" content="text/html; charset=utf-8">
    <meta name="viewport" content="width=device-width, initial-scale=1.0, maximum-scale=1.0, user-scalable=0">
    <meta name="apple-mobile-web-app-capable" content="yes">
    <!-- <link rel="stylesheet" href="https://openlayers.org/en/v3.20.1/css/ol.css" type="text/css"> -->
    <link rel="stylesheet" href="https://cdnjs.cloudflare.com/ajax/libs/openlayers/4.6.5/ol.css"
          integrity="sha256-rQq4Fxpq3LlPQ8yP11i6Z2lAo82b6ACDgd35CKyNEBw=" crossorigin="anonymous"/>
    <script src="jquery-3.4.1/jquery-3.4.1.min.js"></script>

    <script src="https://cdnjs.cloudflare.com/ajax/libs/openlayers/4.6.5/ol.js"
            integrity="sha256-77IKwU93jwIX7zmgEBfYGHcmeO0Fx2MoWB/ooh9QkBA="
            crossorigin="anonymous"></script>
    <!-- <script src="https://openlayers.org/en/v3.20.1/build/ol.js" type="text/javascript"></script> -->

    <title></title>
</head>

<body onload="init()">
    <h2>WMS</h2>
    <div id="map" style="height: 900px; width: 100%;"></div>
    <script type="text/javascript">
        //基于openlayers3
        function init() {
            //WMS的边界范围 在发布后设置的边框参数里面有
            var extent = [719.732854878202, -29203.49459640363, 66300.68943086099, 42326.37664149498];

            //这里的url就是你地址栏里复制的,一点都没有改
            //我复制的:http://localhost:8082/geoserver/workhome/ows?service=WFS&version=1.0.0&request=GetFeature&typeName=workhome%3Aployline&outputFormat=application%2Fjson
            var vectorsource = new ol.source.Vector({
                url: 'http://localhost:8082/geoserver/workhome/ows?service=WFS&version=1.0.0&request=GetFeature&typeName=workhome%3Aployline&outputFormat=application%2Fjson',
                format: new ol.format.GeoJSON(),
                features:ol.Feature,
            })

            var styles = [
                new ol.style.Style({
                    stroke: new ol.style.Stroke({
                        color: 'blue',
                        width: 3
                    }),
                    fill: new ol.style.Fill({
                        color: 'rgba(0, 0, 255, 0.1)'
                    })
                }),
                new ol.style.Style({
                    image: new ol.style.Circle({
                        radius: 5,
                        fill: new ol.style.Fill({
                            color: 'orange'
                        })
                    }),
                })
            ];

            var tiled = [
                new ol.layer.Vector({
                    style: styles,
                    source: vectorsource
                })
            ];
            //定义地图对象
            var map = new ol.Map({
                layers: tiled,
                target: 'map',
                view: new ol.View({
                    projection: 'EPSG:3857',
                    zoom: 20
                }),
                controls: ol.control.defaults({
                    attributionOptions: {
                        collapsible: false
                    }
                })
            });

            map.getView().fit(extent, map.getSize());

    </script>
</body>

</html>
希望我的这篇文章能对你有所帮助,留个赞吧,谢谢

魔乐社区(Modelers.cn) 是一个中立、公益的人工智能社区,提供人工智能工具、模型、数据的托管、展示与应用协同服务,为人工智能开发及爱好者搭建开放的学习交流平台。社区通过理事会方式运作,由全产业链共同建设、共同运营、共同享有,推动国产AI生态繁荣发展。
更多推荐


 11
11 0
0- 0


 已为社区贡献2条内容

所有评论(0)