怎么在控制台打印vue实例对象_从实践了解Vue生命周期
点击上方的蓝字关注置顶
♡期待与你相遇♡
01
前言
想要使用Vue高效的完成开发,那么只是单纯地知道Vue里面的基本语法是不够的,如果一旦发生问题,可能需要花费大量的时间去寻找问题的根源,很多时候遇到的问题就是代码写错了地方,不了解在哪个阶段该做怎么事情,所以了解生命周期是件很有必要的事情。
02
什么是Vue的生命周期
Vue生命周期就是Vue在创建实例时经历的页面加载到页面渲染的过程,以及数据更新重新渲染的过程。在这个过程的不同阶段会运行不同的生命周期函数,生命周期函数允许我们在实例不同阶段执行各种操作,便于我们更好地控制和使用实例。这里放一张官网提供的图来了解具体的过程吧。

从图中我们可以看到从Vue实例化到Vue销毁的过程中,运行了以下8个生命周期函数:
-
beforeCreate
-
created
-
beforeMount
-
mounted
-
beforeUpdate
-
updated
-
beforeDestroy
-
destroyed
03
Vue生命周期钩子函数详解
知道了在整个Vue生命周期内会经历的8个钩子函数后,我们来看看这些钩子函数具体在什么时候进行调用。
首先我们创建一个HTML文件并创建一个Vue实例并在各个生命周期函数内进行打印操作,看看会发生什么。
<html lang="en"><head> <meta charset="UTF-8"> <meta name="viewport" content="width=device-width, initial-scale=1.0"> <title>Documenttitle>head><body> <div id="app"> <div>{{msg}}div> div> <script src="js/vue.min.js">script> <script> let vm = new Vue({ el:'#app', data:{ msg:'daxiong' }, beforeCreate:function(){ console.log('beforeCreate'); }, created:function(){ console.log('created'); }, beforeMount:function(){ console.log('beforeMount'); }, mounted:function(){ console.log('mounted'); }, beforeUpdate:function(){ console.log('beforeUpdate'); }, updated:function(){ console.log('updated'); }, beforeDestroy:function(){ console.log('beforeDestroy'); }, destroyed:function(){ console.log('destroyed'); } });script>body>html>打开浏览器页面一加载完毕后在控制台界面可以看到如图:
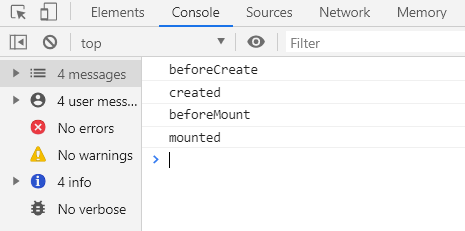
在页面加载完毕后调用了beforeCreate、created、beforeMount、mounted这几个钩子函数,但是具体什么时候调用的呢?下面我们更改一下JavaScript部分代码看看。
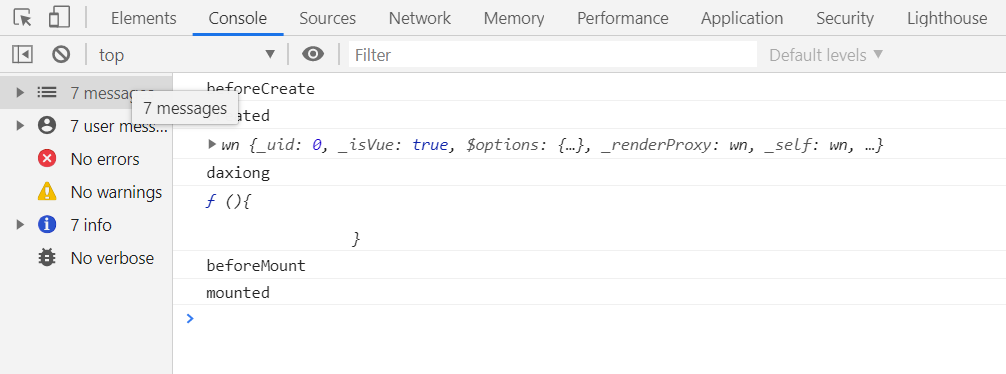
let vm = new Vue({ el:'#app', data:{ msg:'daxiong' }, methods: { clickEvent:function(){ } }, beforeCreate:function(){ console.log('beforeCreate'); console.log(this); console.log(this.msg); console.log(this.clickEvent); }, created:function(){ console.log('created'); }, beforeMount:function(){ console.log('beforeMount'); }, mounted:function(){ console.log('mounted'); },}打开控制台可以看到结果如下:

此时在beforeCreate钩子函数中的this已经指向的是Vue实例对象,说明此时Vue已经实例化成功了,但是this.msg和this.clickEvent却为undefined。
明明在data中有数据msg,也创建了clickEvent方法,这说明这个阶段只是Vue实例化成功了,但是data中的数据和声明的方法还没有绑定到Vue实例对象上。在这个阶段我们只适合进行数据绑定操作、发送ajax请求等。
那什么时候data中的数据和方法会被绑定到Vue实例对象上呢?我们接着改一下Vue代码看看。
let vm = new Vue({ el:'#app', data:{ msg:'daxiong' }, beforeCreate:function(){ console.log('beforeCreate'); }, created:function(){ console.log(this); console.log(this.msg); console.log(this.clickEvent); }, beforeMount:function(){ console.log('beforeMount'); }, mounted:function(){ console.log('mounted'); },}打开控制台得到结果如图:
我们把this.msg和this.clickEvent在created钩子函数中进行打印,已经可以打印出this.msg和this.clickEvent的值了,说明beforeCreate到created这个阶段进行了数据和方法的绑定。
那beforeMount、mounted钩子函数阶段又操作了什么呢?我们在data中增加一个className数据,在app盒子中添加一个button进行类名绑定,分别在这两个函数中用绑定的类名进行获取绑定的DOM元素来看看这两个生命周期钩子函数进行了什么操作,修改代码如下:
<html lang="en"><head> <meta charset="UTF-8"> <meta name="viewport" content="width=device-width, initial-scale=1.0"> <title>Documenttitle>head><body> <div id="app"> <div>{{msg}}div> <button :class="className">销毁button> div> <script src="js/vue.min.js">script> <script> let vm = new Vue({ el:'#app', data:{ msg:'daxiong', className:'btn' }, beforeCreate:function(){ console.log('beforeCreate'); }, created:function(){ console.log('created'); }, beforeMount:function(){ console.log('beforeMount'); let dom = document.querySelector('.btn'); console.log(dom); }, mounted:function(){ console.log('mounted'); } });script>body>html>打开控制台可以看到结果如图:
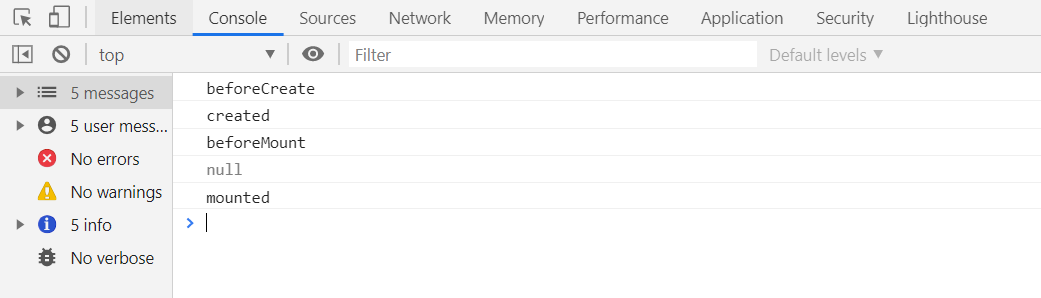
在beforeMount函数中根据绑定的类名进行DOM查询,查询的结果为NULL,说明这个阶段data中的数据还没有渲染到页面当中。那试着把DOM查询放到mounted生命周期函数中呢,修改一下Vue代码如下:
let vm = new Vue({ el:'#app', data:{ msg:'daxiong', className:'btn' }, beforeCreate:function(){ console.log('beforeCreate'); }, created:function(){ console.log('created'); }, beforeMount:function(){ console.log('beforeMount'); let dom = document.querySelector('.btn'); console.log(dom); }, mounted:function(){ console.log('mounted'); }});打开控制台得到结果如图:
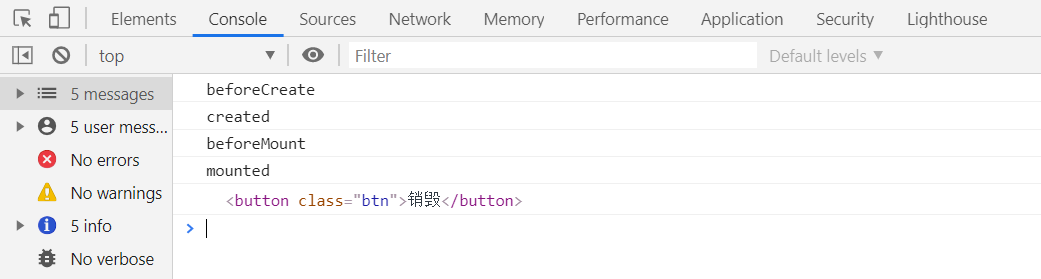
这时我们看到DOM已经被查询出来了,说明这时data中的数据已经渲染到页面中了。我们可以得出结论beforeMount到mounted阶段经历数据渲染过程。
生命周期钩子函数我们已经讨论了四个,这四个当页面一加载完毕后都会执行,而剩余的四个生命周期却毫无反应。既然上面四个生命周期函数经历了从Vue实例化到数据绑定再到渲染,那我们大胆的猜测一下会不会有数据发生变化时执行的生命周期函数呢?
我们就试一试吧,在Vue实例对象中添加beforeUpdate、updated生命周期钩子函数。
let vm = new Vue({ el:'#app', data:{ msg:'daxiong', className:'btn' }, beforeCreate:function(){ console.log('beforeCreate'); }, created:function(){ console.log('created'); }, beforeMount:function(){ console.log('beforeMount'); }, mounted:function(){ console.log('mounted'); }, beforeUpdate:function(){ console.log('beforeUpdate'); }, updated:function(){ console.log('updated'); }});我们在控制台对Vue实例化对象vm的msg进行重新赋值得到结果如图:
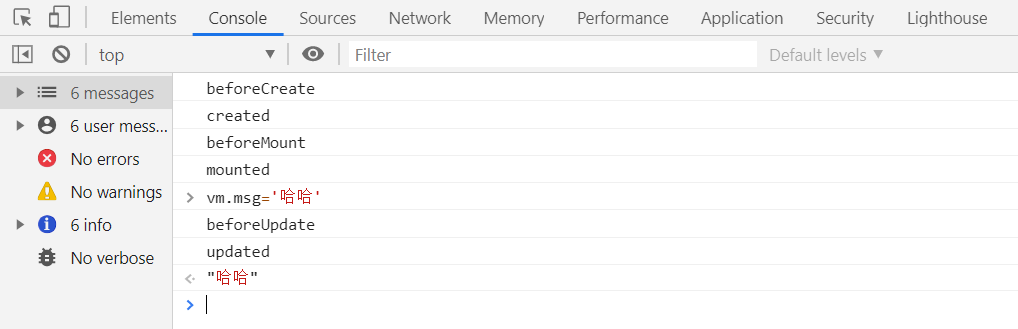
当我们把Vue实例对象data中的数据进行更改时,这时不仅数据被改变了,还触发了beforeUpdate、updated生命周期钩子函数,beforeUpdate是数据更新前被触发,updated被触发。
这里我们已经讨论了Vue的六个生命周期函数,还有两个生命周期函数分别是:beforeDestroy、destroyed。其中beforeDestroy是实例销毁前触发,destroyed是实例销毁后触发。这里就不详细讨论了,在组件的生命周期中进行讨论。
04
组件的生命周期
Vue中组件的生命周期和Vue实例的生命周期是一致的,其中beforeDestroy、destroyed生命周期函数还未详细说明,这里我们通过组件的生命周期进行说明吧。
<html lang="en"><head> <meta charset="UTF-8"> <meta name="viewport" content="width=device-width, initial-scale=1.0"> <title>Documenttitle>head><body> <div id="app"> <button-test v-if="isShow">button-test> <br> <button @click="handle">隐藏组件button> div> <script src="./js/vue.js">script> <script> Vue.component('button-test',{ data:function(){ return { msg:'更新前' } }, methods: { handle(){ this.msg = '更新后' } }, beforeCreate:function(){ console.log('beforeCreate'); }, created:function(){ console.log('created'); }, beforeMount:function(){ console.log('beforeMount'); }, mounted:function(){ console.log('mounted'); }, beforeUpdate:function(){ console.log('beforeUpdate'); }, updated:function(){ console.log('updated'); }, beforeDestroy:function(){ console.log('beforeDestroy'); }, destroyed:function(){ console.log('destroyed'); }, template:` {{msg}}
{{msg}} 更新 ` }); let vm = new Vue({ el:'#app', data:{ isShow:true }, methods: { handle(){ this.isShow = !this.isShow; } }, });script>body>html>
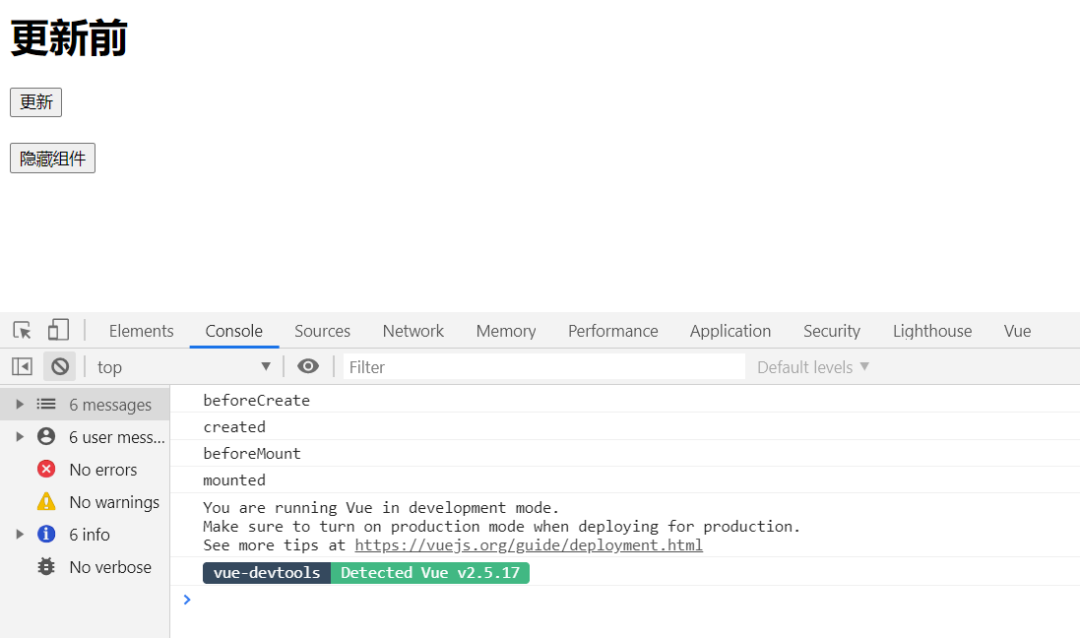
上述代码我们创建了一个Vue实例和一个Vue组件,在组件中调用了所有的生命周期钩子函数,并且定义了一个点击事件,当点击按钮时进行更新操作。在Vue实例中定义了一个点击事件,当点击按钮后隐藏组件。打开浏览器后的到结果如图:
可以看到页面加载完毕后,组件同样的经历了beforeCreate、created、beforeMount、mounted这四个生命周期函数。当点击更新按钮把组件中data的数据进行更新后得到结果如图:
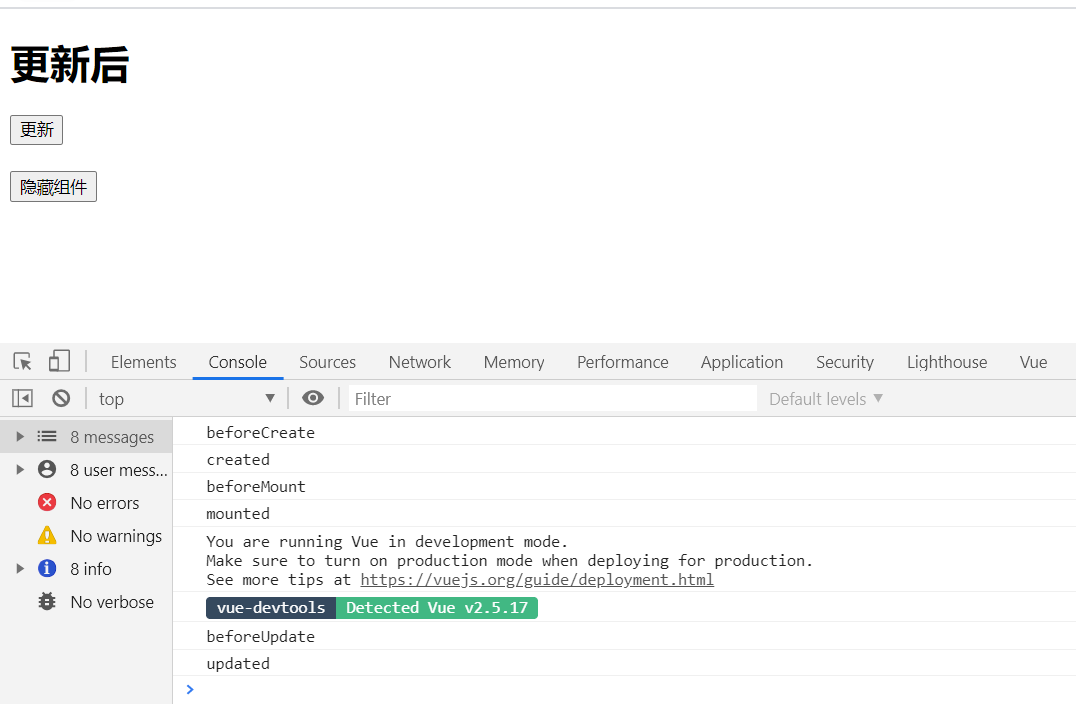
可以看到控制台打印了beforeUpdate、updated,同样的经历了beforeUpdate、updated生命周期函数。当点击隐藏组件按钮后,把组件节点从DOM树中删除,相当于销毁了此组件,这时得到结果如图:
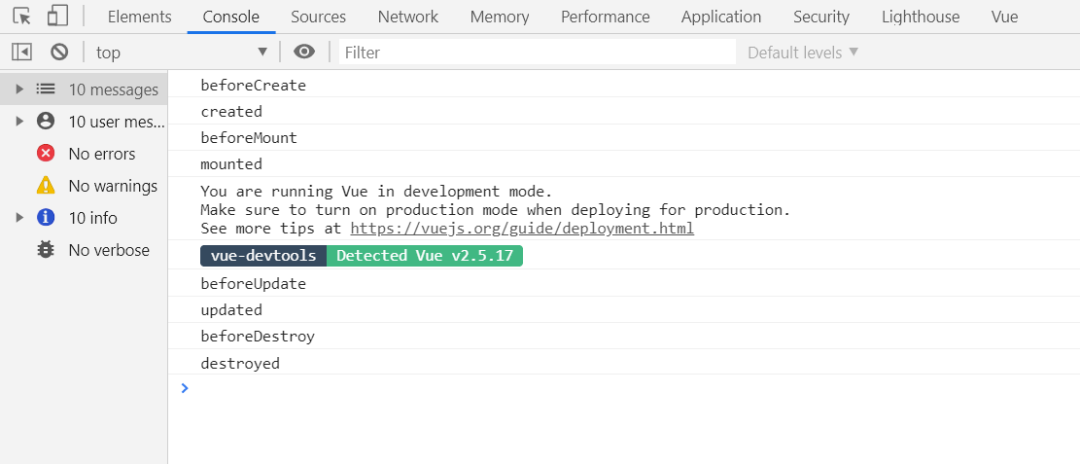
可以看到beforeDestroy、destroyed生命周期函数被触发,说明组件已经被销毁了。其中beforeDestroy是销毁之前被触发,此时实例依然可用。destroyed是销毁后被触发,触发后实例所绑定的数据和事件均被销毁。
05
总结
从上面实践中可以得出Vue实例生命周期和Vue组件生命周期大体相似,都经历了以下几个生命周期钩子函数:
-
beforeCreate
-
created
-
beforeMount
-
mounted
-
beforeUpdate
-
updated
-
beforeDestroy
-
destroyed
大家需要记住的就是Vue生命周期里有哪些钩子函数,在什么情况下会被调用,能在开发中合理的运用这些钩子函数即可。


扫二维码|关注我们
微信号:F194199339
知乎:仲阳十七
一生很长,而爱无疆,
与你同行,不介路长。

魔乐社区(Modelers.cn) 是一个中立、公益的人工智能社区,提供人工智能工具、模型、数据的托管、展示与应用协同服务,为人工智能开发及爱好者搭建开放的学习交流平台。社区通过理事会方式运作,由全产业链共同建设、共同运营、共同享有,推动国产AI生态繁荣发展。
更多推荐


 1
1 0
0- 0


 已为社区贡献6条内容

所有评论(0)