二维云台跟踪色块(openmv+stm32)
·
一、硬件准备
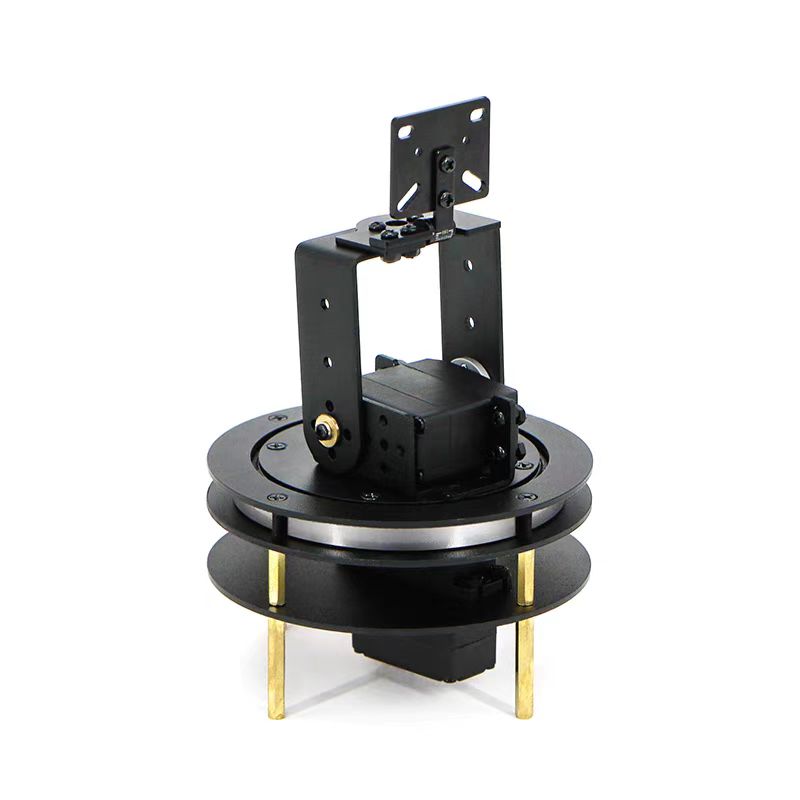
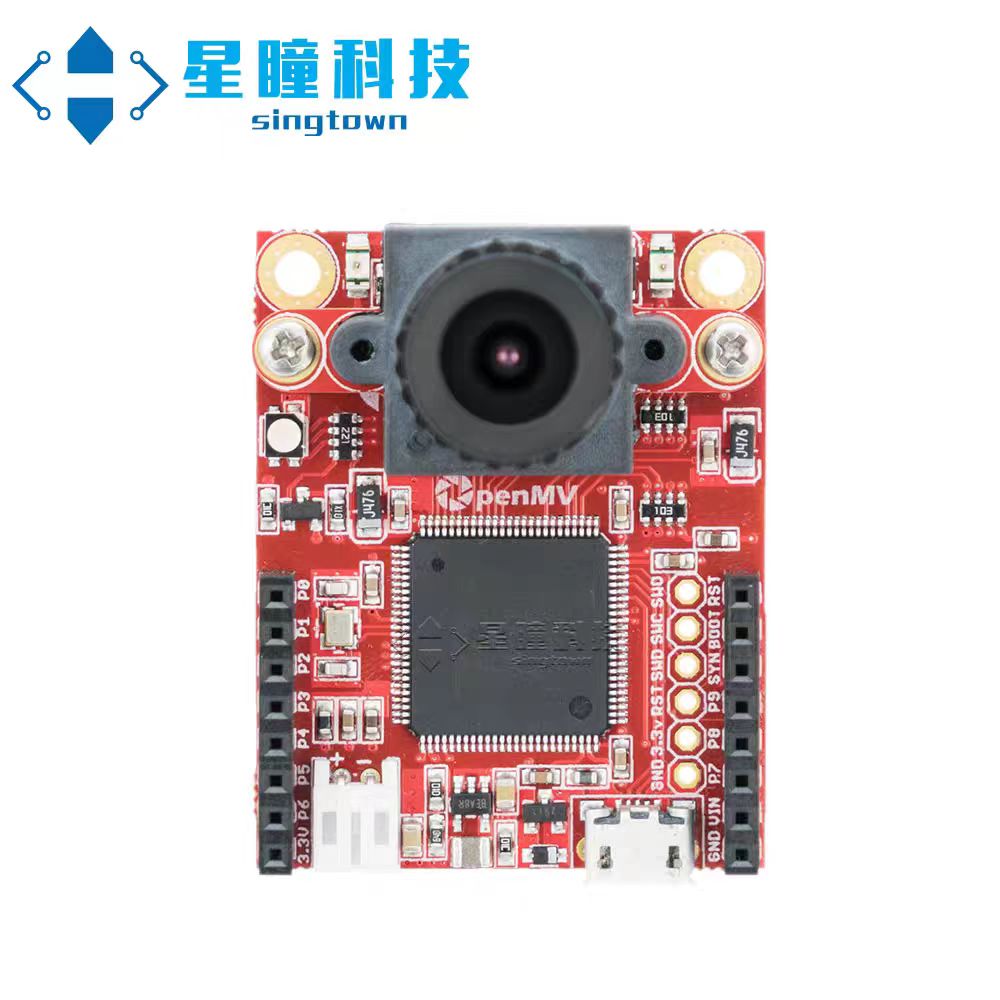
二维云台*1,openmv*1,stm32核心板*1
二、openmv部分
1.寻找色块阈值
- 运行下述代码,将色块置于图中白色方框中,串口的输出即为色块大致阈值
import sensor, image, time

sensor.reset() # 初始化摄像头
sensor.set_pixformat(sensor.RGB565) # 格式为 RGB565.
sensor.set_framesize(sensor.QVGA)
sensor.skip_frames(10) # 跳过10帧,使新设置生效
sensor.set_auto_whitebal(False)               # Create a clock object to track the FPS.
sensor.set_vflip(True)

ROI=(160,120,15,15)

while(True):
    img = sensor.snapshot()         # Take a picture and return the image.

    statistics=img.get_statistics(roi=ROI)
    color_l=statistics.l_mode()
    color_a=statistics.a_mode()
    color_b=statistics.b_mode()
    print(color_l,color_a,color_b)
    img.draw_rectangle(ROI)
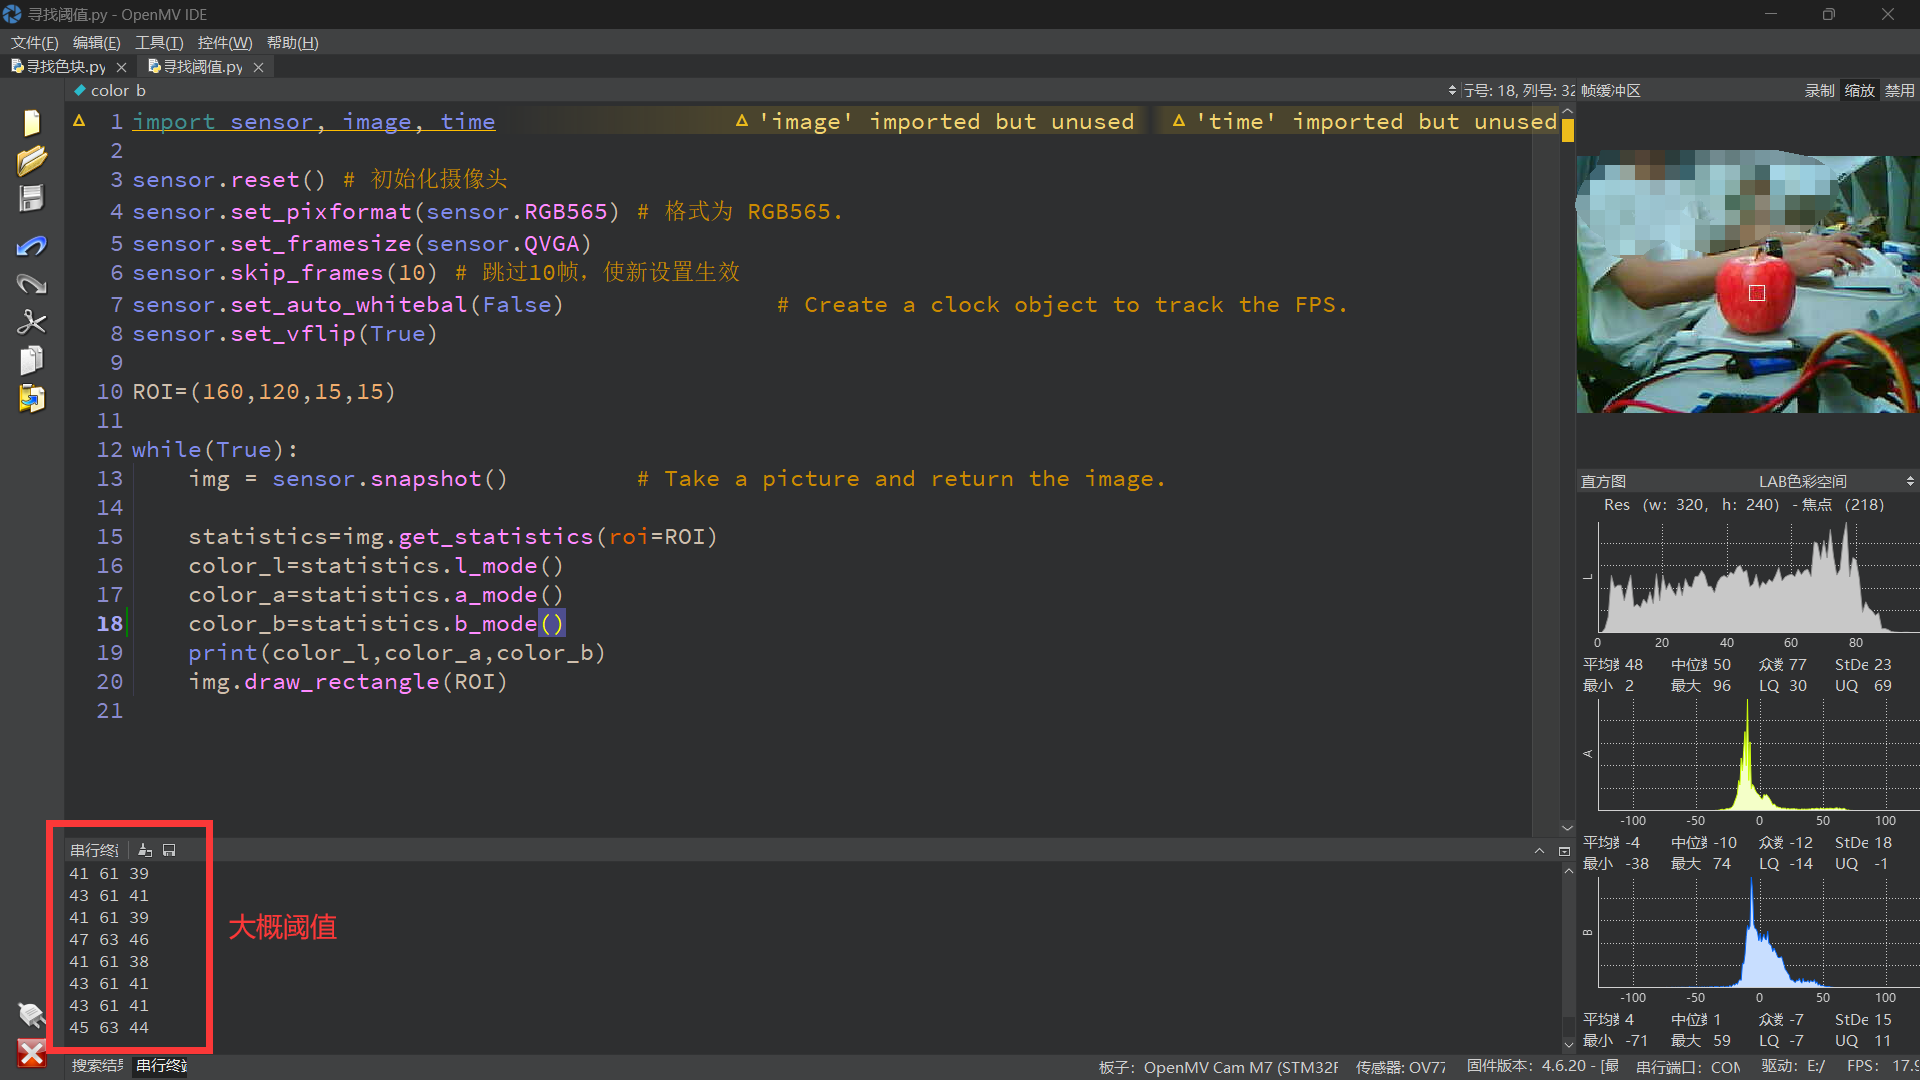
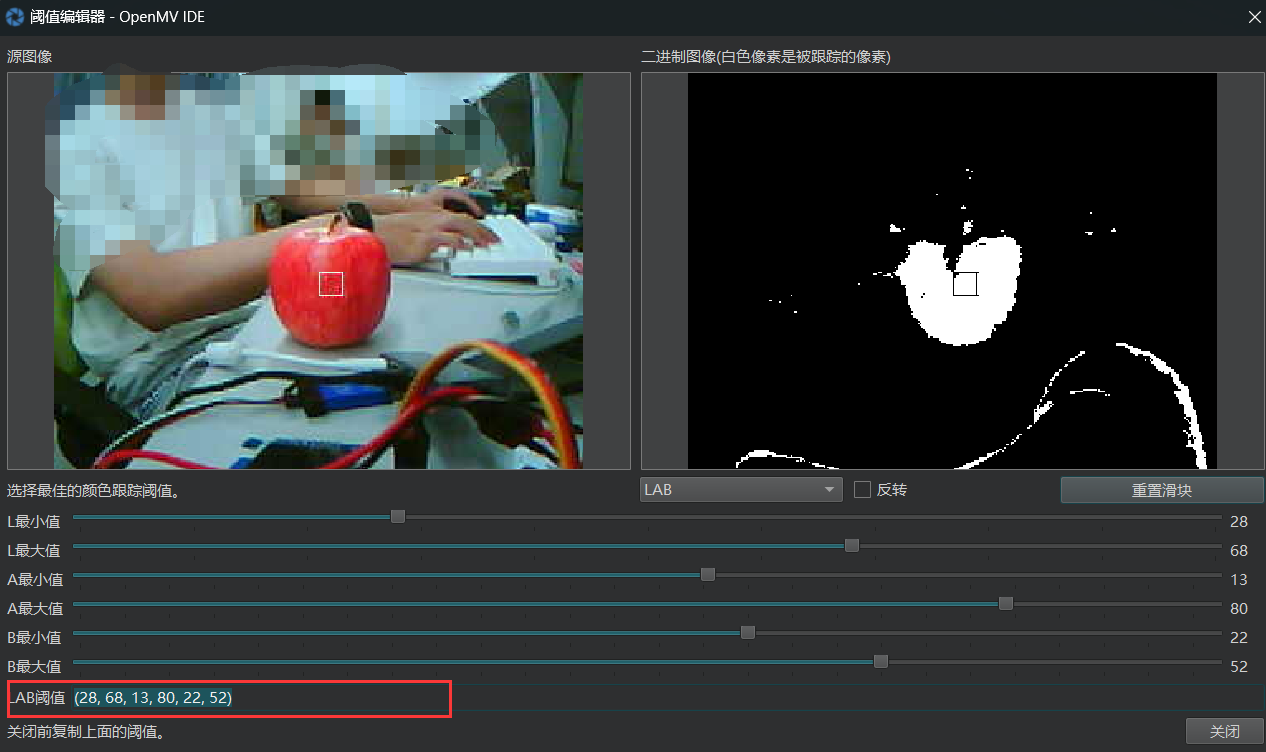
- 在工具中打开openmv的阈值编辑器,调整阈值到合适值
2.寻找色块算法
import sensor,time,pyb
from pyb import UART

color_threshold = (28, 68, 13, 80, 22, 52)  #颜色阈值元组
uart = UART(3,115200)                       #设置串口3,波特率115200
sensor.reset()                              #初始化摄像头
sensor.set_pixformat(sensor.RGB565)         #格式为RGB565.
sensor.set_framesize(sensor.QVGA)           #设置图像大小 320*240
sensor.set_auto_whitebal(False)             #关闭自动白平衡
sensor.set_vflip(True)                      #图像垂直翻转
sensor.skip_frames(10)                      #跳过一些帧保证图像稳定
clock = time.clock()

while(True):
    img = sensor.snapshot()                        #拍摄一帧图像
    blobs = img.find_blobs([color_threshold])      #按照阈值寻找色块
    if blobs:
        max_size = 0
        for blob in blobs:                         #寻找最大的色块,防止小色块干扰
            if blob.pixels() > max_size:
                max_blob = blob
                max_size = blob.pixels()
        img.draw_rectangle(max_blob.rect())
        img.draw_cross(max_blob.cx(),max_blob.cy())
        x_point = max_blob.cx()
        y_point = max_blob.cy()
        rx_buf = "A5" + f"{x_point:03d},{y_point:03d}" + "A5"  #数据格式:A5xxx,xxxA5
        uart.write(rx_buf)                                     #串口向下位机传递数据
3.向stm32通过串口发送中心点坐标
uart = UART(3,115200)                       #设置串口3,波特率115200
rx_buf = "A5" + f"{x_point:03d},{y_point:03d}" + "A5"  #数据格式:A5xxx,xxxA5
uart.write(rx_buf)                                     #串口向下位机传递数据
三、stm32部分
整体逻辑就是openmv向stm32传输色块中心点的坐标,而stm32则保证摄像头的中心与色块中心点重合, 即PID的设定值是摄像头的中心(与图像像素大小有关,比如我的320*240,中心就是160*120),测量值是openmv测量出的色块中心点坐标,输出值控制舵机的角度。
#include "gpio.h"
#include "tim.h"
#include "usart.h"
#include "stdio.h"
#include "string.h"

float  Pitch = 30;
float  Yaw = 90;

uint16_t  x_point = 160;
uint16_t  y_point = 120;

uint8_t  rx_buff[12];

float    Kp = 0.1;
float    Ki = 0.01;
float    Kd = 0.01;

uint8_t	 count = 0;

/* 外设初始化 */
void Periph_Init(void){
    // PWM
    HAL_TIM_PWM_Start(&htim12,TIM_CHANNEL_1);
    HAL_TIM_PWM_Start(&htim12,TIM_CHANNEL_2);
    // TIM
    HAL_TIM_Base_Start_IT(&htim6);
    // USART
    HAL_UARTEx_ReceiveToIdle_IT(&huart2,rx_buff,11);
}

/**
  * @brief	舵机角度控制
  * @param	Pitch: 俯仰角
						Yaw  : 偏航角
  **/
void Servo_Angle(float Pitch,float Yaw){
	  /* 角度限制 */
    if      (Pitch > 180)   Pitch = 180;
    else if (Pitch < 0  )   Pitch = 0;

    if      (Yaw > 180)   Yaw = 180;
    else if (Yaw < 0  )   Yaw = 0;

    TIM12->CCR1 = 50 + Pitch * 200 / 180;
    TIM12->CCR2 = 50 + Yaw   * 200 / 180;
}

/* PID控制 */
void PID_Control(void){
    static int  X_Err_Last,X_Err_Last_2;
    static int  Y_Err_Last,Y_Err_Last_2;
		int   X_Err;
		int   Y_Err;
	  /* 1.计算偏差 */
    X_Err = x_point - 160;
    Y_Err = y_point - 120;
	  /* 2.设置死区 */
    if (X_Err < 15 && X_Err > -15)
        X_Err = 0;
    if (Y_Err < 10 && Y_Err > -10)
        Y_Err = 0;
    /* 3.增量PID计算 */
    Yaw   += Kp*(X_Err - X_Err_Last) + Ki * X_Err + Kd * (X_Err - 2*X_Err_Last + X_Err_Last_2);
    Pitch -= Kp*(Y_Err - Y_Err_Last) + Ki * Y_Err + Kd * (Y_Err - 2*Y_Err_Last + Y_Err_Last_2);
    /* 4.输出限幅 */
    if (Yaw > 180) Yaw = 180;
    if (Pitch > 180) Pitch = 180;
		/* 5.误差传递 */
    X_Err_Last_2 = X_Err_Last;
    X_Err_Last = X_Err;

    Y_Err_Last_2 = Y_Err_Last;
    Y_Err_Last = Y_Err;
}

void Task_Handle(void){

}

// 1ms刷新一次
void HAL_TIM_PeriodElapsedCallback(TIM_HandleTypeDef *htim){
    if (htim->Instance == TIM6){
			count ++;
			// 10ms 计算一次PID
			if (count == 10){
				PID_Control();
        Servo_Angle(Pitch,Yaw);
				count = 0;
			}
    }
}

void HAL_UARTEx_RxEventCallback(UART_HandleTypeDef *huart, uint16_t Size){
    if (huart->Instance == USART2){
        // 判断帧头帧尾
        if (rx_buff[0] == 'A' && rx_buff[1] == '5' && rx_buff[9] == 'A' && rx_buff[10] == '5'){
            x_point = (rx_buff[2] - '0') * 100 + (rx_buff[3] - '0') * 10  + (rx_buff[4] - '0');
            y_point = (rx_buff[6] - '0') * 100 + (rx_buff[7] - '0') * 10  + (rx_buff[8] - '0');
        }
        HAL_UARTEx_ReceiveToIdle_IT(&huart2,rx_buff,11);
    }
}
四、最终效果
openmv二维云台追踪色块

魔乐社区(Modelers.cn) 是一个中立、公益的人工智能社区,提供人工智能工具、模型、数据的托管、展示与应用协同服务,为人工智能开发及爱好者搭建开放的学习交流平台。社区通过理事会方式运作,由全产业链共同建设、共同运营、共同享有,推动国产AI生态繁荣发展。
更多推荐


 6
6 0
0- 0


 已为社区贡献1条内容

所有评论(0)